Showing posts with label snippets. Show all posts

Tuesday, 19 June 2018

Path of Positivity Midway Reminder

We are half way through Challenge #60 at the Path of Positivity with the optional theme of neutrals. For my card this time I chose an image from Mari's Digis, one of our challenge sponsor, which work so well with a neutral palette.

The story of the Little Match Girl by Hans Christian Anderson, is such a bitter sweet story so using bright colours would not have been fitting. If you do not know the story then you can find a telling of it here: http://www.online-literature.com/hans_christian_andersen/981/

DSC_0273(watermarked)

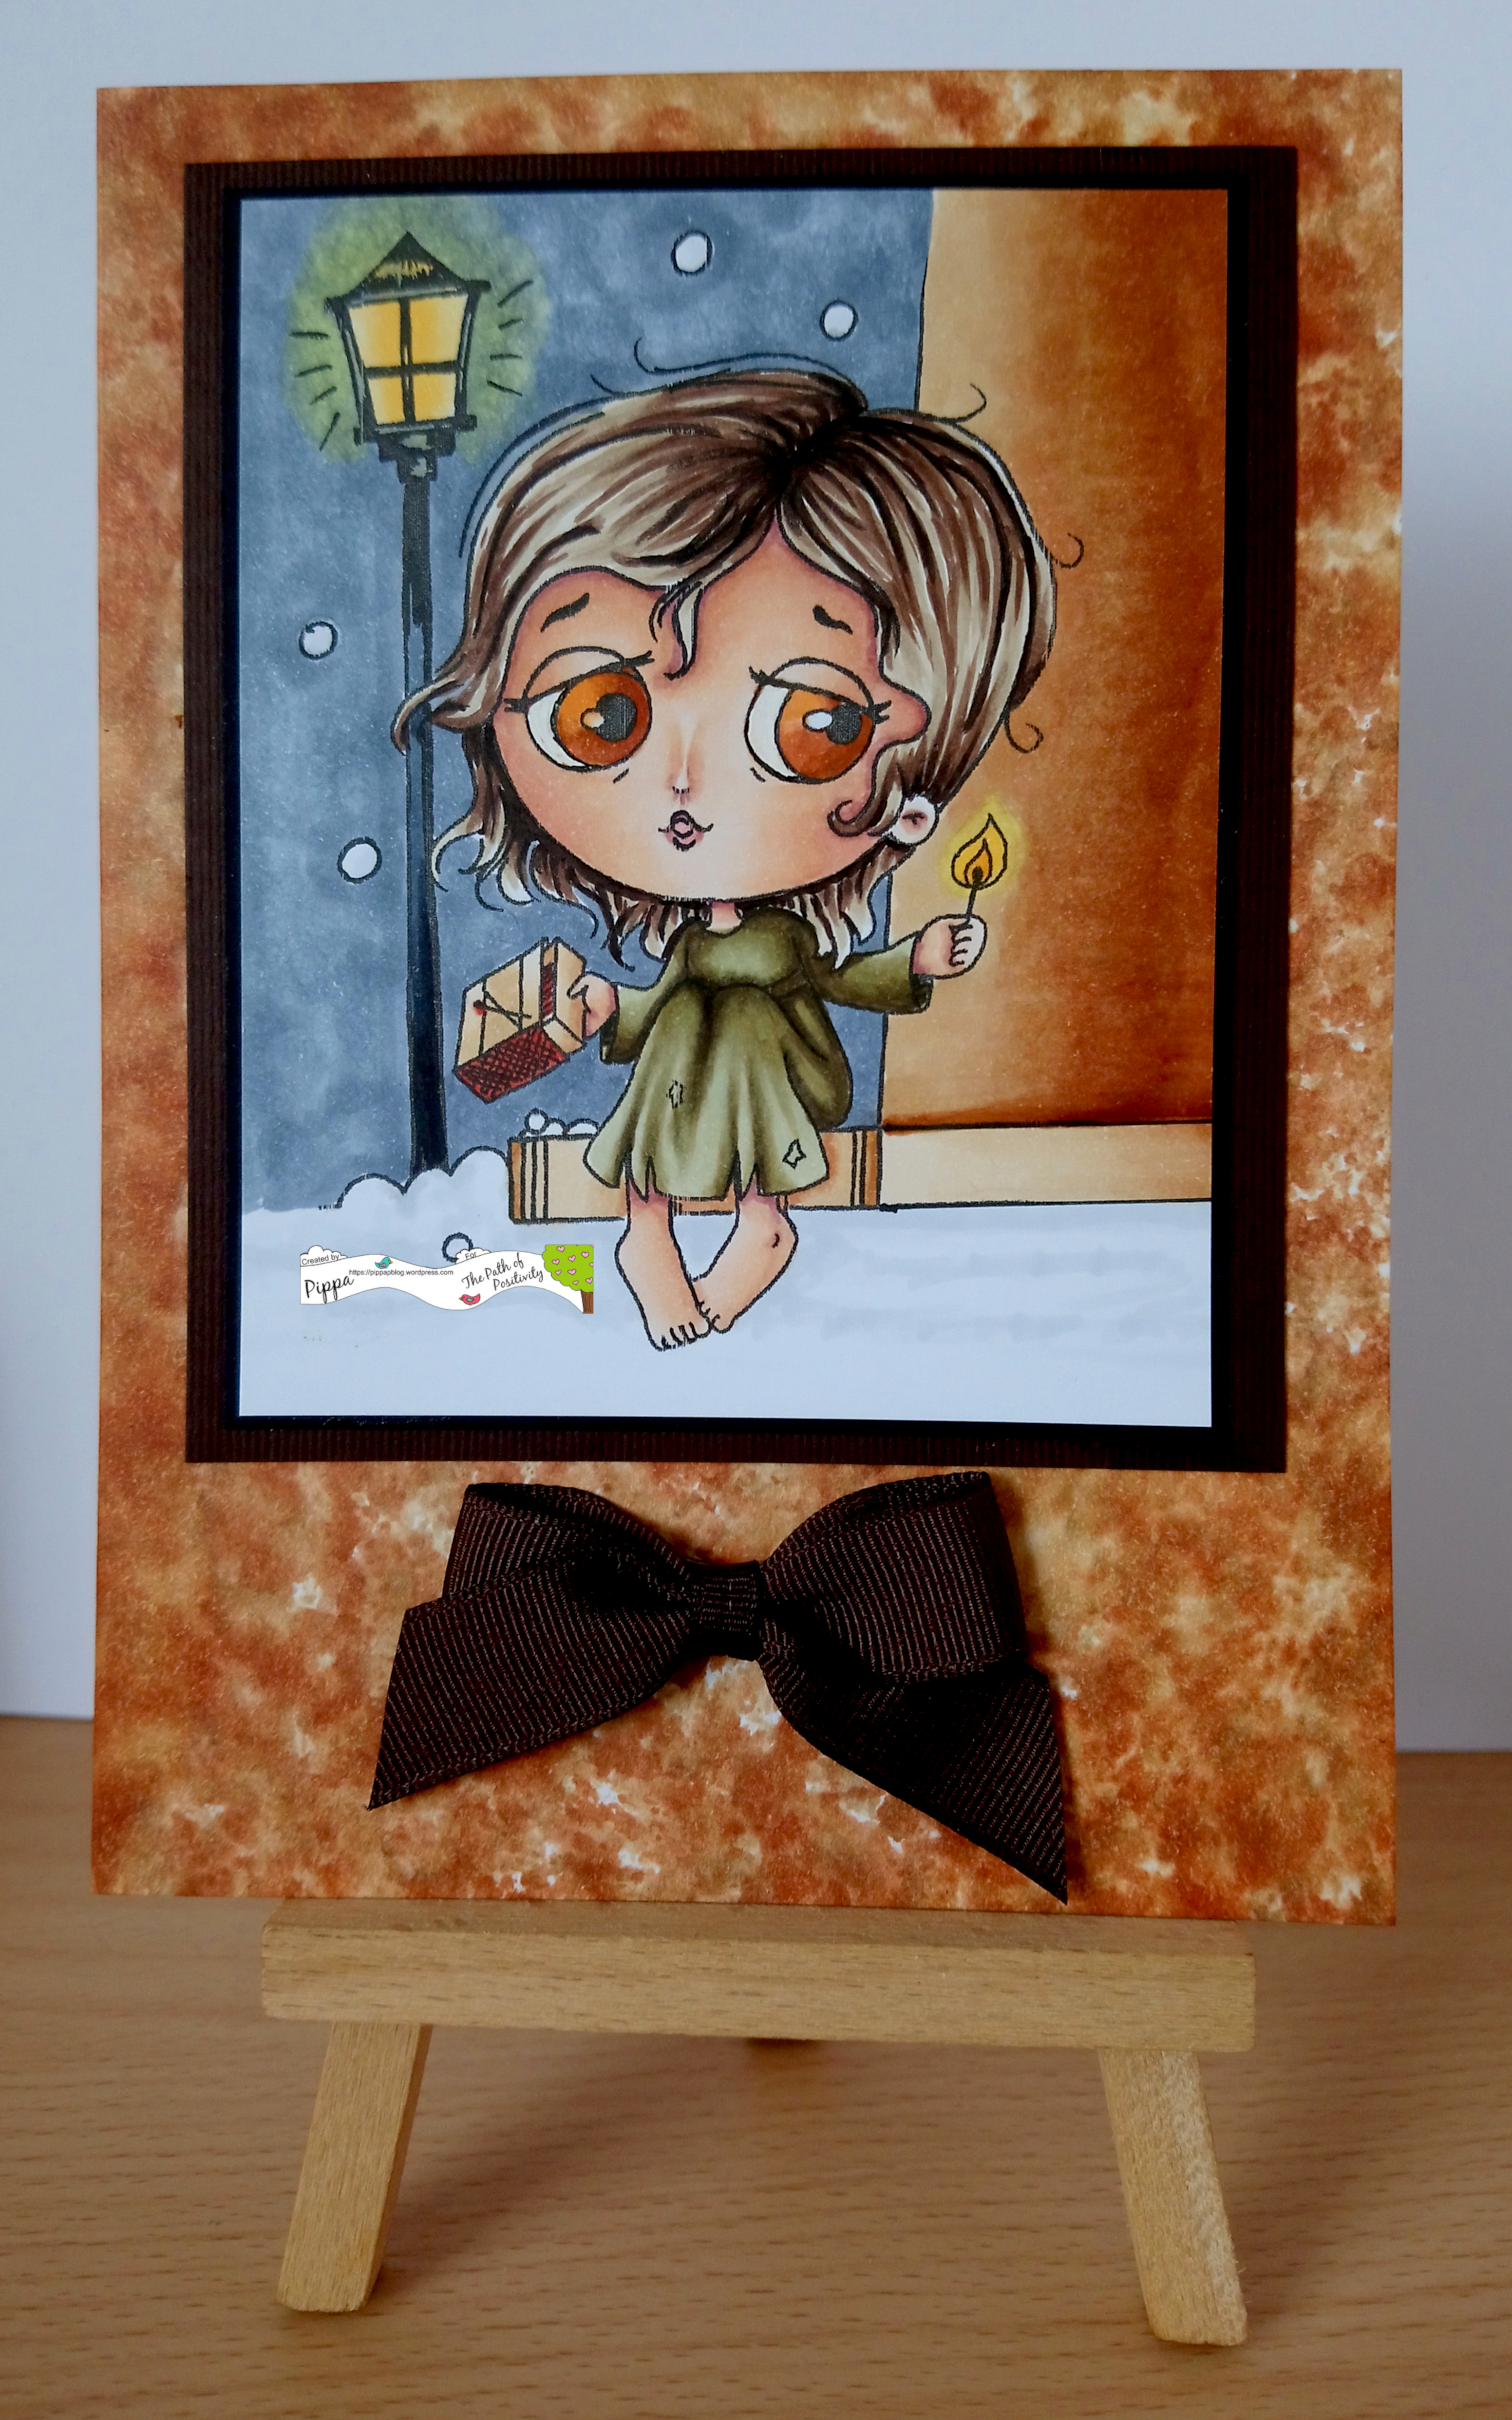
Materials used:Mari's Digis - The Little Match GirlX-Press It card
brown and black card
7x5" card blank
brown bow
blending tool and felt pad
Copic pens:
skin - E000, E00, E21, E11, E04  R20
hair - E42, E43, E47, E49
dress - E81, E84, E87, E89
wall - E31, E33, E35, E37, E39
step and wall base - E30, E31, E33, E35
sky and snow shadows - C0, C1, C3, C5
lamp and match glow - Y21, Y35, Y11
lampost - C5, C7, C9
matchbox - E50, E51, E53, E34, E08
eyes - YR12,E15, E37


card base - various inks refils - E39, E35 and blending solution

I think I used almost every pen I have in the E range! The base of the card is coloured using Copic ink from refil bottles dabbed on with a blending tool and felt pad. The brown bow came from a box of chocolates, quite by chance it has the same texture as the bown card of the mat.

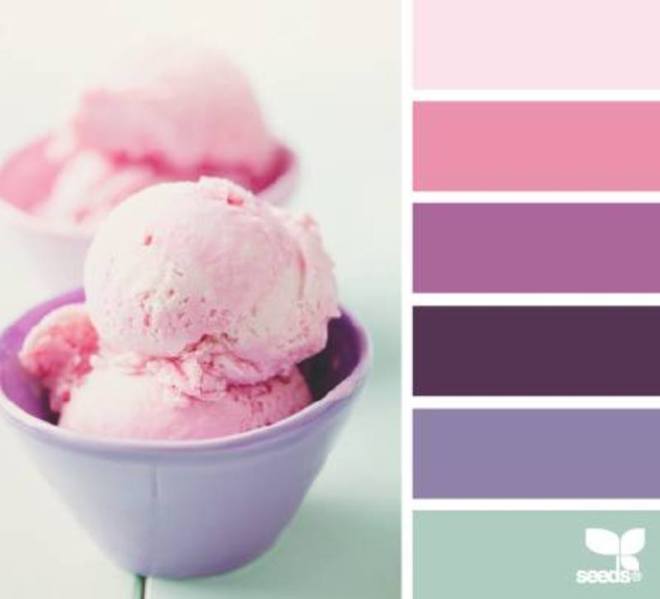
I hope you will join us on the next stage of our year of colour at Path of Positivity. As always we have two wonderful sponsors offering great prizes. If you follow the optional theme make sure that over half of your colour scheme is neutral colours. Entries that follow the theme have the opportunity to win the Most Inspirational Creation prize, just remember to add FT after your name.

We’d also love to find out how this month’s colour grouping makes you feel, if you’d like to share that with us. What kinds of feelings do neutral colours evoke in you? You can write a sentence or two in the body of your post, write a sentence at the bottom of your post next to the link up for this challenge, or simply leave a comment on this post if you’d like.

Remember, in order to be considered eligible for this month’s prizes, ALL creations must be positive, inspirational, motivational or encouraging in some nature. You don’t need to follow the optional theme if you simply want to have a chance at the Random Draw prize of a $12 gift certificate from A Day for Daisies, one of our guest sponsors this month. You only need to follow the theme if you want a chance to win an additional sponsored prize of the same three digis used by team members, provided by Mari Digis, the second of our guest sponsors this month, for the project chosen as Most Inspiring.

Thanks for dropping in. Take care.

Pippa

Entering the following challenges:
Mari's Digis #67 - Anything Goes (Must Use Mari's Images)
Crafty Creations #368 - Anything Goes
Penny's Paper-Crafty Challenge #384 - Anything Goes
Crafting With An Attitude #40 - Anything Goes
A Bit More Time To Craft #70 - Anything Goes 
Jo's Scrap Shack FFC #238 - Anything Goes
Crafting With Friends #69 - Anything Goes
Simply Papercraft #58 - Anything Goes
Crafty Friends #86 - Anything Goes
Creative Fingers #148 - Anything Goes
Lil Patch of Crafty Friends #84 - Anything Goes
613 Avenue Create #210 - Anything Goes/Optional Twist Buttons and Bows
PIP Challenge #1824 - Anything Goes
Artistic Inspirations #202 - Anything Goes
Inspiration Destination #152 - Anything Goes
A Bit More Time To Craft Extra - June Anything Goes
My Creative Scoop Colour Inspiration Link Up #35

Wednesday, 6 May 2015

Look what I found in the snippets drawer!

I set myself a challenge this weekend, to make a card using nothing but snippets. As some of my snippets are quite big, the discarded beginnings of a project that faltered, I actually almost managed it, (the two number stickers were not actually in the snippets drawer).

Material used:SAM_1666(watermarked)
Acrylic stamp - Footballers (I think it may be from Dimension Stamps)
Acrylic stamp - Happy Birthday
small numbers stamps
Thing-a-ma-jig
x-cut die - Football
Anita's number peel-offs
black Spectrum Noir pen
blue Copic pens
Memento ink pad - Tuxedo black
various snippets in white, blue and black


Method:
I stamped the footballers onto a snippet of white blending card, carefully removing the original number on the back of the shirt of the nearest player, and stamped the 21 in it's place. I coloured the kit of that player with the Copic pens and left the rest black and white.

I trimmed down my image and then matted and layered it onto black and blue snippets. I used the die to cut three footballs in black card and mounted blue card behind them. The card blank is what was left from cutting down an A4 card blank on a previous project. I glued my topper and the footballs in place and stamped the greeting at the bottom. I used the black pen to colour silver number peel-offs black and stuck them to the top football.

My daughter's stepson is 21 in a few days time and he is a keen Chelsea supporter which is why I changed the number on the shirt and coloured it blue. I decided to leave the rest of the image black as a contrast and to make the number more obvious!

[caption id="attachment_1156" align="alignleft" width="300"]SAMSUNG CAMERA PICTURES 
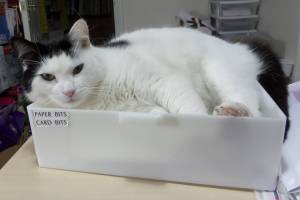
Finnegan 'helping'[/caption]

I did have a 'helper' at one point! (Thankfully after I had taken out all the snippets I thought I might need).

Thank you for visiting. Take care.

Pippa

I would like to enter my card into:
Pixie's Snippets Playground weeks 175-176
2 Cute Ink challenge 128 - Anything goes

Wednesday, 29 April 2015

Creative Moments Colour Challenge

CMcolour+challenge290415

Deedee is sponsoring the latest challenge at Creative Moments and this time they have a colour challenge. I am not a great fan of colour challenges but decided to have a go at this one anyway.

SAM_1655(watermarked)Materials used:
Deedee's Digi Stamp Set - Baby Blessings Girl
Copic pens
white stamping card
purple card (two shades)
pink card
A5 white card blank
safety pin
snippet of pink check ribbon
border die


Method:
I printed out the images and sentiment that I wanted and coloured them with the Copic pens. I cut out parts of two images to decoupage onto my main image giving a 3d effect. I trimmed my main image and the sentiment and then matted and layered them onto the purple and pink card. I used the border die to cut a ribbon of purple card and stuck the ribbon down the middle of it. I cut out the top of two pins and glued them each side of a real safety pin before sticking it through the topper. I then arranged all the elements onto my card blank and stuck them down.

I don't actually have anyone in mind for this card but with the royal baby due any day now it seemed the obvious one to make with the colours in the challenge! As I used the snippet of ribbon and some card snippets for the mating and layering I think I will pop along to Pixie's Snippets Playground a little later and see what is going on there!

Thank you for visiting. Take care.

Pippa

I would like to enter my card into:
Pixie's Snippets Playground Week 174
Outlawz Greetings Challenge - Anything goes

Friday, 24 April 2015

From the Heart Stamp of the Month Challenge

I am a big fan of progressive freebie challenges, not only do you get the following month's image free but you have a whole month to come up with an idea! From the Heart this month gave out a new image from their Hamlet PigWit range.

SAM_1611(watermarked)

Materials used:
From the Heart Stamps Stamp of the Month: Hamlet PigWit Being Shy
Copic pens
small note acrylic stamp
sheet music block acrylic stamp
Adirondack black archival ink pad
snippet of black card
5 inch square white card blank


Method:
I sized and printed out the image and the greeting I wanted to used then used the Copic pens to colour him in. I stamped the music block onto the front of the card blank, fussy cut Hamlet and stuck him on. I trimmed the greeting and matted it onto black card before attaching it to the card base.

SAM_1612(watermarked)

I had printed out several copies of Hamlet so turned the extra into ATC cards as I am running out and have a small pile of books from the United Kingdom Stampers Network to add too.

Thank you for dropping by. Take care.

Pippa

I would like to enter my card into the following challenges:
From the Heart Stamps Stamp of the Month - April
Pixie's Snippets Playground - week 173

Wednesday, 25 March 2015

Outlawz Challenges

This month's free digi image is a cute little elephant and bird. I have made a couple of cards with it using different techniques.

Material's used:
Elephant and Bird image
balloons stamp
white stamping card
purple card
black card
silver mirri card
gold mirri card
white A5 blank card
white 15cm square card blank
snippets of purple patterned paper
Spectrum Noir pens
Versamark ink pad
Glossy Accents


SAM_1499 (watermarked)Method:
I printed out my images and sentiments on the stamping card then used the pens to colour them in. On the second card I used a little pointillism on the elephant. One image I cut into a square and the other I cut out leaving a narrow white border around the image.

For the square card I matted and layered my image onto black, purple and silver card. I folded the card blank to make an easel card before attaching the topper to it. I matted and layered the sentiment for the front onto black and purple and attached to the card. For the stopper I used the second sentiment also matting and layering it match. I covered the inside of the card with purple paper onto which I had randomly stamped balloon using Versamark ink before attaching the stopper with 3d foam pads.SAM_1498 (watermarked)

On the A5 card I used some purple snippets left from making crackers and made a line down the left side of the card. I used glue gel to attached the cut out image onto black card and then matted it onto gold mirri card. I made up the sentiment to match and printed the rest of it onto the insert so that inside it says ... it's your birthday. Finally I added glossy accents to the balloon.

I have a little pot on my desk which contains a lot of purple diamonds which are the 'waste' from making the box of crackers back in December. I thought using them on the front would get rid a a few, especially as they matched the colours I had used. There are still a lot left but it remains to be seen whether I ever get around to using them!

Thank you for dropping in. Take care.

Pippa

I would like to enter my card into:
The Outlawz Progressive Freebie Challenge

The Outlawz Friday Coloring Challenge
Pixie's Snippets Playground - Week 169

Friday, 20 March 2015

Easter is coming

Easter tends to be the forgotten Christian festival. We get so caught up in all the paraphernalia associated with celebrating Christmas that Easter creeps up on us and takes us by surprise. It is a pity because Easter is even more important than Christmas. I am just as guilty as anyone. Despite managing to make hundreds of Christmas cards for friends and family, my Easter cards' on the rare occasion I actually make any at all, tend to number in the teens! So you might think I am about to share an Easter card with you - sorry not yet, it's still a work in progress, but I do have a mini gift bag of eggs!

SAM_1480 (watermarked)

Materials used:
Deedee's Digi sets - Spring Chicks and Uneggspected
scalloped circle dies
We R Memorykeepers Gift Bag Punch Board
snippet of acetate
White blending card
printer paper
Promarkers
white narrow ribbon


Method:
I printed out a sheet of spotty paper from the Spring Chicks set and used the punch board to make my bag. Before sticking it together I cut an aperture in the front and a slightly larger piece of acetate to stick behind it forming a transparent window. I printed out several copies of the chicken SAM_148 (watermarked)1image from the Uneggspected set and coloured them in with Promarkers trying to match the colours of the spots on the egg to those on the bag. I used one image for the base cutting it out with a narrow white border around it and used parts from two other images to add dimension before sticking it to the front of the bag. A length of white ribbon for the handles, some shredded green tissue in the bottom and a few little chocolate eggs finished it off.

The snippet of acetate was from the backing sheet to some acrylic stamps that came with a magazine so if I am quick enough I might just make it over to the Snippets Playground this week.

Thank you for dropping in. Take care.

Pippa

I would like to enter my bag into Pixie's Snippets Playground Week 168

Thursday, 12 March 2015

A little bit of magic

Kit and Clowder have a competition on their Facebook to create a project with a fantasy theme; extra entry if you use a unicorn. So I thought I would share my attempt with you.

SAM_1467 (watermarked)

Materials used:
The Paper Shelter Digi - Princess and her unicorn
white stamping card
watercolour card
Brusho Crystals
A5 white card blank
black card
pearlised card
Spectrum Noir and Copic pens
small alphabet stamps
Stamp-a-ma-jig
black archival ink pad


Method:
I actually found an A5 card blank in my snippets box from a failed project. It had a bit of smudged stamping on the front but as I was going to cover it, it did not matter. I attached a slightly smaller piece of the pearlised card to the front to act as a mat for my background paper. Using the Brushos and watercolour card I made a large piece of coloured card for the background, cut it to size and layered it onto the card front. I printed out the image to the size I wanted, coloured it in with the pens and then cut it out leaving a narrow white border around the edge. I found a piece of already coloured card and some black card in my snippets box and used these to make a mat for my image. I attached the imaged to the mat using 3d foam pads then attached the whole topper to the card. Finally I used the alphabet stamps and a Stamp-a-ma-jig (the most useful gadget I have ever bought) to place them and stamped out the greeting along the bottom of the card.

I really love the effects you can get with the Brusho Crystals and although I have only had a little play with them I certainly plan to make more use of them.

Thank you for dropping in. Take care.

Pippa

I would like to enter my card into Pixie's Snippets Playground Challenge - week 167

Friday, 27 February 2015

Raiding the snippets box for Rudolph day

Most crafters have a box of snippets around the place, and most crafters remember they have it and use it regularly. But then I am not most crafters and my overflowing snippets box is sadly neglected, buried under a pile of 'work to do' boxes.  So as I had a relatively free day today I decided to raid it and create a card or two for Rudolph Day at the same time.

SAM_1450 (watermarked)

SAM_1451 (watermarked)


Materials used:
Snippets of various sizes and flavours!
X-cut and Spellbinders snowflake dies
Let it snow . . . acrylic stamp

Method:
I took all my snippets and arranged them into a card! There is not much else to say really. The penguins, complete with googly eyes were from some crackers we had at Christmas, the backing paper you might recognise left over from a previous project, even the shaped card was already made up and abandoned in the box. So both cards were completely made up from snippets.

With all those snippets I feel a trip to the Snippets Playground is called for. Maybe I will see you there?

Thank you for popping in. Take care.

Pippa

I would like to enter my card(s) into these challenges:
Rudolph Day February 2015
Snippets Playground Week 165

Wednesday, 18 February 2015

Love struck Birdbrain

The image for the From the Heart Stamp of the Month Challenge features one of their characters, Birdbrain. I decided this time to colour her brown so that the flower would be the colour focus.

SAM_1409 (watermarked)

Materials used:
white stamping/blending crd
snippets of green, white and purple card
Spectrum Noir and Copic pens
Liquid Pearls
Spellbinders dies Labels 23
Heartfelt Creations die Leafy Swirl from Cut Mat Create 1B
Flower die - unknown origin


Method:
I printed out the Birdbrain image on the stamping card at the required size and coloured with the pens before cutting out using the labels die. I also cut printed and cut out the sentiment. I matted both of these onto purple paper, from an old shop bag.
I cut two leafy swirls from green card, a snippet left over from another project, and several flowers from snippets of white which I then coloured with the pens. I then assembled three flowers. I arranged all my elements on the card front before sticking them down. Finally I added Liquid Pearls to Birdbrains necklace.


Thank you for stopping by. Take care.

Pippa

I would like to enter my card into the following challenges:
From the Heart Stamps - Stamp of the Month Challenge: February
Sir Stamp Alot - Stamping Sensations Challenge - Anything Goes
Digi Galore Challenge - Anything Goes
Pixie's Snippets Playground - Week 164

Wednesday, 11 February 2015

Love is in the air

You either love it or hate it - Valentines Day, that is. I fall into the first category even though I am not a 'mushy, slushy' person! At a local craft fair last month I came across a couple of Doo Lally Pip stamp sets, one of which is very apt in light of my last post and being a Pippa! You'll see what I mean from the photo.

Materials used:SAM_1392 (watermarked)
Doo Lally Pip - My fragile heart
A4 white blending card
A4 white card
A4 100gsm white paper
Snippets of patterned paper and gold mirri card
Spectrum Noir pens and pencils
Copic pens
Versamark ink pad
Memento Tuxedo Black ink pad
Detail Gold embossing powder
Glossy Accents


MethodSAM_1390 (watermarked):
I stamped out Doo Lally Pip a couple of times on the blending card and also stamped the sentiment and embossed with the gold embossing powder. I coloured the images using the Spectrum Noir and Copic pens. i then trimmed one of the images to the required size and matted it onto gold mirri card. I did the same with the sentiment. I cut the dress from the second image and layered it onto the base image with 3d gel glue. When the glue was dry I covered the heart with glossy accents.

I folded and trimmed the white card to make an A5 card blank with the front flap shorter than the back. I stamped, embossed and coloured in the hearts down the right side of the card. I attached a strip of patterned paper to the front of the card and added my image and sentiment.SAM_1395 (watermarked)

Using the white paper I made and insert and stamped and embossed aheart and greeting on it. I coloured the heart with the Spectrum Noir pencils.

So all I need to do now to be ready for Saturday is to write in it and hide it away!

Thank you for dropping in. Take care.

Pippa

I would like to enter my card into the following challenges:
Stamping Sensations February Challenge - Anything goes

Snippets Playground - week 163

Sunday, 25 January 2015

Little Snowman

From the Heart Stamps have a lovely little snowman as the image for their progressive challenge. This is my take on him.

SAM_1340 (watermarked)

Materials used:
From the Heart Stamps - Little Snowman
Bearly Mine - Winter Swirls 17 (unfortunately no longer in business because of the new EU Vat laws)
Snowflake Die (Spellbinders)
Copic and Spectrum Noir Pens
Stamping card
Printing card and paper
Cosmic Shimmer Diamond Sprinkles
Wink of Stella Shimmer Pen - Clear


Method:
I printed out a panel of the Winter Swirls on the right hand side of piece of card before folding it into an A5 card blank with the printing inside. I cut the front panel down to 11 cms so that when the card is closed part of the printed inside shows. I then printed out two A4 sheets of the same Winter Swirls paper, one I used as an insert and the other as the front panel.

SAM_1337 (watermarked)I printed out the Little Snowman onto stamping card and coloured in with the pens before cutting out the snowman and a small part of the snow under him. I put some wink of stella onto the pom-pom and trim of his hat. Taking the panel of patterned paper for the front I cut a slit along the snow drift long enough to slip the bottom of the snowman into. I inked the edges of the panel with black ink and then stuck it to the card front. The snowman is held in place by the part behind the paper.

Finally I die cut a snowflake from a snippet of paper and covered it with diamond sparkles before attaching it to the card front so that it overlaps the card opening.

When I finished the card I discovered that the front panel matches up to the back quite well, purely by chance. I was not so successful in matching the insert but it is not visible when the card is closed!

Thank you for popping in. Take care.

Pippa

I would like to enter this card into the following challenges:
From the Heart Stamps - stamp of the month challenge
Rudolph Day Challenge
Pixie's Snippets Playground (the snowflake cut from a snippet)
Outlawz Friday Colouring Challenge - Winter Wonderland

Wednesday, 7 January 2015

Dancing Queen

My youngest daughter has a birthday coming up soon. She just loves to dance and she is rather fond of fairies and so when I came across 'A spritely sprite' at Squigglefly I knew it was meant for her.

SAM_1295 (watermarked)

Materials used:
Squigglefly - A spritely sprite
Copic and Spectrum Noir pens
colouring card
snippets of silver, purple, black and patterned card
Wink of Stella Shimmer Clear
DL card blank
A5 card blank


Method:
I printed out my image to the desired size on card suitable for alcohol ink pens and coloured it in with the Copic and Spectrum Noir pens. I added some wink of stella to the wings then trimmed the image to size and matted and layered it onto silver and black card before attaching it to the card blank. I printed off the sentiment, matted it onto white card and attached to the card front. 

SAM_1296 (watermarked)


(Detail showing the glimmer on the wings) 


SAM_1290 (watermarked)

I coloured in a second image using purple instead of blue but the wings did not come out as I liked so I cut them off. Now I am not sure which one to send her! Her favourite colour is blue so I may send that one but then I am not sure if the wingless image looks the better coloured of the two. Her birthday is not until the end of the month so I have a couple of weeks to make a decision!

Thank you for dropping in. Take care.

Pippa


I would like to enter this card into the following challenges:
Your Scrapbook Place - anything goes
Pixie's Snippet's Playground - Week 158
Squigglefly Challenge 115 - glitter and/or sparkle
Pennys Challenge 209 - Anything goes

Monday, 29 December 2014

From the Heart

I have just got time to squeeze in with my entry for this month's From the Heart Stamps progressive challenge.

Materials used:SAM_1285 (watermarked)
From the Heart - Christmas spirit Birdbrain
Happy Christmas stamp
rectangle die
Memento Tuxedo Black ink pat
White stamping card
snippets of Christmas design papers
Spectrum Noir pens


Method:
I printed out the image a couple of times onto white card and coloured them in with Spectrum Noir pens. One image I cut with the die. I cut Birdbrain's body from the second image and layered it onto the base image. I matted the topper onto purple paper from an old paper bag, then attached the whole thing to an A5 card blank. I used snippets from 3 designer papers to make rolls in different widths and stuck them to the card in a 'tree'shape. I added a star at the top and a greeting at the bottom.


As far as I know at the moment From the Heart stamps are continuing trading to EU countries which is a blessing. I was beginning to think my dalliance into the world of digi stamping was going to be very short lived as many of my favourite companies are giving up as a result of the new EU vat laws. I am still waiting for a response from my local MP but not really holding out much hope that things will change.

Thank you for visiting.

Pippa

I would like to enter my card into the following challenges:
From the Heart Stamp of the Month
Pixie's Snippets Playground - Week 156 & 157

Friday, 28 November 2014

Slow down please, I'm not ready

That time of year is rapidly approaching now with Advent just around the corner. Have I made the cards? Have I bought the presents? Am I ready? Don't be daft!

Anyway to take my mind off all the things I have not done, I have been working on anther challenge, this time the monthly one at From the Heart Stamps. Like Deedee's challenge it is another progressive one, if you enter you automatically get sent the image for the following month. The image this month is a lovely simple Christmas one and it fits the bill for a few challenges.

Materials used:SAMSUNG CAMERA PICTURES
From the Heart Stamps - Angel Joy (faithful friends)
Spectrum Noir and Copic pens
Wink of Stella Clear
White stamping card
gold pen
Centura Pearl White card
patterned paper and left over snippets


Method
I used the centura pearl card to make a 14.8 cm square easel card base. I matted a 14.5 cm square piece of patterned paper to a 14.8 cm square of centura pearl card and attached this to the fold on card front. I printed out the image 4 times at the size I wanted then coloured them in with the pens.

[caption id="attachment_835" align="alignleft" width="260"]Close up of angel Close up of angel[/caption]

I cut the base image into a square and ran a pink Spectrum Noir pen around the edges. I used a second image and cut out most of the angel and the top of the large bauble which I stuck over the top of the first image using gel glue. I then stuck the topper to the front of the card. I printed out the sentiment and cut it to size. After running the same pink pen around the edges I matted and layered it onto patterned paper and centura pearl card. I lined the inside base of the card with patterned paper and added the greeting using 3d foam pads as the card stopper.

SAMSUNG CAMERA PICTURES

The remaining two images were cut out and decoupaged then added tothe front of a white A5 card blank which already had the sentiment printed onto it. Both angels then had wink of stella applied to their wings.

I think these two cards will cover a few challenges so off now to check the requirements. I know they fit the bill for Rudolph Day and as it is Sarn's final one I really want to get over there.

I hope your preparations for Christmas are going better than mine! Thanks for taking the time to visit. Take care.

Pippa

I would like to enter my cards into the following challenges:
Easel card: From the Heart Stamps Monthly Challenge
Outlawz Friday Coloring Challenge - Anything goes with optional Christmas twist
A5 card: Less is More Challenge - Week 199 Jingle all the way
Outlawz Monday Greetings Challenge - Anything goes
Both cards: Rudolph Day Challenge

Thursday, 27 November 2014

Deedee's Challenge

I know it's been a while and I did say I was going to try to keep up with the Less is More challenge but life got in the way!  Today has seen a flurry of activity in the craftroom trying to make amends for the 'dry' patch. Spurred on by the realisation that the end of November is only a few days off  I have rustled up a couple of entries for progressive challenges that end on Sunday. If you enter you automatically get sent the free digi for the next challenge, so you can see why I did not want to miss out.

The first one I tackled was for Deedee's challenge. I really like the fact that the images come in  coloured and line drawing  versions. Being pressed for time I chose to use the coloured version for my make.

Materials used:Moose Bag (watermarked)
white printing card
Deedee's Digi Mix it up
2 holly brads
snippet of ribbon
X-cut bag die


Method:
I used a designer software programme to make the paper for the bag taking the stacked bowls image, reducing the size and repeating it across the whole A4 sheet. I printed out two sheets of my created paper, 1 sheet of Deedee's stripped paper and 1 sheet of the cooking moose with repeated images on it (I used the same programme to put one image onto a green background.

Moose Bag and Tag (watermarked)

I used the x-cut die to cut out my bag from my designed paper and also cut the tag and 2 bows from the stripped paper. I cut out the moose images and used four of the extra images to 3d decoupage the base image on the green background. I made up the two bows, 1 I attached to the front of the card with a holly brad and the other I attached with another holly brad to the top of the tag. Finally I threaded a piece of ribbon through the loop at the top of the bow on the tag.

Sorry the photos are not good, still trying to work out the lighting. I am not a photographer so any tips would really be appreciated.

Thank you for dropping in. Take care.

Pippa

I would like to enter this card into the following challenges:
Deedee's Digis: November Digi of the Month Challenge
Pixie's Snippets Playground - week 152

Tuesday, 11 November 2014

Word Art Wednesday

A long-standing member of our congregation at church is leaving soon and moving closer to her family so I was asked to make a card for the church members to sign. The design I eventually settled on also qualifies for the Word Art Wednesday challenge.

Shepherd (watermarked)

[caption id="attachment_808" align="alignright" width="291"]Shepherd Closeup (watermarked) A closer view of the shepherd[/caption]

Materials used:
Shepherd and verse stamps (origin unknown)
tuxedo black memento ink
stamping card
A5 kraft card blank
mid and dark brown card
snippet of green stripy paper
Spectrum Noir and Copic pens


Method:
I stamped the shepherd out three times and coloured the images in with the pens. One image I trimmed and matted and layered as the base of my topper, the others I cut different pieces out of to 3d decoupage on top of the base image.

I stamped out the verse and matted and layered that to match the topper. I placed a snippet of green paper behind the topper and then arranged the other items how I wanted them before sticking them to the card front.

Thank you for dropping in. Take care.

Pippa

I would like to enter this card into;
Word Art Wednesday Challenge 157
Pixie's Snippets Playground Week 150

Tuesday, 28 October 2014

BFG

My favourite film from a Roald Dahl book has to be 'The BFG' with David Jason voicing the BFG. I love the way he gets words mixed up and also his logical use of the English language, such as referring to the Queen as Majester (pronounced Majest - her!) Anyway all this rambling is just to introduce a card I made with the Docrafts BFG stamps and a page from a very tatty copy of the book.

SAM_0887  watermarked

Materials used:
page from old BFG book
Docrafts Roald Dahl stamps
Memento tuxedo black inkpad
Spectrum noir pencils
A5 white card blank
old purple paper bag


Method:
I managed to find a page in the book that had a blank space at the bottom so I could stamp the BFG into this. I coloured the image with greys and black Spectrum Noir pencils then tore the page into a panel. I matted the panel onto a piece of purple paper out of a bag from a shop then stuck the topper onto the front of the card. Finally I used the banner stamp and the words to put the greeting in.

[caption id="attachment_790" align="aligncenter" width="271"]SAM_0888 watermarked coloured with greys and black Spectrum Noir pencils[/caption]

Since I used newsprint, purple (my favourite colour at the moment and a snippet) and a greeting on the front, my card qualifies for several challenges so I am off to make the links! (I have thought of 4, which must be a record for me!)

Thank you for visiting. Take care.

Pippa

I would like to enter my card into the following challenges:
Less is More Recipe Week 195: Newsprint
Outlawz Greetings Card Challenge - OCTOBER 27th - Anything Goes
Your Scrapbook Place - black, white and your favourite colour
Pixie's Snippets Playground - Week 148

Monday, 29 September 2014

Seasonal Fairy

Kit and Clowder are running a competition with a free digi stamp, what more could a crafter want? The idea is to say which your favourite season is and colour in the fairy appropriately. My favourite season is winter.

SAM_0791.jpg with watermark


Materials used:
Fairy Fall image by Amy Doodle Stamp Co
white card
black A5 card blank
snippets of silver mirri card and white card
Die'sire Nouveau Stamping Frame die
mixture of Spellbinders and x-cut snowflake dies
crystal glamour dust
iridescent spray and sparkle
Spectrum Noir Pens


Method:
I printed out the fairy onto white card four times (it's good to have a spare or three to practice colours on!) Having coloured her in with the pens I used the Die'sire die to cut her out along with a silver frame and several snowflakes in white. I sprayed the snowflakes with Spray and Sparkle and left them to dry.

I mounted the image onto the frame and then attached to the card blank. I then used the glamour dust on her wings to give her a bit of sparkle. Finally I attached the snowflakes using gel glue.

Because she is a winter fairy I have dressed her in Christmas red and made her headdress a holly one. I have tried to keep her skin pale (not a lot of sun in the winter so not much tan.) The leaves on the ground are winter brown rather than green and her hair is grey for the end of the year. I have not added a sentiment yet because I am not sure if she is a Christmas or Birthday Winter Fairy.

Thank you for dropping in. Take care.

Pippa

I would like to enter this card into the following challanges:
Kit and Clowder Fall Fairy Colouring Competition

Pixie's Snippets Playground

Thursday, 25 September 2014

Rocking and rolling

The theme this week at Simply Less in More is 'Face the Music and Dance'.  With a son-in-law that plays the guitar I had to go for the rocker!

SAM_0789

Material used:
guitarist stamp - not sure where it's from
A5 white card blank
snippets of black and silver card
snippet of yellow paper
Neenah card
computer generated sentiment
Spectrum Noir pens
memento tuxedo black ink pad


Method:
I stamped the guitarist onto the neenah card and coloured him with Spectrum Noir pens before cutting him out. I made up the mat with black and silver card adding yellow paper to look like the light beam from a spotlight. I printed out the sentiment and matted it onto black card. Using 3d foam pads I attached the guitarist to the mat then attached the topper and sentiment to the front of the card blank.

Thank you for popping in. Take care.

Pippa

Wednesday, 24 September 2014

Autumn is here

This month's image for DeeDee's Digi of the Month Challenge is a cute chipmunk and a cider apple cup. I decided that I wanted my chipmunk to have a big apple instead of a small one so combined the two images.

SAMSUNG CAMERA PICTURES

Materials used:
DeeDee's Digi images: Fall warm up
Snippets of patterned and plain paper
Spectrum Noir pens
Distress inks: scattered straw, dried marigold and barn door
Black micron pen
8" square card blank
Neenah card stock


Method:
I printed out the two images onto the Neenah card, having first digitally masked off the apple being held by the chipmunk and resizing the large apple to fit my design. I then coloured the images with the Spectrum Noir pens, cut the main image into a panel and decoupaged the large apple, leaves and cinnamon stick onto the design. I cut the sentiment into a panel and coloured with the distress inks and stencil brushes.

I used the snippets of paper to cover the front of the card blank then used the black micron pen to add faux stitching to the card blank and the panels. Finally I added the panels to the front of the card blank.

This card also gave me the chance to play with my pens a bit more, I am still learning how to get the best out of them. I wanted to try to make the apple look two tone as most Somerset cider apples are, not sure if I have been totally successful in that, though for some reason the photo has made it look a lot brighter!

Having used snippets in this card I think I will head over to Pixie's again, it's a lovely sunny afternoon after a wet start so a run round in the snippets playground would be ideal!

Thanks for popping in. Take care.

Pippa

I would also like to enter this card into The Outlawz Greeting Card Challenge