Showing posts with label Deedee's Digi Stamps. Show all posts

Monday, 21 December 2015

I did do them all in time - honest!

Well you may have been wondering where I have been and why I did not finish the 'Catch the Bug Christmas Chaos' challenges. Actually I did get all seven done before the deadline but our internet went down for two days so I could not post them in time. On the bright side I still have four projects to share which will tide me over the Christmas period.

The fourth challenge was a recipe.CreateaCardXmasChaos2015

Materials used:SAM_2500(watermarked)
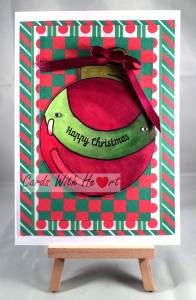
Bugaboo Stamps - Ornament
Deedee's Digis - Christmas Cuties  (Deedee is closing the shop at the end of the year and is having a 75% off sale)
acrylic greetings stamp from stash
black archival ink pad
white A5 card blank
snippet of red ribbon
gems
Copic pens
blending card
gold pen


Method:
Print out the ornament to the desired size onto blending card. Also print out three sheets of backing paper from the Christmas Cuties set.


Colour in the ornament with the Copics and gold pen and fussy cut it  out  then stamp the sentiment across the middle.

Cut the backing paper into 3 different size mats and layer up on the card front.

Use a shaping tool to emboss the back of the ornament to 'puff' it out then stick to the card with foam pads. Tie the ribbon into a bow and attach to the top of the ornament. Finally add two gems.

It was certainly a challenge trying to work out how to incorporate all the elements needed to meet the criteria of the challenge.

Thank you for dropping in. Take care.

Pippa

I would like to enter my card into the following challenges:
2 Crafty Girls #8 - Anything Goes
Cardz 4 Galz Challenge #12 - Christmas
Crafting With An Attitude #10 - Anything Goes

Tuesday, 8 December 2015

Deedee sponsoring the Clear it Out Challenge

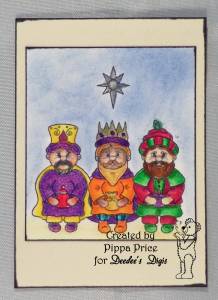
Deedee's Digi's is sponsoring the latest Clear It Out Challenge with the theme of anything goes. For my sample I used the Wise Men set to make a card and an ATC.

Materials used:SAM_2403(watermarked)
Deedee's Digis - Wise Men
Derwent colouring paper
Polychromo pencils
silver  and gold pens
black pen
artists chalks in blues and yellows
black , cream and blue card
small greetings foam stamp


Method:
Print out the image to the size required. Colour the wise men  with pencils and the background with chalk. Trim and edge with a silver pen. Add silver and gold to the star, the middle wise man's crown and accents on the presents.

Trim the coloured image to size and mat onto black card.

Cover the front of the card blank with blue card slightly smaller in size to leave a white border around the edges. Attach the topper at the top of the card and stamp the sentiment underneath in the middle.

SAM_2401(watermarked)For the ATC print out the image at the correct size and colour as before. Edge the image and a cream ATC blank with a black pen and attach the image to the ATC card.

Sadly Deedee is closing down at the end of the year so if you like her images you need to get them now, there is even a 75% sale going on so what are you waiting for?

Thank you for visiting. Take care.

Pippa

 I would like to enter my card into the following challenges:
Brown Sugar #175
Creative Fingers #99
Funday Friday Challenge #117
Pattie's Creations #117
Simply Papercraft Challenges #19

Sunday, 29 November 2015

Deedee's Sponsoring Outlawz

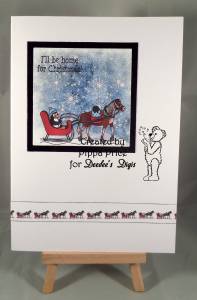
Today Deedee is sponsoring the Outlawz CAS Challenge with the theme the mode of transportation you'd use to travel to see family or friends for the holidays or any occasion. Deedee produced a new set for the occasion.

s175182838839828623_p615_i1_w540

I have always wanted to go for a sleigh ride on snow so choosing which image to use for my sample was easy, and it has penguins too!

I used the precoloured image for my card.

SAM_2416(watermarked)

Materials used:
Deedee's Digi Set - Here Comes Christmas
Bearly Mine Background Papers (out of business)
white A5 card blank
black card
printing card and printing paper
black pen


Method:
Using a graphics programme assemble the background paper with the sleigh and sentiment on top at the required size. Trim and then matt onto black card.

To make the paper ribbon use the graphics programme to produce a line of small sleigh images. Cut into a strip at the size you need and run a black pen along the top and bottom of the strip.

Attach the ribbon and and the matted image onto the front of the card.

If my card has inspired you why not head over to the Outlawz Challenges and have a go yourself.

The weather forecast for the UK is not hopeful for getting snow this winter, but then again forecasters are not always accurate with their predictions.

Thank you for visiting. Take care.

Pippa

Tuesday, 24 November 2015

Awe and wonder

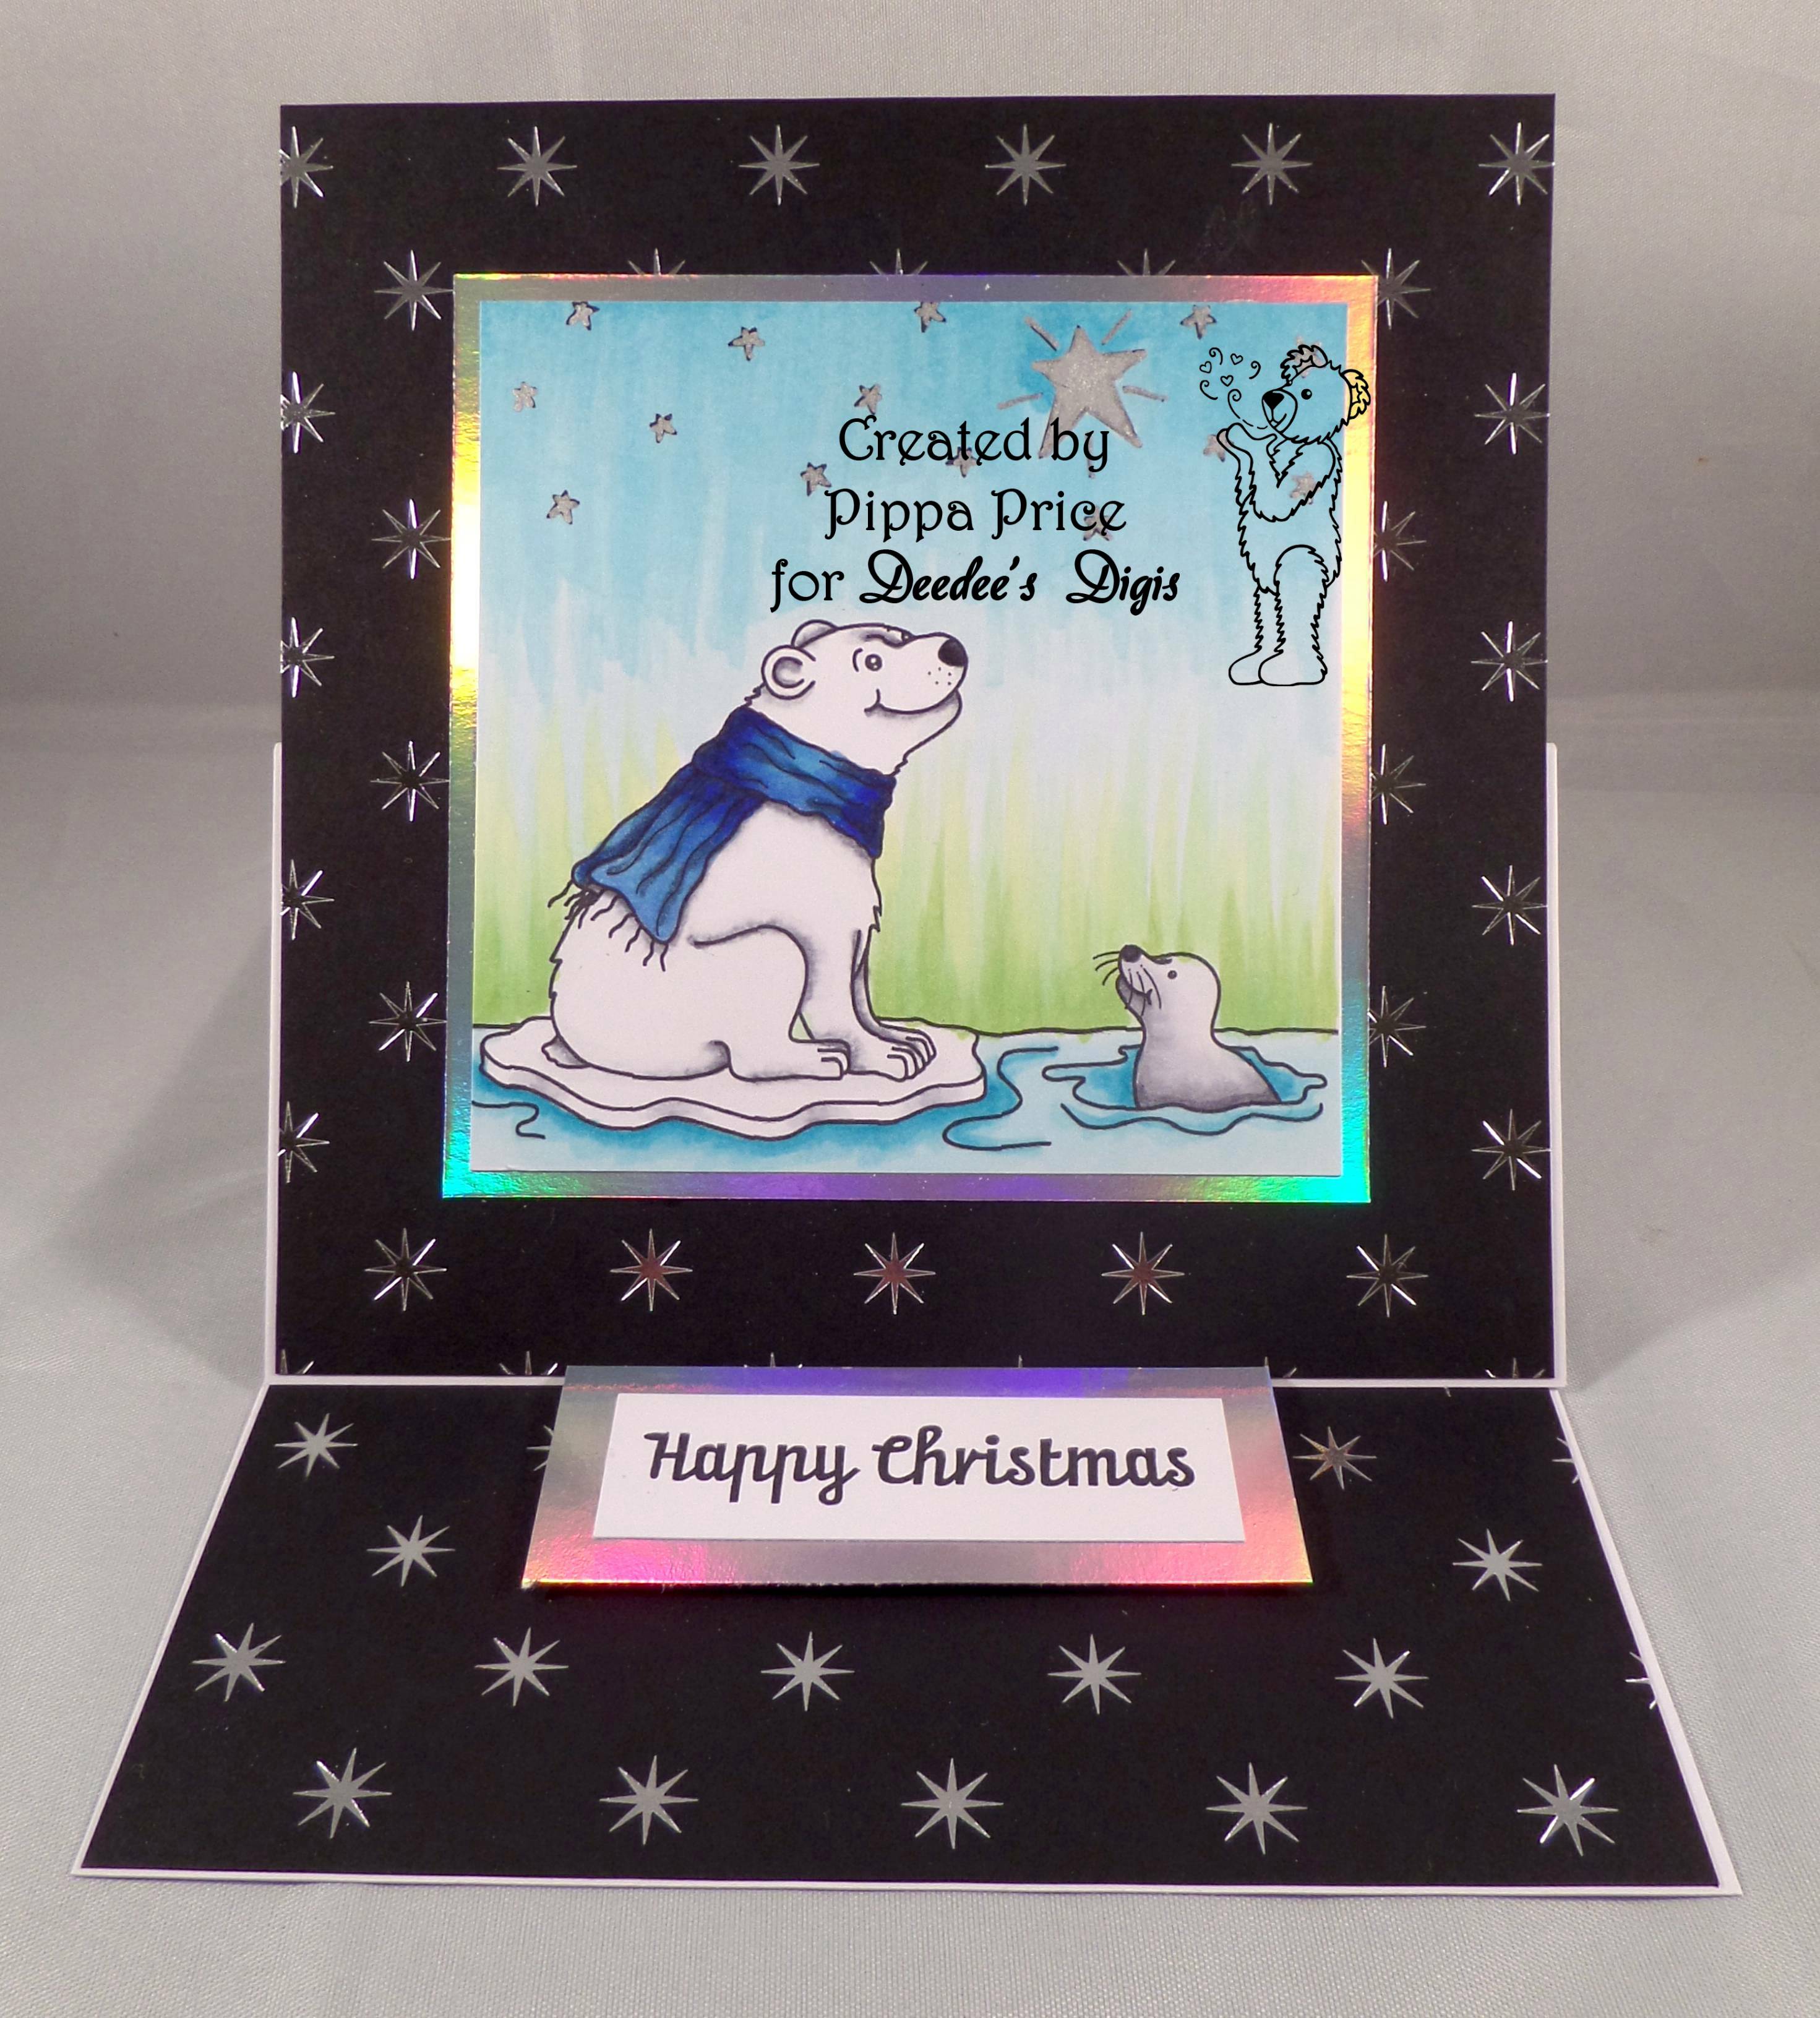
I have always wanted to see the Northern Lights, there is something truly amazing about the spectacular light show. Now I know that scientists will be able to explain exactly what is happening and why but for me it just shows the amazing creativity of God when he established the physical laws of the universe.

My card today uses the image for the current DOM at Deedee's Digis (I did say it would be back!) If you like this image then now is a good time to hop on over to Deedee's shop because there is a big sale going on now so don't miss out.

Materials used:SAM_2393(watermarked)
Deedee's Digi Set - Polar Peace
stamping card
15cm square white card blank
silver mirri card
black foiled silver star card from stash
acrlyic greeting stamp
archival black ink pad
silver pen
Copic pens


Method:
Print out the image at the required size and colour with the Copics. Trim and matt onto silver mirri card.

Fold the card blank to  make an easel card. Cover the front of the card blank (sticking down only at the bottom) and the inside face with the foiled card.

Stamp the greeting onto a scrap of white card and matt onto silver mirri card. Attach to inside of card to make the stopper using foam pads.

As I type this the temperature is dropping rapidly as sunset approaches. In fact here in the UK the weather has at last caught up with the season and become chillier, there was even a frost the past couple of mornings. Maybe the flowers will stop behaving as if it is spring and go back to sleep now!

Thank you for stopping by. Take care.

Pippa

I would like to enter my card into the following challenges:
Crafty Girls Creations #9
Crafting With An Attitude #9
Brown Sugar Challenge #173
Crafting With Friends #11
Creative Fingers Challenge Blog #98
Simply Papercraft #18
2 Creative Chicks #4
Sisters of Craft - November
Lil' Patch of Crafty Friends #22
Inspiration Destination #60

Wednesday, 18 November 2015

Path of Positivity - Gratefulness

The theme for the current challenge at Path of Positivity is Gratefulness. So often we loose our happiness in life through the green-eyed monster jealousy which then steals our awareness of how much we really have. If we are constantly comparing ourselves to those who are richer, look nicer, have better jobs, are famous, are healthier, and so on then we will always be miserable and never grateful. Once we start to see those who are actually worse off than us the gratitude flows and happiness increases as we become more and more aware of how much we have to be grateful about. It does not take much effort or imagination to find those who are struggling in life and who have so much less than us, you only have to read a newspaper or watch or listen to the news especially in recent times. As I was thinking about this challenge there were a series of terrorist attacks going on all over the world. In Beirut a suicide bomber claimed 43 lives and injured 239, stabbings of Israelis in Italy and Israel and of course the most recent attacks in Paris claiming 129 lives. There are wars going on in many areas of the world and famine is once again stalking African countries. Many communities are on the  move trying to escape war and terror leading to the largest migration of people in living history.

Looking at the bigger picture puts our problems into perspective. Yes you may not have much money, yes you may be stuck in a dead end job and taken for granted, yes you may be suffering from illness and disease but in comparison to so many others you are rich indeed. So look outwards at what you do have and practice gratitude instead of envy and be happier.

So what have I got to be grateful about? So much it is hard to know where to start. Deciding what to focus on to illustrate with a card was really difficult so I decided to focus on the thing that I am most grateful for, God's love for his world and for me put into practice when his son Jesus died to take away my sin and the sin of the world. So I know that no matter how desperate a situation is, be it personal or world wide, God is in control and his plan is working itself out for the world even if we do not understand it.

Materials used:SAM_2415(watermarked)
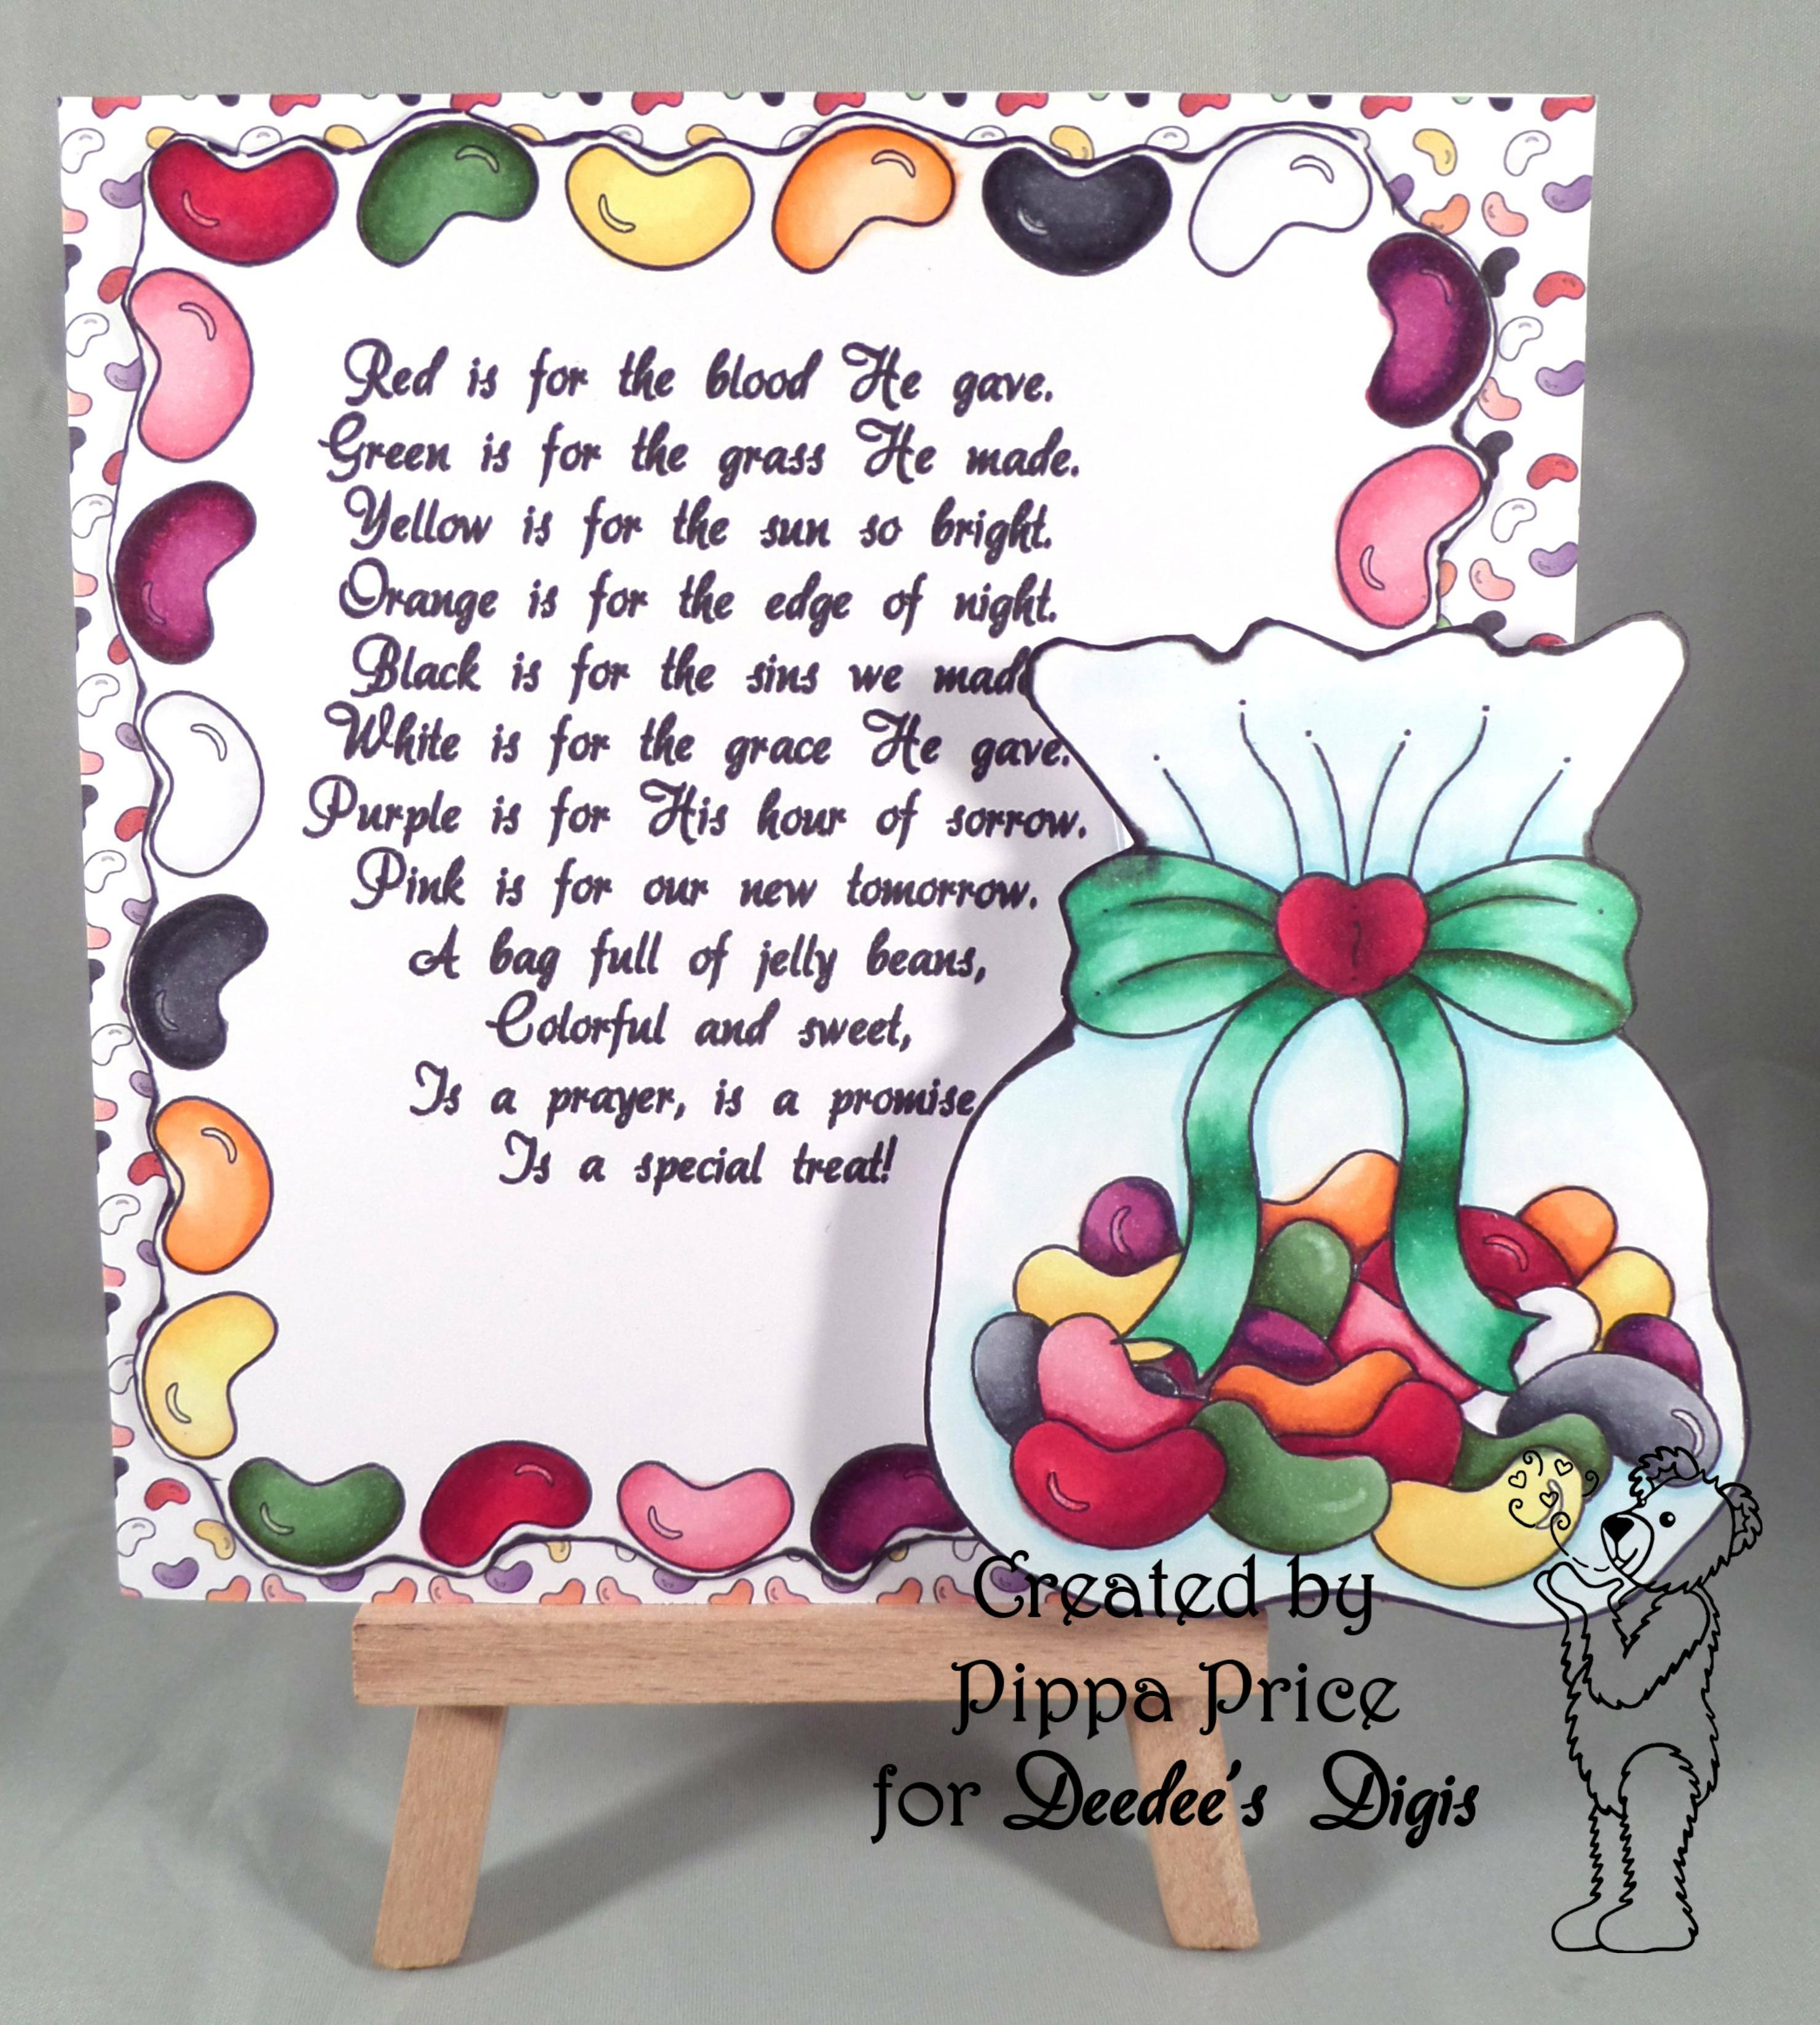
Deedee's Digi Set - Jellybean Prayer
stamping card
printer paper
white square card blank
snippet of scrap white card
Copic Pens


Method:
Print out the required images to the correct size. (I made the frame for the verse using the jellybean border, cropping it to size then copied and pasted it flipping the image on alternate sides.) Colour all images in with Copics.

Print out a sheet of the jellybean backing paper that comes with the set.

Cut around the outside edge of the framed verse and edge with a black pen. Do the same for the bag of beans image.

Cover the front of the card blank with the printed patterned paper and attach the verse to it.

Take a strip of scrap white card and snip along both the long edges. Fold both snipped edges in leaving a narrow part between them. Bend the snipped card around the jellybean bag image and trim to length then glue the tabs to the back of the image. When dry glue the tabs on the other side to the front of the card. Your jellybean bag should now be able to hold  a small bag of jellybeans.

This card would be great for Easter with some jellybeans inside the bag. The tricky part will be finding the right coloured beans!

I hope your week brings plenty of opportunities for feeling and expressing gratitude. Thank you for visiting. Take care.

Pippa

I would like to enter my card into the following challenges:
Path of Positivity #32 - Gratefulness
Lil Patch of Crafty Friends #22
Crafting From the Heart #86
Craft Your Passion #288
Love to Scrap Challenge Blog #66
2 Creative Chicks Showcase #4
 

Saturday, 14 November 2015

Anything but a card.

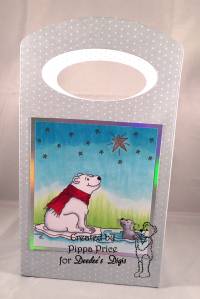
Deedee's Digis  is sponsoring the Allsorts Challenge which runs for a week  from today. The theme this week is 'Anything But a Card'. My DT samples for this challenge are a gift bag and a couple of very quick ATC's.

Materials used:SAM_2398(watermarked)
Deedee's Digi Stamp Set - Polar Peace (still at special offer price)
1" square punch
stamping card
silver mirri card
black sparkle card
Trimcraft Silent Night designer card
x - cut gift bag die
Copic pens
silver pen


Method:
Print out the images at the desired size onto the blending card and colour in with the Copics and the silver pen (for the stars).

Use the die to cut the bag out of designer card. Glue the two parts together but do not make up the bag, keep it so it still lies flat.

Mat the image onto silver mirri card leaving a narrow border around the edges. Then attach the matted image onto the front of the bag.

Join the last edge of the bag and secure the bottom with glue.

SAM_2395(watermarked) SAM_2394(watermarked)

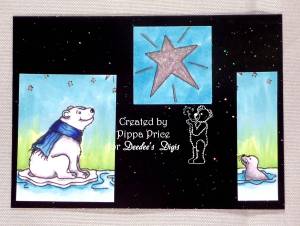
For the ATC's print out a smaller image and colour in. Trim down to make up the two panels.

To make the stars crop the image so that you only have the star and resize accordingly. (I made mine so they would fit on an inchie.) Colour the stars with the silver pen and punch them out.

Cut the ATC blanks from black sparkle card and arrange the elements on the front before sticking them down.

This will not be the last outing for this particular set from Deedee there is still one more make to come before the end of the month!

Thanks for dropping by. Take care.

Pippa

I would like to enter my project into the following challenges:
A Snowflakes Promise #9
Fan-Tastic Tuesday #111 - Anything goes with a twist: something beginning with B (bag!)
Inky Chicks #59 - Silent Night
Papertake Weekly Challenge - Christmas Critters
2 Creative Chicks Showcase #4
Inspiration Destination #59

Wednesday, 4 November 2015

Beautiful boxed butterflies on a dreary dismal dank day!

For the last couple of days we have been experiencing Autumn weather, fog, drizzle, rain, wind and just to add to the misery it gets dark so early. Actually today it did not really ever get light with all the grey cloud and drizzle about. So what better way to cheer up a cheerless day than with a box of butterflies!

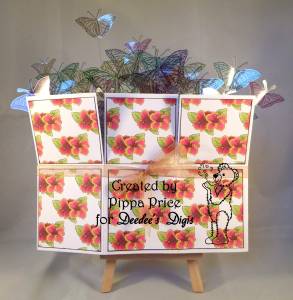
[caption id="attachment_1859" align="alignleft" width="293"]Closed box Closed box[/caption]

Materials used:
Deedee's Digi set- Bloom and Grow and Framed Comfort
exploding box die set
white card
white printing paper
printable acetate
construction weight acetate
pastel orange organza ribbon
gold peel off letters and numbers


Method:
I used one of the flowers from the Bloom and Grow set to make a sheet of backing paper on the computer and printed it off. I used the die to cut the exploding box elements twice from white card and constructed a double size one. I cut panels from the backing paper to cover the outside of the box and the inner 'shelves' of the box.

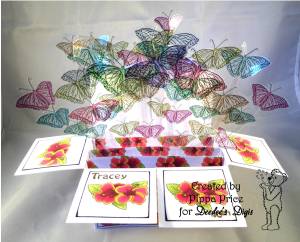
[caption id="attachment_1860" align="alignright" width="300"]Open box Opened box[/caption]

Using a basic graphics programme I made up a sheet of 40 butterflies of different sizes and recoloured them in different pastel shades. The butterfly image came from the Framed Comfort set. I printed the butterflies onto the acetate and cut them out. I then used strips of construction acetate and attached one to each butterfly. I then arrange my butterflies on their holding strips inside the box, sticking them to the inner strips. Finally I added the gold letters and numbers to make my greeting. When the box is folded flat it is kept together with the orange ribbon tied with a bow.

With so many butterflies to fit into the box and even with using a double sized box I still had butterflies sticking out when it was folded flat. They acted as a teaser as to what else might be in the box! As the butterflies are acetate the light shines through them and makes them look ethereal. I made the card for the 40th birthday of our former youth worker, hence the 40 carefully cut out butterflies!

Thanks for stopping by. Take care.

Pippa

I would like to enter my box of butterflies into the following challenges:
2 Creative Chicks Showcase #4
Sisters of Craft - November Challenge
Artistic Inspirations #143 Anything Goes/twist birthdays
Crafting From the Heart #84
Craft Your Passion #286
Get Creative Challenges #27 - Birthday
Not Just Cards #26
Doodle Pantry Ants in my Pantry #11
Papertake Weekly Challenge - Anything Goes
Creative Card Crew #99 - Off the Edge
Through the Craftroom Door November 3-11
Little Claire's Monthly Digi Stamp Challenge #11

Sunday, 25 October 2015

Deedee's DOM Reminder

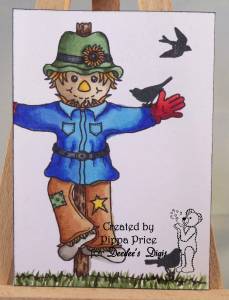
Deedee is posting a reminder for this month's DOM on  her blog today so here is the sample I made. You will recognise the design because I have already posted a card I made, this is the smaller ATC version!

Materials used:SAM_2327(watermarked)
Deedee's Digi Set - Pumpkin Patch
Clarity Stamps - Birdhouse Garden
Stamping card
Archival Black ink pad
Copics


Method:
I printed out the scarecrow image onto white stamping card and coloured the image with Copics. I then trimmed it to the size I wanted then edged it with the black ink pad. I added the crows to his arm and the sky using the Clarity stamps and black ink.

There is still time to have ago at the challenge yourself. Don't forget if you enter this month you get the image for next month absolutely free, so everyone's a winner!

Thanks for dropping by. Take care.

Pippa

I would like to enter my card into:
Scrap-Creations - Pumpkins
Papertake Weekly Challenge- All about the base
Through the Craftroom Door
Addicted To Stamps #167
Inspiration Destination #56
Not Just Cards #25

Thursday, 15 October 2015

Deedee at the Crafty Girlz Challenge

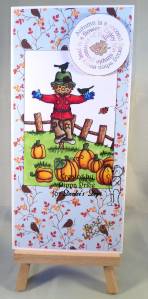
This month Deedee is sponsoring the Crafty Girlz Challenge with the theme anything goes. This is my sample for the challenge.

Materials used:SAM_2326(watermarked)
Deedee's Digi Set - Pumpkin Patch
Imagine That - Subtle Harvest Kit
Clarity Stamps - Birdhouse Garden
designer paper from stash
DL white card blank
Stamping card
circle die
Archival Black ink pad
Copics


Method:
I printed out the scarecrow image and the saying onto white stamping card and coloured the image with Copics. I then trimmed it to the size I wanted then edged it with the black ink pad. I added the crows to his head and arm using the Clarity stamps and black ink. I covered the front of the card blank with the designer paper leaving a small border around all the edges. I cut out the saying with the circle die, arranged my toppers on the front of the card as I wanted them and then stuck them down.

So why not go and look at Deedee's blog and the Crafty Girlz Challenges for more inspiration and have a go yourself.

Thank you for visiting. Take care.

Pippa

I would like to enter my card into the following challenges:
Crafting With Friends #8
Creative Fingers #95
Simply Create Too #96 - Halloween Colors
Simply Papercraft #15
My Time To Craft #306 - Autumnal Colours
Scrappers Delights #49 - Fall/Halloween
Suzy Bee's Bloomin' Challenge #101 - Anything goes with a twist: something beginning with S - my twist is the scarecrow

Saturday, 3 October 2015

World Card Making Day and Deedee's Tic Tac Toe Game

Today is World Card Making Day and to celebrate Deedee has got a fun competition going with the opportunity to win prizes, so why not go and have a look at Deedee's Digi's   where you can find how to play, the prizes on offer and inspiration from the DT.

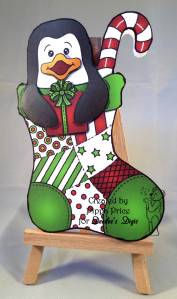
For my sample I used one of the Stocking Pals which you can win by taking part.

Materials used:SAM_2278(watermarked)
Deedee's Digi Stocking Pals Set (one of the prizes)
printer card
Black Pen


Method:
This is a really easy card to do. I printed out the pre-coloured image at the size I wanted twice. I then cut out one image attached it to a white card blank and cut round it making sure to leave some of the side fold in place so that it would open (otherwise you end up with two shapes and no fold).From the second image I cut the part of the penguins flippers holding the present with the present as well and the beak. I then used a glue gel to attach them to the main image giving some dimension. Finally I ran a black pen around the outside edge to finish him off.

This has to be the quickest card I have made in a while and surprise surprise no colouring! Of course you can use the same method to make gift tags and because it is a digital image you can make it any size you like depending on the size of your present.

So I hope you pop along to Deedee's site and look at all the wonderful samples from other members of the team and be inspired to have a go yourself.

Thanks for dropping in. Take care.

Pippa

Tuesday, 29 September 2015

Deedee's Digis Challenge Sponsorship Flurry!

If your are a fan of Deedee's images or just want to own some more there are lots of opportunities to win some as Deedee is sponsoring a heap of challenges at the moment. Take your pick from:
Clear it Out Challenge Blog
{PIN}spirational Challenge
and Through the Craftroom Door Challenge. So why not check them out and have a go yourself.

My card for today is my sample for the Through the Craftroom Door Challenge.

Materials used:SAM_2263(watermarked)
Deedee's Digis Stamp Set - Loaves and Fishes
white printer card
2016 calendar blank
white stamping card
Copic pens
dark turquoise card


Method:
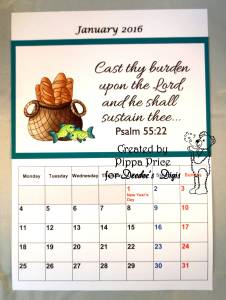
I printed out the calendar blank on the A4 white card (this was the hardest part trying to get it the right size!) I then printed out my image and the verse from Psalm 55 to the right size to fit the space left on the calendar. I coloured the image with the Copics and then trimmed to size. I matted it onto the turquoise card and then mounted the whole topper onto the calendar.

I decided to go with this particular set and verse for January as a good reminder of God's gracious provision and love, no matter what life throws our way. It seemed a fitting thought to start a new year with.

My plan is to have a whole calendar finished in time for Christmas but so far this is as far as I have got!

Thank you for dropping in. Take care.

Pippa

I would like to enter my calendar page into the following challenges:
Crafting From the Heart #79
Craft Your Passion #281
Not Just Cards #24
Scrapbook Stamp Society #76
Jo's Scrap Shack: FFC #107
Inspiration Destination Challenge #52
Addicted to CAS #73 - Dream (January a time to dream of all the new year might have in store)

Monday, 24 August 2015

Deedee's August DOM

If you have not already done so there is still time to enter Deedee's Digi's Progressive Challenge and to make it even easier for you she has provided a free image to use, so there is no excuse!

Materials used:DSCF9005(watermarked)
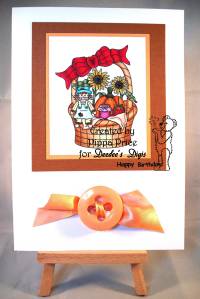
Deedee's DOM - Seasonal Baskets or Freebie Christmas Seasonal Basket (scroll down the post to find the images)
Blending card
Core'dinations card stock in two browns
white A5 card blank
large peach coloured button
snippet of peach wide satin ribbon
Copic pens
small black peel off greeting


Method:
I printed the image to the size I required and coloured it with the Copics. I then trimmed it and matted and layered it onto two shades of brown card. I attached my topper to the card front and added the peel off greeting at the bottom of the frame. Finally I threaded the ribbon through the button, trimmed the ends and attached to the card under the topper.

Why not have a go at Deedee's challenge yourself. If you do not like colouring she also provides pre-coloured images to use. If you need one more incentive, everyone who enters gets the image for the following month free of charge.

Thanks for dropping in. Take care.

Pippa

Thursday, 30 July 2015

To have and to hold

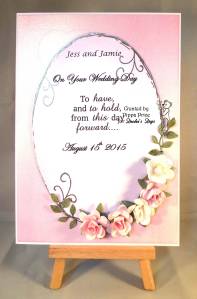
Traditionally there are always more weddings in the summer months than during the winter ones. Having just made a card for a Ruby Anniversary I found myself reaching for the same digi set to make a wedding card.

Materials used:SAM_1822(watermarked)
Deedee's Digi Stamps sets - Two Hearts and
Framed Comfort
Britannia rose dies and leaf die
heart shaped dies
shimmer white paper
Copic pens
white printer card
centura pearl card
white A5 card blank
memento rose bud ink pad
silver pen
spray and shine
clear wink of stella


Method:
I printed out the frame from the Framed Comfort set with the words from the Two Hearts set and the names of the couple and the date in the middle. I cut around the outside of the frame to make the topper. Using the silver pen I traced over the design of the frame and then went over the top with the Wink of Stella pen. I cut a piece of centura pearl card slightly smaller than my card blank and embossed some heart shapes on it using the heart dies. I then blended the memento rose bud ink over the card. It left a very subtle watermark effect which does not really show up very clearly in the photo.SAMSUNG CAMERA PICTURES

Using the Britannia dies and the shimmer white paper I cut out the rose petals andleaves and coloured them with Copic pens before making up the flowers. When the flowers had set I sprayed them and the leaves with spray and shine.

Finally I attached the topper to the card blank and arranged the flowers and leaves along the bottom edge of the frame.

This is the first card commission I have had for a while and I am happy to report that my customer was very pleased. She had given me a good idea of what she wanted so I guess I was following a recipe for it.

Thank you for dropping by. Take care.

Pippa

I would like to enter my card into:
Simon Says Anything Goes
Crafty Gals Corner Challenge #30: Anything Goes
ATSM Challenge #155 - Photo (flowers; colours white and pink)
Word Art Wednesday Challenge #194 - Anything Goes/Family Friendly
DSC #140 - Anything Goes!

PS This will be the last post for a while as I am off on my summer holidays. Hoping that the weather warms up a bit and the sun comes back for good!

Wednesday, 29 July 2015

Two hearts as one for a long time.

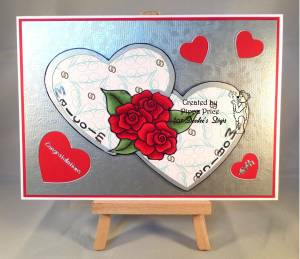
Today I would like to share a card I made for friends celebrating their ruby wedding anniversary.

Materials used:SAM_1819(watermarked)
Deedee's Digi Stamps - Two Hearts
blending card
Copic pens
silver pen
Wink of Stella Clear
Spray and Sparkle Iridescent
red card
silver rose embossed card
silver peel off stickers
heart dies
A5 white card blank


Method:
I printed out the entwined hearts image and coloured it with the Copics and the silver pen. I fussy cut the image making the inside area of the hearts slightly bigger by reducing the heart shape edges then sprayed the flowers with the Spray and Sparkle. I added some Wink of Stella to the heart frames.

I trimmed the red and silver card to the correct size for layering then used the heart dies to cut some hearts from the silver card. I printed out a sheet of backing paper from the set and attached my cut out image onto it. When the glue had dried I cut it out. I attached the red and silver card to the card base and attached the topper then placed my peel offs in the heart shaped apertures.

Thank you for dropping in. Take care.

Pippa

I would like to enter my card into:
Simon Says Stamp - Anything Goes
Crafty Gals Corner Challenge #30: Anything Goes
Word Art Wednesday #194 Anything Goes
Create and Inspire Challenge 26 - Anything Goes
Inspiration Destination Challenge Blog: Anything Goes Challenge No. 44
Through the Craft Room Door Challenge
Crafty Creations Challenges: Challenge #294 - Four (I have put in 4 red hearts and there is a 4 in 40!)

Tuesday, 21 July 2015

End of the School Year

It's been a long year but we made it! An emotional end this time because after 14 years in Reception I am on the move to work with the older children from September. It's not a choice I would have made for myself but recent health issues have meant it is better for the school if I am in a less active place.

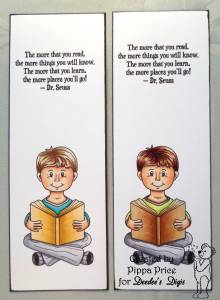
I usually give the children a little gift at the end of the summer term and this year I decided to make a bookmarker each for them all. So I made 14, 7 for the boys and 7 for the girls and put their names on the back.

The Path of Positivity challenge this time around has the theme of 'Sharing'. I have been thinking about what to do for a while, the problem was not lack of ideas but having too many. When I decided to make the bookmarkers I knew that had to be my entry for POP. One of the joys of working in Reception is being able to share a love of books with them. When they first come into school we do not give them a reading book but allow them to choose one from the class to take home and 'share' with mummy or daddy. In fact most of the time we talk about sharing books rather than reading a story.

Because of health problems I had when I was born I spent a lot of time alone and unable to go outside to play so I learned to read very young and have been the stereotypical bookworm ever since. While I was a guide I even ran a library for the village children. I trained as a librarian but life's circumstances took me into working in schools.

So next year will be different with new challenges but I hope there will still be opportunities to share a love of books with the older children along the way.

Materials used: SAM_1788(watermarked)
Deedee's Digis set - Little Readers
Clarity Stamps - Letter Box Kit
Stamping card
Copic pens
Archival Black ink pad


SAM_1789(watermarked)

Method:
I printed out the images and wording using a template on Word so that I could fit two bookmarkers to an A4 sheet of card. I used the Copics to colour the images in then cut them apart and scored the fold line. I then used the letterbox kit to write the children's names on the backof the bookmarkers. Finally I folded them in halves and glued them down.

SAM_1790(watermarked)

It took a while to do the colouring and the stamping but I think it was worth it. I hope the children like them and that they are encouraged to use them in the ongoing discovery of books.

Thanks for sticking it out with my ramblings today. Take care.

Pippa

I would like to enter my card into:
The Path of Positivity Challenge #28 - Sharing
Anything But a Card Challenges No. 49 "Anything Goes"
Ike's World Challenges #42 - Anything but a Square
Through the Craftroom Door - Anything goes
Word Art Wednesday: Challenge #192

Monday, 13 July 2015

Deedee's DOM

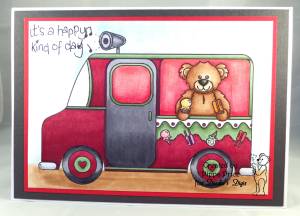
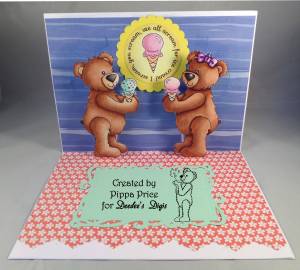
This month Deedee's Digi of the month is an ice cream truck and some bear customers! I went to town with it this time having a go at another pop-up card.

Materials used:SAM_1792(watermarked)
Deedee's Digis Set - Ice cream truck
It's a happy kind of day acrylic stamp
blending card
A5 white card blank
A5 printer card
red card
grey card
bright yellow card
pale green card
blue designer paper
orange designer paper
Copic pens
Stampendous pop-up die set
circle die set
scalloped circle punch
Die'sire Nouveau Stamping Frame die


Method:
I printed out my main image, the two bears and the sentiment at the size I wanted and coloured them in with the Copics. I trimmed the ice cream truck image to size, matted and layered it onto red and grey card and attached it to the card front. Using black ink I stamped the sentiment in the top left corner. I fussy cut the two bears and cut out the sentiment with a circle die. I made a scalloped edged mat from the yellow card using the punch.

SAM_1793(watermarked)Using the printer card and the pop-up die I cut the tabs out twice to attached my bears on. I covered the top half with blue paper (to resemble sky) and the bottom half with orange floral paper (for the ground) and stuck it all on the inside of the card. I shaped the bears slightly by hand and attached them to the tabs inside the card. I attached the sentiment in between the bears (I had sunshine in mind when I did it!). Finally I die cut the nouveau stamping frame from the green card for the sender to write their greeting on.

Thank you for popping by. Take care.

Pippa

I would like to enter my card into:
Digi Galore Challenge July - Summery/Bright
Give a crafter a cookie challenge #22
Digitally Sweet - Anything goes
Stamping Sensations July Challenge - Feature a Creature
Not Just Cards Challenge 22 July

Sunday, 12 July 2015

Deedee's Digi's to the rescue again!

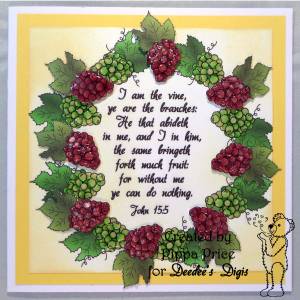
After four years our wonderful church youth worker is moving on to pastures new. I was commissioned to make a card for everyone to sign to thank her and wish her well in her next position. After a complete blank on what to do I eventually had a brainwave! One of the youth groups is called Gazebo Grapes and Deedee had just the set I needed. By now there was not enough time to colour in the image so I used the already coloured in version.

SAM_1783(watermarked)

Materials used:
Deedee's Digi Set - Fruit of the vine
printing paper and card
15cm x 15cm white card blank
yellow card
Adirondack ink pad - Lemonade
Distressing tool
glossy accents


Method:
I made up my base design with the green grapes image and sized it to fit my card blank. I also added some red grape images the same size in the spare area of my sheet then printed it out. I trimmed the main image down, distressed around the edges almost into the middle with the lemonade ink and matted it onto the yellow card before attaching to the card base. I covered the grapes with glossy accents and left it to dry. I fussy cut the red grape images and when the base image was dry attached the red grapes between the green grapes using 3d glue gel. When the glue was set I put glossy accents on the red grapes. This time I did it in stages to try to get the individual grapes to stand out more. (I am not sure why but at this point some of my grapes went white!)

I made an insert for the card using a graphics programme to made a backing paper with the green and red grape images on it. (I forgot to photograph the inside before it went off to the church to be signed.)

Whenever I see that verse from John 15 I want to sing 'I am the vine, you are the branches', I love that hymn/song in all it's different renditions. This one is a particularly tuneful one if you are interested: https://www.youtube.com/watch?v=LF4J7CCximo

I did say that I was hoping to get some quality time in my craft room this weekend and I have managed to finish a couple of projects so will be sharing them during the coming week. Thank you for stopping by. Take care.

Pippa

I would like to enter my card into:
Word Art Wednesday - #191 Anything Goes
Your Scrapbook Place - July: Anything Goes
Outlawz Greeting Card Challenge - Inspired by a movie or song.
Digitally Sweet Challenges - 140: Anything goes
Not Just Cards Challenge - Anything Goes
Ants in my pantry digital challenge 7 - Anything Goes

Wednesday, 10 June 2015

Summer is a comin'

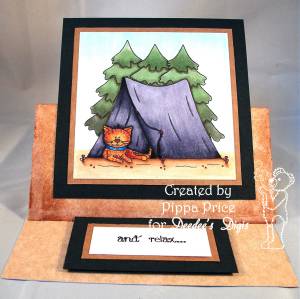
Well, it's trying too, still a bit chilly in the wind but there is some sunshine at least. Deedee is sponsoring the current challenge at Crafty Gals Corner with the theme 'The great outdoors'. It maybe a little predictable but I have gone with camping for my card. We used to camp regularly when the girls were younger at a Christian Family Conference, on the Bath and West Showground just outside Shepton Mallet in Somerset. We went from tent to caravan and back to tent before a particularly wet year when the tent was packed away and has not come out again! That was the year we were situated near the lake and our neighbours had dug a trench around their tent to stop it flooding. I can still remember waking up one morning and watching a line of ducks come up from the lake, waddle across the grass and then swim up the trench before hopping out and waddling off. I never did find out where they went but they would be back the next day taking the same route!

Materials used:DSCF9011(watermarked)
Deedee's Digi Stamps - Great Outdoors
'and relax ...' stamp from stash
a white 15cm square card blank
kraft card
dark green card
stamping card
Copic pens
vintage photo distress ink
brown serviette


Method:
I printed out the image at the size I wanted and coloured it with Copics. I then matted and layered it onto kraft and dark green card. Having first distressed the edges of the card blank with Vintage Photo I stuck one layer from the serviette to it and then folded it down the middle to create an easel card. I stuck the other layer from the serviette to the inside of the card. I then made the stopper by stamping the sentiment onto a scrap of the white card, trimming it down and matting and layering it to match the main topper. Finally I stuck the topper and the stopper to the card blank.

The brown serviette I used came from a snack box from an online company and was hanging around my snippets box for a while so I think I may head over, in my woolly jumper and coat, to see if anyone is brave enough to be in Pixie's Playground!

Thank you for dropping bye. Take care.

Pippa

I would like to enter my card into:
Pixie's Snippets Playground Week 180
Inspiration Destination Anything Goes Challenge 137

Addicted to stamps challenge 148 - Holiday
Word Art Wednesday - 187

Tuesday, 9 June 2015

{PIN}spirational Challenge

As a member of Deedee's design team you can opt to provide samples for the challenges she is sponsoring. This month I decided to have a go at something I have never tried before which is to make a card inspired by a picture. It just so happens that Deedee is sponsoring the {PIN}spriational Challenge, the picture provided for inspiration is:

june+9

So I had a good look through Deedee's store and found an image which I thought would work.

Materials used:
Deedee's Digi Stamps - Dog Days of Summer and Hello Spring
Stamps Away Versatile stamp set
stamping card
dark green card stock
white A5 card blank
small butterfly punch
snippet of patterned paper
Copic pens
Adirondak Black Archival ink pad

DSCF9013(watermarked)
Method:
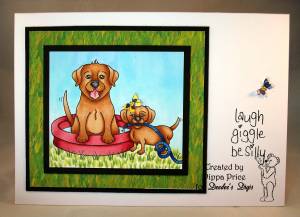
I printed out my image to the desired size and coloured it in with the pens. I also printed out a sheet of the grassy paper from the Hello Spring set. I trimmed my image and matted and layered it up with the printed paper and the green card. I attached my topper to the left side of the card blank and stamped the sentiment onto the card on the right side. The puppy in the image has a bow in 'her' hair but as I wanted a boy to fit in with the photo I had to work out how to disguise the bow. After an unsuccessful attempt to turn it into a bone I finally decided to cover it up with a small butterfly. I punched two butterflies from a snipped of pansy paper left over from a previous project and stuck one over the bow and the other above the stamped sentiment.

My take on the picture is a role reversal but I think it will not be long until he is in the pool with dad! I chose the sentiment because in my mind I see father and son having fun together and enjoying a bit of fun play.

Thanks for dropping in. Take care.

Pippa

Sunday, 7 June 2015

DOM at Deedee's Digi Stamps

The first week of the month long challenge at Deedee's Digi Stamps is already gone but there is still time to have a go. If this is your first entry you will need to purchase the DOM from the store (link below), after that as long as you keepentering you will get the next months image free. This month has summer in mind.

SAM_1728(watermarked)

Materials used:
Deedee's Digi Stamps - Diver Daniel
Digi Paper from Pixel Scrapper - The Captain Paper 363
white stamping card
white printer card
3 Fold card die
starfish die cuts from stash


Method:
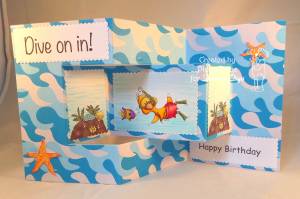
I printed out a sheet of the Captain backing paper and die cut it to form the card blank. I printed out two coloured images from the Diver Daniel set and one line drawing image along with the two sentiments. I coloured in Daniel and then die cut all the elements. I decided to use the scalloped edge option to fit with the idea of waves. Finally I attached my elements to the card and added a couple of die cut starfish I found in my stash.

Thanks for dropping in. Take care.

Pippa