Showing posts with label Clarity Stamps. Show all posts

Sunday, 25 October 2015

Deedee's DOM Reminder

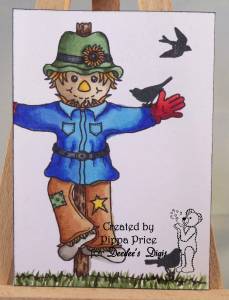
Deedee is posting a reminder for this month's DOM on  her blog today so here is the sample I made. You will recognise the design because I have already posted a card I made, this is the smaller ATC version!

Materials used:SAM_2327(watermarked)
Deedee's Digi Set - Pumpkin Patch
Clarity Stamps - Birdhouse Garden
Stamping card
Archival Black ink pad
Copics


Method:
I printed out the scarecrow image onto white stamping card and coloured the image with Copics. I then trimmed it to the size I wanted then edged it with the black ink pad. I added the crows to his arm and the sky using the Clarity stamps and black ink.

There is still time to have ago at the challenge yourself. Don't forget if you enter this month you get the image for next month absolutely free, so everyone's a winner!

Thanks for dropping by. Take care.

Pippa

I would like to enter my card into:
Scrap-Creations - Pumpkins
Papertake Weekly Challenge- All about the base
Through the Craftroom Door
Addicted To Stamps #167
Inspiration Destination #56
Not Just Cards #25

Thursday, 15 October 2015

Deedee at the Crafty Girlz Challenge

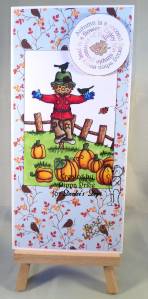
This month Deedee is sponsoring the Crafty Girlz Challenge with the theme anything goes. This is my sample for the challenge.

Materials used:SAM_2326(watermarked)
Deedee's Digi Set - Pumpkin Patch
Imagine That - Subtle Harvest Kit
Clarity Stamps - Birdhouse Garden
designer paper from stash
DL white card blank
Stamping card
circle die
Archival Black ink pad
Copics


Method:
I printed out the scarecrow image and the saying onto white stamping card and coloured the image with Copics. I then trimmed it to the size I wanted then edged it with the black ink pad. I added the crows to his head and arm using the Clarity stamps and black ink. I covered the front of the card blank with the designer paper leaving a small border around all the edges. I cut out the saying with the circle die, arranged my toppers on the front of the card as I wanted them and then stuck them down.

So why not go and look at Deedee's blog and the Crafty Girlz Challenges for more inspiration and have a go yourself.

Thank you for visiting. Take care.

Pippa

I would like to enter my card into the following challenges:
Crafting With Friends #8
Creative Fingers #95
Simply Create Too #96 - Halloween Colors
Simply Papercraft #15
My Time To Craft #306 - Autumnal Colours
Scrappers Delights #49 - Fall/Halloween
Suzy Bee's Bloomin' Challenge #101 - Anything goes with a twist: something beginning with S - my twist is the scarecrow

Friday, 18 September 2015

Another one I made earlier

Still playing 'catch up' so here is another card from August. My husband asked for a card for a colleague who was retiring so out came the old acrylic stamps.

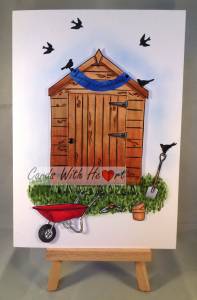
[caption id="attachment_1656" align="alignright" width="197"]SAM_1995(watermarked) Front of card[/caption]

Materials used:
Dimension Stamps - Garden Shed Set (no longer available)
Clarity Stamps - Bird House set
stamping card
A5 white card blank
Copic pens


Method:
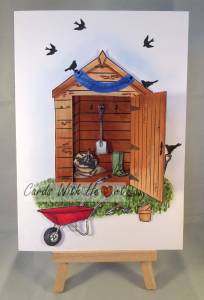
I stamped the garden shed onto the front of the card blank and then again with all the tools I wanted onto stamping card. I coloured all my images in with the Copics and then added the wooden plank detail to the back of the shed on the front of the card. From the second shed image I cut the front and the door and mounted these on top of the card using foam tape to give the shed some depth.

[caption id="attachment_1657" align="alignleft" width="204"]Behind the shed door Behind the shed door[/caption]

I cut out all the elements I wanted to add to my card and attached them to the card base, some just flat and some with foam pads. Finally I stamped on the birds from the Clarity set where I wanted then and added the banner.

Sometimes the idea you have in your head do actually work when you get going on constructing them! I was so pleased when it all worked and the shed door opened to reveal all the tools etc inside!

Thank you for stopping for a while. Take care.

Pippa

I would like to enter my card into:
Creative Fingers #93
Inspiration Destination #51
Addicted to Stamps #162 - Make your mark
Crafty Gals Corner #37 - Anything goes
Crafting With An Attitude #7
Crafty Catz Challenge #293 -
Special Occassion
(my special occasion - Retirement)
Beccy's Place September Challenge
Crafts Galore September Challenge - Anything Goes
Jo's Scrap Shack Fun-day Friday- Boys to Men

Tuesday, 21 July 2015

End of the School Year

It's been a long year but we made it! An emotional end this time because after 14 years in Reception I am on the move to work with the older children from September. It's not a choice I would have made for myself but recent health issues have meant it is better for the school if I am in a less active place.

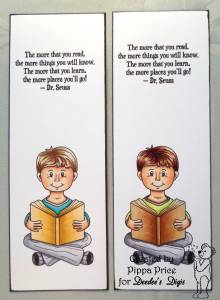
I usually give the children a little gift at the end of the summer term and this year I decided to make a bookmarker each for them all. So I made 14, 7 for the boys and 7 for the girls and put their names on the back.

The Path of Positivity challenge this time around has the theme of 'Sharing'. I have been thinking about what to do for a while, the problem was not lack of ideas but having too many. When I decided to make the bookmarkers I knew that had to be my entry for POP. One of the joys of working in Reception is being able to share a love of books with them. When they first come into school we do not give them a reading book but allow them to choose one from the class to take home and 'share' with mummy or daddy. In fact most of the time we talk about sharing books rather than reading a story.

Because of health problems I had when I was born I spent a lot of time alone and unable to go outside to play so I learned to read very young and have been the stereotypical bookworm ever since. While I was a guide I even ran a library for the village children. I trained as a librarian but life's circumstances took me into working in schools.

So next year will be different with new challenges but I hope there will still be opportunities to share a love of books with the older children along the way.

Materials used: SAM_1788(watermarked)
Deedee's Digis set - Little Readers
Clarity Stamps - Letter Box Kit
Stamping card
Copic pens
Archival Black ink pad


SAM_1789(watermarked)

Method:
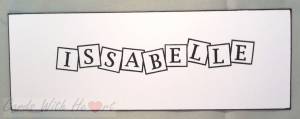
I printed out the images and wording using a template on Word so that I could fit two bookmarkers to an A4 sheet of card. I used the Copics to colour the images in then cut them apart and scored the fold line. I then used the letterbox kit to write the children's names on the backof the bookmarkers. Finally I folded them in halves and glued them down.

SAM_1790(watermarked)

It took a while to do the colouring and the stamping but I think it was worth it. I hope the children like them and that they are encouraged to use them in the ongoing discovery of books.

Thanks for sticking it out with my ramblings today. Take care.

Pippa

I would like to enter my card into:
The Path of Positivity Challenge #28 - Sharing
Anything But a Card Challenges No. 49 "Anything Goes"
Ike's World Challenges #42 - Anything but a Square
Through the Craftroom Door - Anything goes
Word Art Wednesday: Challenge #192

Sunday, 1 March 2015

Away with the fairies

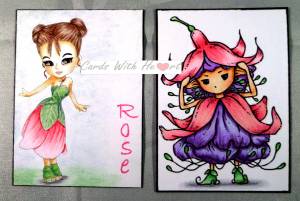
Kit and Clowder have a competition this week on their Facebook page to colour in a fairy or fantasy image from Scrappers Delight and as I have run out of ATC's for my swap group I thought I might be able to kill two birds with one stone. Not that I advocate or would consider participating in bird killing, but you know what I mean!

SAM_1453 (wtermarked)

Materials used:
Digital image from Scrappers Delight - Rose Petal
Digital image from Aurora Wings - Fuchsia Sprite
White blending card
Derwent Studio colouring pencils
Spectrum Noir Pens
Clarity Letterbox stamp set
Memento Rose Bud ink pad


Method:
Having decided I did not want to print out the images and then cut them out to glue to an ATC I made up a table using Word, sized the cells to ATC size and then put the images in the cells. It worked quite well. Having printed them out I then cut them into individual ATC's. I coloured Rose Petal with the pencils and Fuchsia Sprite with Spectrum Noir pens. I then used the Letterbox set to stamp Rose in pink down the side.

I have had my Derwent pencils for longer than I care to remember and used to use them a lot more. Since discovering alcohol ink markers I have been concentrating on them. I am at the start of a course with Kit and Clowder and have used applied what I have learned so far to the pencil colouring. (That will be the next course!) If you want to advance your colouring skills or just do a single project it is worth visiting Kit and Clowder and taking a look at the classes there. Alyce is very good and provides helpful and encouraging feedback as you go along.

Thank you for popping in. Take care.

Pippa

Thursday, 13 November 2014

Making decisions

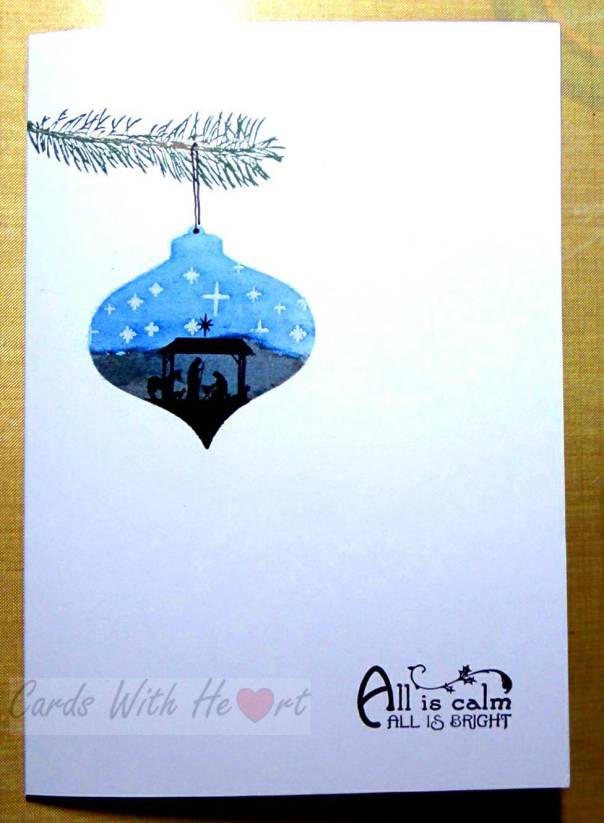
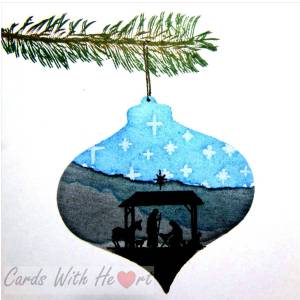
I have discovered a whole wealth of crafty challenges out there that I would love to participate in but unfortunately this week and the next couple of weeks are just too full and busy already. It is a shame because I have some ideas I would love to try. Hopefully it will calm down a bit, although with the all too rapid approach of Christmas I somehow doubt it!  I have decided that there are a couple of my favourites that I just have to keep going, no matter what, and Less is More is one of them. This week the theme is 'Starry, starry night' (I have been humming 'Vincent' all week!) The added challenge is that it is one layer. So here goes.

Bauble 2 watermarked

Materials used:
pine branch stamp: Dimension stamps
star and sentiment stamps: Creative Crafting magazine
nativity stamp: Clarity
bauble die: Spellbinders
memento ink: rich cocoa, northern pine
adirondack ink: pitch black, denim, archival black
versamark pad
clear embossing powder
stencil brushes


[caption id="attachment_815" align="alignright" width="300"]Bauble watermarked A closer look[/caption]

Method:
I stamped the pine branch at the top of an A5 white card blank using northern pine and rich cocoa. I then made an aperture mask of the bauble and used it to stamp the stars through with versamark and emboss with clear powder. Keeping the mask in place I then used denim and pitch black to stencil in the sky and ground. I stamped the nativity with archival black then darkened the bottom tip of the bauble with pitch black to make it look like a continuation of the stamp. I then stamped the sentiment at the bottom with black archival ink. Finally I added the hanger with a black miron pen and buffed up the stars with a tissue.

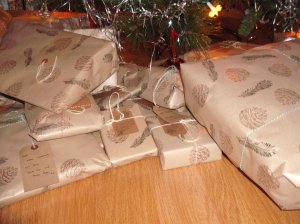
DSCF9060The design is a variation of one I used a couple of years ago for our Christmas card. In fact I have used both the pine branch and the little nativity a number of times now. The pine branch stamped on brown parcel wrapping paper along with the pine cone from the set makes great wrapping paper.

I am off now to see what wonderful cards have already been submitted for the Less is More challenge.

Thank you for visiting. Take care.

Pippa

I would like to enter my card into Less is More One Layer Week - Starry, starry night! week 197

Thursday, 4 September 2014

Time flies!

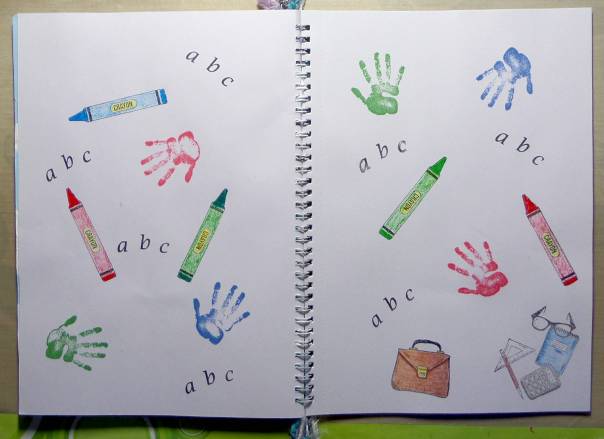
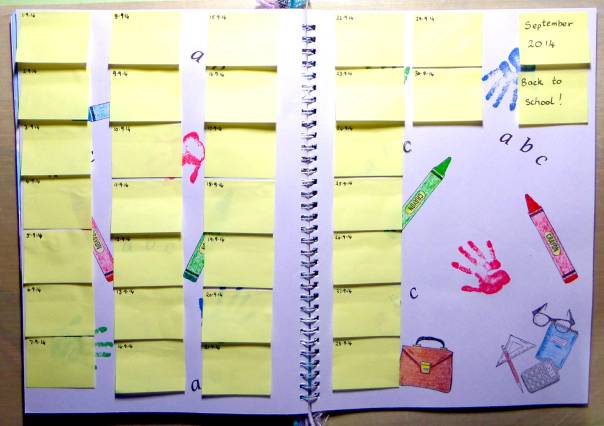
It does not seem like yesterday that I was breaking up for the summer holidays and now I am back at school again. Also another month has started so time to do my September page.  I went with the 'Back to school' idea and used post-it notes for the journalling dates, leaving them stuck to the page only at the top.  Anyone who works in a school will understand the use of post-its; they are everywhere in the classroom and very useful.

Materials used:
stamps from Creative Stamping magazine
Clarity letterbox kit
memento tuxedo black, lady bug, cottage ivy, and Danube blue ink pads
wax crayons
Spectrum Noir pencils


SAMSUNG CAMERA PICTURES

Method:
I used the stamps to make the background on my page, arranging the a b c from the letterbox kit on one mount. The crayons I coloured in with the wax crayons and the other images with the Spectrum Noir pencils. Finally I used post-it notes for the days of the month putting extra glue on top of the sticky part.SAMSUNG CAMERA PICTURES


I have surprised myself at getting this one done in the first week!  Sometimes a quick page is needed to meet deadlines.

Thanks for dropping in.  Take care.

Pippa


Monday, 4 August 2014

See you on the flip side

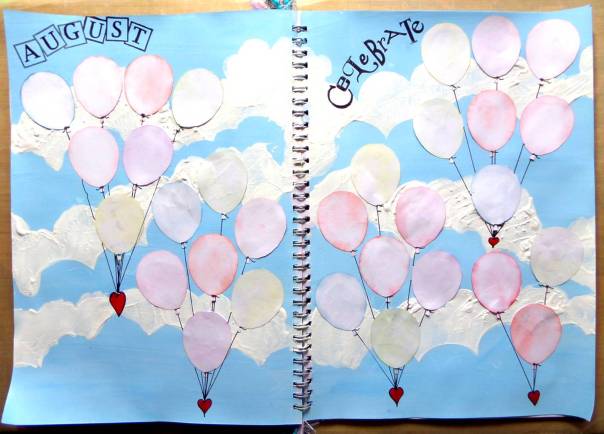
August is our holiday month, working in a school we are still tied to school holidays and the most expensive time to go away!  Anyway we will be off for a couple of weeks or so and this will be my last post for a while. My final offering before the break is August's page for my Art Journal Calendar. I know, I've managed to get it in really early for a change, the deadline of getting it done before we go away galvanized me into action!

Apart from holidays, August is a busy month for celebrations. A lot of family members have birthdays this month, including yours truly , and it is our wedding anniversary - biggish one next year.  So the theme for the August pages had to be Celebrate.

SAMSUNG CAMERA PICTURES

Materials used:
Clarity Stamps: Letterbox Kit, Word Chain - Celebrate

Clarity Cloud stencil
Adirondack Black inkpad
white gesso
blue acrylic paint
red Spectrum Noir pen
various distress inks
glossy accents
black fineliner pen

Method:
I mixed a little blue acrylic paint with some white gesso and painted the pages. When they were dry I used the stencil and plain white gesso to add clouds. Being impatient for the clouds to dry I heated them with my heat gun and discovered that they bubbled and made the paint even more textured.


[caption id="attachment_674" align="aligncenter" width="300"]SAMSUNG CAMERA PICTURES Close up of the clouds showing texture[/caption]

I used a clip art balloon outline and printed out 31 balloons then cut them out. I edged each balloon with distress inks and distressed the middles too.

Using the black ink I stamped August and Celebrate onto the pages before arranging the balloons in groups of 7. When I had got them arranged to my satisfaction I stuck them onto the page then added the strings and the hearts by hand. I coloured the hearts with the red pen then added glossy accents on them to give them a bit of shine.

So now on with the holiday and the celebrations to fill the pages!

Thanks for popping in. Take care.

Pippa

Oh yes, if you were wondering where the numbers are, I added very, very small ones to the balloon knots after taking the photos!

Sunday, 27 July 2014

Did it before the end of the month!

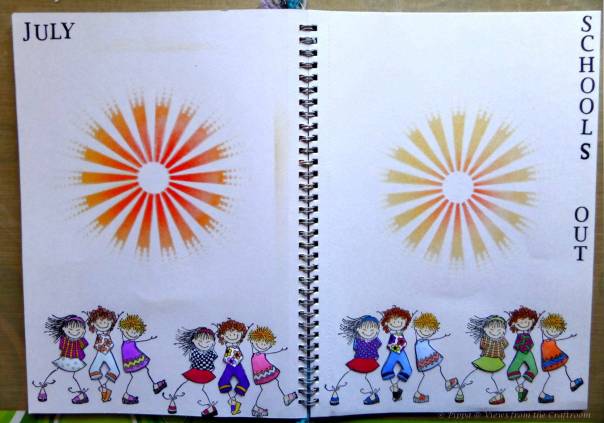
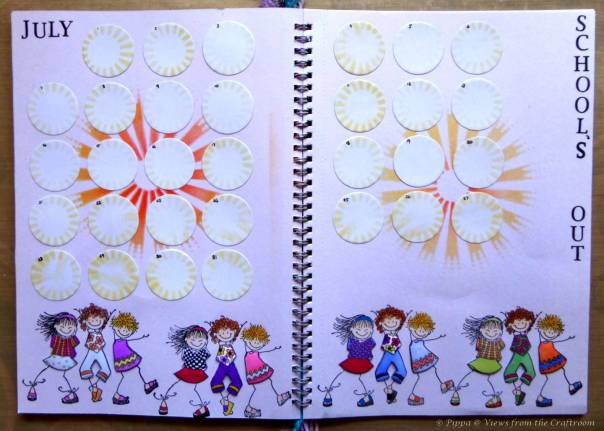
Having failed dramatically to meet the deadline for June's calendar page I was determined to do better this month.  OK it may not be that much better but at least the month as not actually ended this time!

Working in a school the only theme that I could do really for July is the fact that the academic year is over - as much a joy to teachers as it is to the children!

July Page 2 Copyrighted
Materials used:
Distress Inks: Ripe Persimmon, Dried Marigold
Adirondack Inks: Butterscotch, Lemonade
Memento Ink: Tuxedo Black
Circle Die
Spectrum Noir pens and pencils
Clarity Sunburst stencil
Clarity Letterbox stamps
Penny Black Girls Rock stamp


Method:
Working directly onto the pages I used the yellow and orange inks to stencil the sunburst in the middle of each page. I punched 31 circles out of white paper and used the yellow inks and stencil to form the pattern around the edges before numbering them with a black pen. I stamped the children along the bottom of the page then again onto paper. I coloured in the skin, hair, shoes and hairbands of the children on the page with pencils and the clothes of the images stamped onto paper with pens. I cut out the coloured clothes and stuck them onto the children with 3d glue gel then arranged the circles and stuck them in place. Finally I added the words using the Letterbox stamps.

July Page 1 Copyrighted

This year the sun did not stop shining as soon as we broke up, in fact it has been glorious all week. I will probably get shot down in flames for this but I think it is just a tad too hot and as it has been very dry some overnight rain would be good for the pond and the garden!

I hope you are having a good summer wherever you are, or maybe a good winter. In the international community that is the internet you just never know who might be popping in or where they come from! So whoever you are and wherever you are thanks for dropping in. Take care.

Pippa

Wednesday, 9 July 2014

Where did June go?

Two things that have taken me by surprise:
1. It is 2 weeks since I last posted.
2. We are already over a week into July!

Working on the premise that occasionally it is better late than never, here is my Art Journal page for June.

Materials used:20140611160324_SAM_0280
Clarity Poppy stamps (two stamps)
Memento Tuxedo Black ink
Adirondack Stonewashed ink
scalloped circle die
Spectrum Noir pencils


Method:
I stamped the poppies in black and coloured them in with the pencils. Using the die I made a paper stencil and stencilled in the journalling circles with blue ink. I used a black micron pen to write June down the side.


SAMSUNG CAMERA PICTURES


I chose to do poppies for June because on my drive to school I pass a glorious patch of bright red poppies.  They always make me smile even on dull, damp mornings.  I would have taken a photograph to show you but there is no where to pull over safely to do so.


Thank you for popping in.  Take care.

Pippa

Saturday, 12 April 2014

A marriage made in heaven?

My eldest daughter celebrated a birthday on Friday.  I am not going to tell how old she is because I am in denial about my own age and she cannot possibly be older than me!

Of course I made her a card.  We are both Hunkydory fans and I love Clarity Stamps so decided to combine the two and at the same time use up some left over bits.

DSCF9010


All the lettering is Clarity Stamps Letter Box kit, the rest of the card is Hunkydory.  I tried to match the colours in the background in the stamping, hence the grey and pink colour scheme.

Thanks for visiting.  Take care.

Pippa

I think I should have positioned the greeting a little lower though!

Thursday, 10 April 2014

How long is 'a certain time'?

Today I read the instructions on my Collall All Purpose Glue; it's a woman thing. The trouble was they left me somewhat baffled, so along with the unanswerable question 'How long is a piece of string?' I would like to add 'How long is a certain time'. To enlighten you here are the instructions from Collall: Apply the glue, let evaporate for a certain time then press the parts firmly together, allow to dry.So you can see my problem!

Back to the original intention of this post, before I got side tracked by gluey problems, my contribution to the Less is More challenge which this week is a colour one - turquoise. It just so happened that my husband needed some 'thank you' cards following a recent birthday so incentive provided off I set.

DSCF9027

Materials Used:
Clarity stamps - Celtic Square and Thank You
Memento ink - Tuxedo Black
Snippets of coloured card
Spectrum Noir Pens


Method:
First I stamped the Celtic Squares out on white card then coloured them in with Spectrum Noir Pens; the colours of snippets of card dictated the colours of the Celtic Squares. Once coloured in I cut the squares out and matted them onto the coloured card before mounting them onto an A6 blank card. I added a strip of the same coloured card at the bottom and stamped the 'thank you' on it.

This was a really quick card to make, just right for a batch lot .  The turquoise version is for the Less is More challenge but I did other varieties as well!

DSCF9030 DSCF9028

Thanks for visiting, come again soon!  Take care.

Pippa

If anyone does has the answer to 'How long is a certain time?' I'd love to know!

I would like to enter this card into the following challenges:
Less is More A touch of turquoise
Snippets Playground week 119

Tuesday, 8 April 2014

A bit late, but at least it is still April!

I have been taking part in a journalling challenge this year and had thoughts on what to do for my April pages right back at the beginning of March!  The problem is these thoughts are no good until they come out of my head and actually materialize as said pages.  So here they are at last!

Materials Used:
Clarity stamps - various and letterbox set
Clarity clouds stencil
Hills and mountains stencil
Adirondack inks - lake mist, slate and juniper
Archival black
Distress ink - black soot


Method:
Using juniper, lake mist, slate, black soot, and the stencils I created the background.
DSCF9007


I then used a variety of Clarity stamps and black archival ink to create a little scene on each page. (The left hand page is now mostly covered with the journalling rain drops but there is some visible on the right hand page.)
DSCF9023

Finally I printed out the tear drop shapes from the computer, distressed them slightly with the same inks used for the background, cut them out and arranged them on the page. Pages done!
DSCF9022

Thanks for dropping in. Take care.

Pippa

OK, new feature, that is what I did, now for what I should have done!
1. Put the hills higher up and make them further apart so the fields are bigger.
2. Worked out the positioning of the rain drops before stamping.
3. Started earlier!

Monday, 7 April 2014

Flutterby

After a few days of sunshine, more warmth and less rain we are back to wet and windy again.  So to cheer up a dismal dark and damp day here are some bright butterflies and a hint of sunshine in the background.

DSCF9009


Materials Used:
white and yellow card
Clarity butterfly stamp
Clarity sunshine stencil
Spectrum Noir pens
Adirodack inks - lemonade, butterscotch
Distress ink - scattered straw


Method:
I made a 19cm square card base and distressed the edges with scattered straw. On a piece of the Clarity gelli plate card I used the sunshine stencil and the yellow inks to stencil the background, darker in the middle and lighter on the edges. With what ink was left on the bush I swept around the sun to lightly ink the white card. I then matted this onto piece of yellow card, and then attached to the card base.

Using the butterscotch ink I then stamped the butterflies around the card in a circle and anther set of butterflies on another piece of white card. This second set of butterflies I coloured in with the Spectrum Noir pens before cutting out and attaching on top of the card using 3d foam pads and raising the wings slightly to add some dimension.

This card fulfils the criteria for both the Clarity challenge this month, which is monochrome, and the Butterfly challenge which is yellow so I shall be heading off to both shortly to link my little offering.

Thanks for popping in. Have a good day and take care.

Pippa

I would like to enter this card into the following challenges:
Clarity Challenge 14
Butterfly Challenge Spring Time At Last


Thursday, 3 April 2014

Going round in circles

Over at Less is More this week the challenge is 'Round and Round'. One of the little ATC Clarity stamps I was fortunate enough to win a while back is the small version of the honeysuckle clever corner so I decided to have a play with it.

DSCF9006

Materials Used:
Clarity small honeysuckle corner
small flowerhead stamp
small greeting stamp
Clarity dotty stencil
Distress inks: Barn Door, tattered rose
Memento ink: Rosebud, Cottage Ivy
White A5 card blank


Method:
Using the stencil and changing position after each colour I used the pink inks to create the dotty background in the middle of the card.
I then used the honeysuckle corner stamp and cottage ivy ink to build up the pattern in the centre first then extended it out, I also stamped in the corners of the card.
Finally with the rosebud ink I added the little flower heads and the greeting in the corner.


Sorry about the picture quality, still having camera issues!

Thanks for visiting. Take care.

Pippa

I would like to enter this card into the Less is More challenge 'Round and Round'.

Monday, 24 March 2014

Austrian Memories

I love Austria, the peace, the clean streets, the invigorating air, the mountains, what is there not to love?  So when the Clarity New Design Club stamp arrived earlier this month and it was an Edelweiss it immediately sparked fond memories of past visits there.  So in homage to Austria here is my Edelweiss card.


Materials used:
Clarity Design Club Edelweiss stamp
Clarity Leafy Swirl stencil
Theuva card
Black card
Adirondack inks: Cloudy Blue, Lettuce
clear embossing powder
embossing pen
Spectrum Noir pens


Method:
Firstly I made a 15cm square easel card base with Theuva card and a separate square for the panel.


[caption id="attachment_412" align="alignleft" width="159"]Single flower Single flower[/caption]


I then stamped the Edelweiss onto left over bits of Theuva card; 1 single flower, 2 stem to stem and 2 flower heads only.


[caption id="attachment_410" align="alignright" width="300"]Stem to stem flowers Stem to stem flowers with added flower heads[/caption]


I printed the Edelweiss song words onto the panel before laying the leafy swirl stencil on and brushing cloudy blue ink through.                         


[caption id="413" align="alignright" width="300"]Detail of stencilled background. Detail of stencilled background[/caption]


I used Spectrum Noir pens to colour the stem, leaves and centres of the flowers before embossing the petals with clear embossing powder. I then brushed on some lettuce and cloudy blue ink to give a hint of grass and sky.


I cut the single flower and the stem to stem flowers into panels then matted them and the card panel onto black card.


Inside the card blank I used the leafy swirl stencil and cloudy blue ink to match the front panel.


I then used 3D foam pads to attach the flower panels to the card. I cut out the separate flower heads and stuck them to the flower panel inside the card.


[caption id="411" align="aligncenter" width="604"]The finished card The finished card[/caption]


The  Clarity  challenge this month is Flower Power so I think I will head over there and enter this one.  Nothing ventured nothing gained.


Thank you for visiting, come again soon.  Take care.


Pippa


I would like to enter this card into the Clarity Challenge