Showing posts with label stencelling. Show all posts

Tuesday, 24 October 2017

Blinged Up Owl At Limited Runs

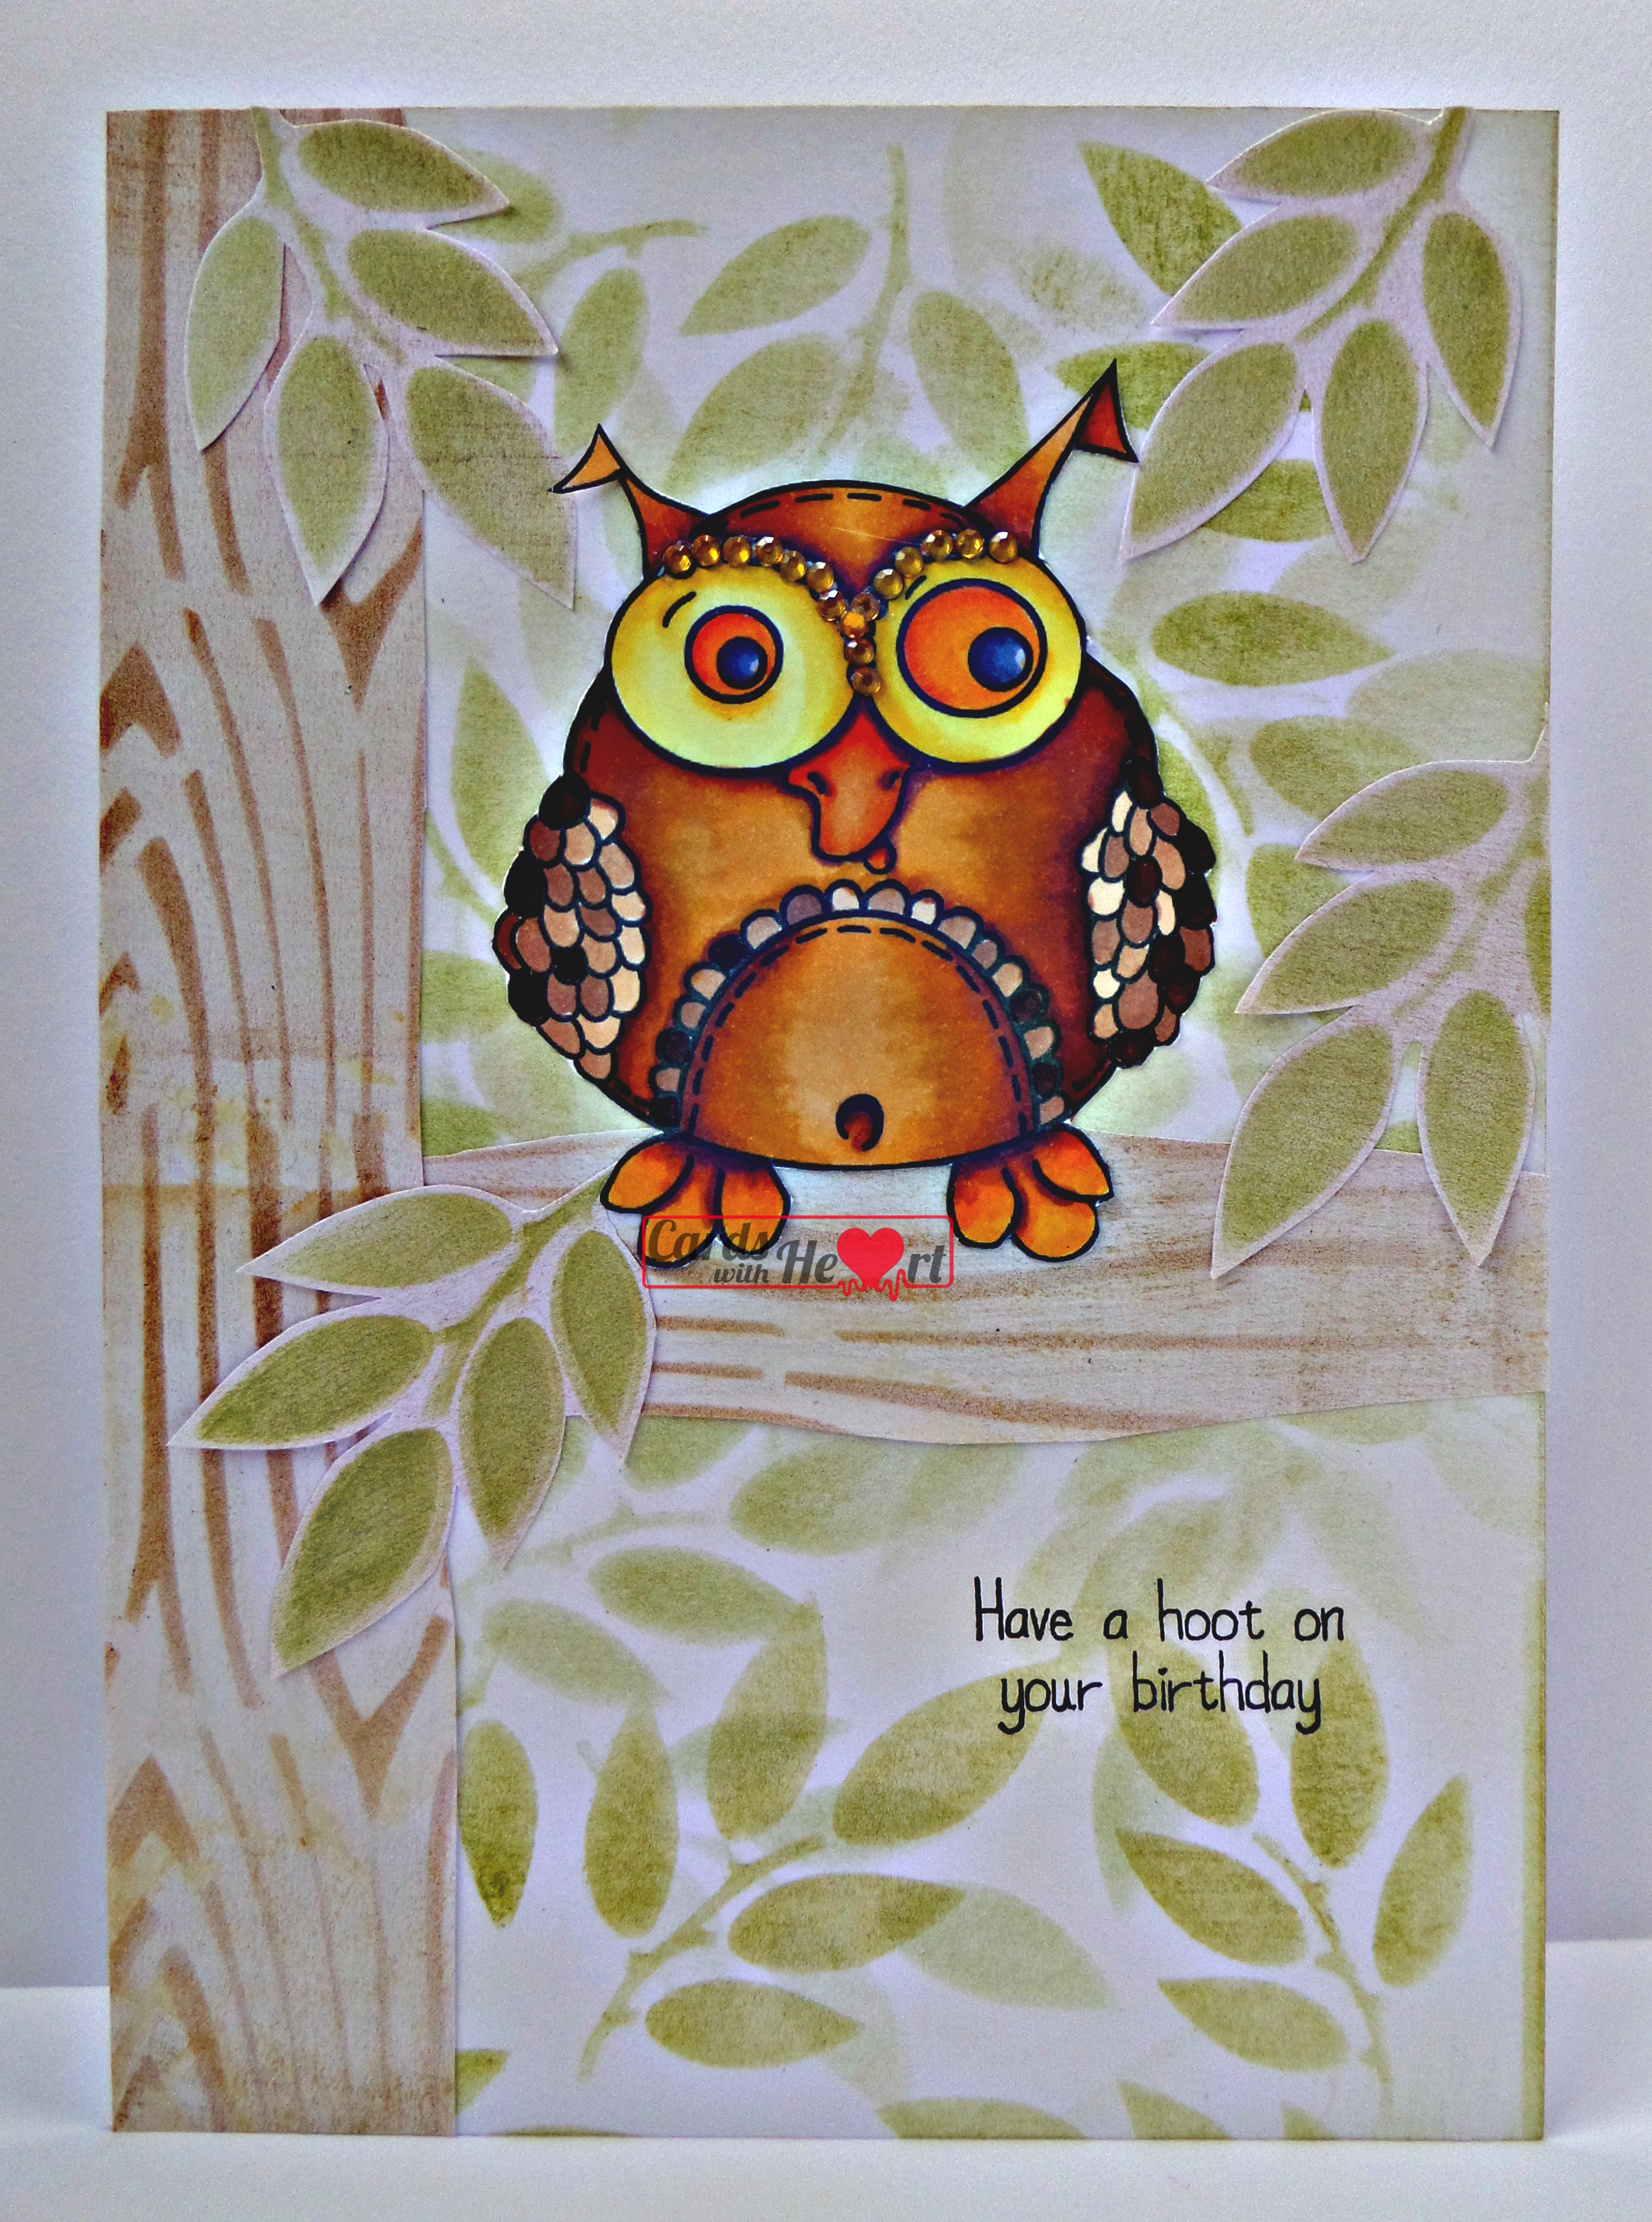
This month the image for the Limited Runs Progressive Challenge is an owl.

SAM_4933(watermarked).JPG

Materials used: 
Limited Runs Digital Stamps - Art Deco Owl
acrylic greeting stamp
X-Press It card
Copic pens
black archival ink pad
Distress Oxides
printer paper
That Special Touch Mica Masks - Leafy
wood grain mask (freebie from crafting magazine)
stencil brushes
very old adhesive gems

The background is made using different Distress Oxides in greens and browns and the stencils on printer paper. I used the leafy stencil on the front of an A5 card blank then cut some extras from the paper I had made. The tree and branch are cut from paper made with the wood grain stencil.

The owl is printed on X-Press It card and coloured with Copics. The gems on his eyes are some I have had for some time but not really known what to use them on. They are not bright enough to be orange, neither are they brown or gold. however they seem to work on my owl.
I have just got time to get him into the Limited Runs Challenge so excuse the rush! Thanks for dropping in. Take care.


Pippa

Entering the following challenges:
Limited Runs Progressive Challenge (Faceboook)
Creative Fingers #139 - Anything Goes
Jo's Scrap Shack FFC #211 - Anything Goes
Crafting With Friends#53 - Anything Goes
613 Avenue Create #202 - Anything Goes / Optional Twist: Masculine
Lil Patch of Crafty Friends #68 - Anything Goes
PIP Challenge #1743 - Anything Goes
Crafting From The Heart #180 - Anything Goes
Artistic Inspirations #188 - Anything Goes
A Bit More Time To Craft #54 - Anything Goes
A Perfect Time To Craft - Anything Goes
Crafts Galore Encore October - Anything Goes
Crafty Girlz Challenges October - Anything Goes/ Optional Theme: Spook It Out
Create and Inspire #67 - Anything Goes
Creative Ladybirds #30 - Anything Goes
Ike's World #100 - Anything Goes / Celebration
Crafty Sentiments Designs - Anything Goes
Inspiration Destination #136 - Anything Goes / Easel


Tuesday, 19 April 2016

Path of Positivity Midway Point - Grace

We are half way through the month's challenge at Path of Positivity so it's time to share my second sample with you. I have done something completely different, for me, and attempted my first mixed media art piece. At the moment it is hanging on my craft room wall but is may become a gift for someone in time!

Having used inspiration from creation for the past couple of PoP posts this time I have gone with the gracefulness of dance. I came across the quote from C. Joybell C while Googling for ideas. To be honest I have never heard of her before but I liked this quote, especially the line, 'Grace is an ability to give as well as receive and be thankful'. All too often I find I am better at giving than receiving and when I think about it, it dawns on me that this is hardly fair to the person or people who want to give to me. Learning to accept all with grace is not an easy lesson for me!

Materials used: SAM_2835(watermarked)
Pickled Potpourri Designs - Just Dance
canvas board
gold mirri card
green and blue acrylic paint
leaf swirl stencil
squares and dots stencil
white gesso
silver texture paste
leafy swirl die
oval die
clear acrylic beads
Victorian Velvet distress ink pad

glossy photo card
guilding flakes
Mica Powders (purple and silver) and mister spray
gold coloured eyelets

black cord

I prepared the board first using gesso, paints, stencils and texture paste.

I printed out the girl dancing on glossy photo paper. I roughly cut out the image and stuck it to two more layers of card before a final fussy cut. I used a glue pen and the guilding flakes to decoreate the swirls on the dress.

I cut the Just Dance out with an oval die and three leafy swirls from gold mirri card. I used the  Mica Powders to take out the brightness of the white card.

I printed my quote out on white card then used the distress ink nad swirly stencil to take off the whiteness and attempt to tie it in with the rest of the swirls on the piece.

I placed two eyelets at the top of the board (having first decided which way up to use it!) I then threaded some beads onto black cord and attached it to the board for a hanger.

Finally I arranged all my elements onto the board before gluing them down.  

Although I enjoyed playing around with the different paints and pastes I cannot say that I have immediately been smitten by mixed media. I think I would need to play around a lot more before attempting another piece. However I may use some of the techniques in future cards.

There is still plenty of time to join in the fun at Path of Positivity. As always there are a prizes on offer from our sponsors and plenty of inspiration to be found from the rest of the DT and on the blog - so what are you waiting for? If you need further persuasion here are the prizes that are up for grabs:
 SPONSOR & PRIZE INFORMATION:


There will also be:


  • A small selection of digital designer papers from Décosse's Dynamite Doodles for one lucky person who leaves a comment on posts published during the challenge timeframe.

  • One digital sentiment for every single person who enters the challenge.


Thanks for popping in. take care.

Pippa

I would like to enter my 'picture' in the following challenges:
Inspiration Destination #81 - Anything Goes
Word Art Wednesday #226 and #227 - Anything Goes
2 Creative Chicks Showcase #9 - Anything Goes
A Bit More Craft #18 - Anything Goes
The Sisters of Craft #April - Anything Goes
Your Scrapbook Place #Mid April Challenge - Anything Goes
Crafting With An Attitude #14 - Anything Goes
Where The HeART Is #8 - Sparkle and Bling/Anything Goes


Wednesday, 22 October 2014

Little critters

It's Less is More challenge time again and this time the theme is 'Little Creatures'. Just lately my life has been full of little creatures; the annual fly invasion has just finished and now the spiders are moving in and at school I have just done minibeasts with the children in science. I never cease to be amazed at the transformation of the humble caterpillar into a beautiful butterfly so have used that idea for my card.

SAM_0867.jpg with watermark

Materials used:
white stamping card
white card
snippet of gold mirri card
Memento tuxedo black ink pad
Adirondack meadow ink pad
set of 'educational' butterfly life cycle stamps (not exactly the best quality of stamp!)
Clarity 'Dream' stamp
circle dies
leafy swirl die
white gelli roll pen
Spectrum Noir pens


Method:
I used an A4 piece of white card to make the card blank, folding it so that the back was wider than the front. I cut swirly leaf out of the middle of a scrap piece of card to use as a stencil then stencilled down the right hand side of the card using the meadow ink.

On the stamped the butterfly and the caterpillar onto the stamping card with the black ink and coloured them in using the Spectrum Noir pens, highlighting the white spots on the butterfly with a white gelli roll pen and drawing in a stem for the caterpillar by hand. The butterfly stamp does not produce a crisp image so I went over it with a black Spectrum Noir pen.

I fussy cut the butterfly and used a circle die to cut the caterpiller, and a slightly larger circle die to cut a mat from the snippet of gold mirri card.

I matted the caterpillar image and stuck it at the bottom left of the card blank using 3d foam pads. I glued the body of the caterpillar at the top right of the front flap so the wings are dimensional. Finally I stamped 'Dream' across the middle of the card using the black ink.

The weather has started getting cooler now with the approach of winter so the minibeasts will all be hiding away somewhere warm soon!

Thank you for visiting. Take care.

Pippa

I would like to enter this card into the following challenges:
Less is More - Little Creatures
Outlawz Monday Greetings - Use your circles
Pixies Snippets Playground - week 147

Clear it out challenge - Orange/Black

Sunday, 27 July 2014

Did it before the end of the month!

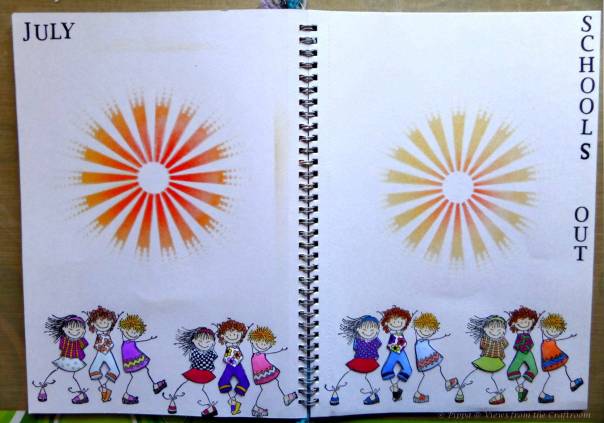
Having failed dramatically to meet the deadline for June's calendar page I was determined to do better this month.  OK it may not be that much better but at least the month as not actually ended this time!

Working in a school the only theme that I could do really for July is the fact that the academic year is over - as much a joy to teachers as it is to the children!

July Page 2 Copyrighted
Materials used:
Distress Inks: Ripe Persimmon, Dried Marigold
Adirondack Inks: Butterscotch, Lemonade
Memento Ink: Tuxedo Black
Circle Die
Spectrum Noir pens and pencils
Clarity Sunburst stencil
Clarity Letterbox stamps
Penny Black Girls Rock stamp


Method:
Working directly onto the pages I used the yellow and orange inks to stencil the sunburst in the middle of each page. I punched 31 circles out of white paper and used the yellow inks and stencil to form the pattern around the edges before numbering them with a black pen. I stamped the children along the bottom of the page then again onto paper. I coloured in the skin, hair, shoes and hairbands of the children on the page with pencils and the clothes of the images stamped onto paper with pens. I cut out the coloured clothes and stuck them onto the children with 3d glue gel then arranged the circles and stuck them in place. Finally I added the words using the Letterbox stamps.

July Page 1 Copyrighted

This year the sun did not stop shining as soon as we broke up, in fact it has been glorious all week. I will probably get shot down in flames for this but I think it is just a tad too hot and as it has been very dry some overnight rain would be good for the pond and the garden!

I hope you are having a good summer wherever you are, or maybe a good winter. In the international community that is the internet you just never know who might be popping in or where they come from! So whoever you are and wherever you are thanks for dropping in. Take care.

Pippa

Wednesday, 9 July 2014

Where did June go?

Two things that have taken me by surprise:
1. It is 2 weeks since I last posted.
2. We are already over a week into July!

Working on the premise that occasionally it is better late than never, here is my Art Journal page for June.

Materials used:20140611160324_SAM_0280
Clarity Poppy stamps (two stamps)
Memento Tuxedo Black ink
Adirondack Stonewashed ink
scalloped circle die
Spectrum Noir pencils


Method:
I stamped the poppies in black and coloured them in with the pencils. Using the die I made a paper stencil and stencilled in the journalling circles with blue ink. I used a black micron pen to write June down the side.


SAMSUNG CAMERA PICTURES


I chose to do poppies for June because on my drive to school I pass a glorious patch of bright red poppies.  They always make me smile even on dull, damp mornings.  I would have taken a photograph to show you but there is no where to pull over safely to do so.


Thank you for popping in.  Take care.

Pippa

Wednesday, 28 May 2014

Down the Garden Path

This week the Less is More challenge has to include a die cut.  Here is my take on it and an excuse to play with my new Spectrum Noir Pencils.

Materials Used:
Spellbinders Die D-Lites Frame 1
Stampendous Cottage Path stamp
Happy Birthday stamp
Memento Tuxedo Black ink pad
Adirondack Shell Pink ink pad
White card
Swirls stencil
paper roses
leaves
Spectrum Noir Pencils


Method:20140528142938_SAM_0273
Using the swirls stencil and Shell Pink ink I dusted ink over the front of an A5 card blank to create a swirly background. I stamped the Cottage Path onto white card with Tuxedo Black and coloured in with the pencils. It is quite hard getting shading in on such a small image but the pencils did help a bit!


SAMSUNG CAMERA PICTURES


I used the die to cut two mats out of white paper and inked them with the Shell Pink ink. I cut the Cottage Path image down to fit inside the frame. The remaining frame I cut and overlapped to make a smaller frame to fit the remaining part of the Cottage Path image.


I then arranged my elements onto the front of the card and stuck them down before adding the birthday greeting.

20140528142753_SAM_0270

Thank you for visiting. Take care.

Pippa

I would like to enter this card into the:
Less is More Challenge
Spectrum Noir Challenge

Addicted to Stamps Make Your Mark Challenge

Tuesday, 8 April 2014

A bit late, but at least it is still April!

I have been taking part in a journalling challenge this year and had thoughts on what to do for my April pages right back at the beginning of March!  The problem is these thoughts are no good until they come out of my head and actually materialize as said pages.  So here they are at last!

Materials Used:
Clarity stamps - various and letterbox set
Clarity clouds stencil
Hills and mountains stencil
Adirondack inks - lake mist, slate and juniper
Archival black
Distress ink - black soot


Method:
Using juniper, lake mist, slate, black soot, and the stencils I created the background.
DSCF9007


I then used a variety of Clarity stamps and black archival ink to create a little scene on each page. (The left hand page is now mostly covered with the journalling rain drops but there is some visible on the right hand page.)
DSCF9023

Finally I printed out the tear drop shapes from the computer, distressed them slightly with the same inks used for the background, cut them out and arranged them on the page. Pages done!
DSCF9022

Thanks for dropping in. Take care.

Pippa

OK, new feature, that is what I did, now for what I should have done!
1. Put the hills higher up and make them further apart so the fields are bigger.
2. Worked out the positioning of the rain drops before stamping.
3. Started earlier!

Monday, 7 April 2014

Flutterby

After a few days of sunshine, more warmth and less rain we are back to wet and windy again.  So to cheer up a dismal dark and damp day here are some bright butterflies and a hint of sunshine in the background.

DSCF9009


Materials Used:
white and yellow card
Clarity butterfly stamp
Clarity sunshine stencil
Spectrum Noir pens
Adirodack inks - lemonade, butterscotch
Distress ink - scattered straw


Method:
I made a 19cm square card base and distressed the edges with scattered straw. On a piece of the Clarity gelli plate card I used the sunshine stencil and the yellow inks to stencil the background, darker in the middle and lighter on the edges. With what ink was left on the bush I swept around the sun to lightly ink the white card. I then matted this onto piece of yellow card, and then attached to the card base.

Using the butterscotch ink I then stamped the butterflies around the card in a circle and anther set of butterflies on another piece of white card. This second set of butterflies I coloured in with the Spectrum Noir pens before cutting out and attaching on top of the card using 3d foam pads and raising the wings slightly to add some dimension.

This card fulfils the criteria for both the Clarity challenge this month, which is monochrome, and the Butterfly challenge which is yellow so I shall be heading off to both shortly to link my little offering.

Thanks for popping in. Have a good day and take care.

Pippa

I would like to enter this card into the following challenges:
Clarity Challenge 14
Butterfly Challenge Spring Time At Last


Thursday, 3 April 2014

Going round in circles

Over at Less is More this week the challenge is 'Round and Round'. One of the little ATC Clarity stamps I was fortunate enough to win a while back is the small version of the honeysuckle clever corner so I decided to have a play with it.

DSCF9006

Materials Used:
Clarity small honeysuckle corner
small flowerhead stamp
small greeting stamp
Clarity dotty stencil
Distress inks: Barn Door, tattered rose
Memento ink: Rosebud, Cottage Ivy
White A5 card blank


Method:
Using the stencil and changing position after each colour I used the pink inks to create the dotty background in the middle of the card.
I then used the honeysuckle corner stamp and cottage ivy ink to build up the pattern in the centre first then extended it out, I also stamped in the corners of the card.
Finally with the rosebud ink I added the little flower heads and the greeting in the corner.


Sorry about the picture quality, still having camera issues!

Thanks for visiting. Take care.

Pippa

I would like to enter this card into the Less is More challenge 'Round and Round'.

Friday, 21 March 2014

Trying something different

I am running close to the wire with this one for the Less is More challenge.  The theme this week is Stencils and Masks and I have managed both in this card.  It is a different style for me but I am quite pleased with the results.

Materials:
Clarity small leaf stencil
Hills and Mountains stencil
Inkylicious Stamps - Handwritten Script, The Coppice
Free Birthday Greeting stamp
Distress Inks - Vintage Photo, Old Paper
Adirondack Inks - Meadow, Denim
Archival Sepia
A4 White card blank 


Method:
I used the leaf cut from the stencil to block out where I wanted the void to be on the background and then stamped the script stamp over it with Vintage Photo and Old P aper.

DSCF9044 

Using the stencil to cover the script I stamped the Coppice stamp through it onto the leaf shaped void. Keeping the leaf stencil in place I used hills and mountains stencil to brush in the grass and sky with Meadow and Denim ink. I then brushed Vintage Photo ink around the edges of the card and very faintly over the script areas.  Finally I stamped the birthday greeting at the bottom.

DSCF9045


Job done, now off to the Less is More challenge before the deadline tonight!


Thank you for visiting, hope to see you again sometime.  Take care.


Pippa


I would like to enter this card in the 'Less is More' challenge.

Tuesday, 7 January 2014

Every book needs a cover

I enjoyed myself so much doing the Art Journal Calendar Challenge that I got carried away and made the cover for the book as well.  As it is a calendar journal I went with a four seasons theme, to cover the whole year.

Materials Used:
Stencils:
That special touch - Grid, Small Polka
Clarity - Leafy Swirl
Swirly one unknown

Acrylic paint - red, purple, yellow, gold

Adirondack Inks:
Wild Plum
Meadow
Denim
Lettuce
Rust

Core'dinations Card - pale blue, pale green, darker green, browny orange

Various stamps from Creative Stamping Magazine
Large number stamps Papermania

Spectrum Noir pens

Paper string - various colours
Wool - various colours
Mixture of beads

For the background I used my stencils and acrylic paints in a random design,  and added a few spots of gold paint here and there. 


When the paint had dried, I blended different coloured inks onto some of the white areas. I cut four large tags from the Core'dinations card, then stamped the numbers in similar colours onto white card.  I then stamped the designs on each number to represent the four seasons, and coloured with Spectrum Noir Pens, before cutting out and sticking onto the tags.  I threaded a piece of paper string, again in similar colours, through the hole in the top of each tag before sticking them onto the cover.


I then threaded some strands of wool through the spine, knotting them at the top to keep them in place and adding different beads to the bottom of some of the them.


So now my Art Journal is covered and January ready to  be written in.  Better start thinking about February's page now!

The Finished Cover