Showing posts with label Imagine That Digi Stamps. Show all posts

Thursday, 19 January 2017

Bugaboo Birthday Bash Day 3

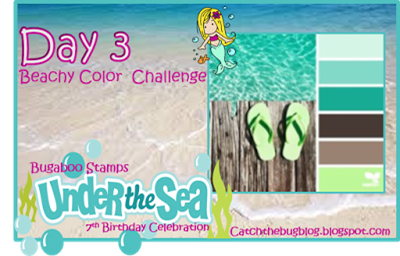
Today's challenge is a Beachy Colour Challenge.

download

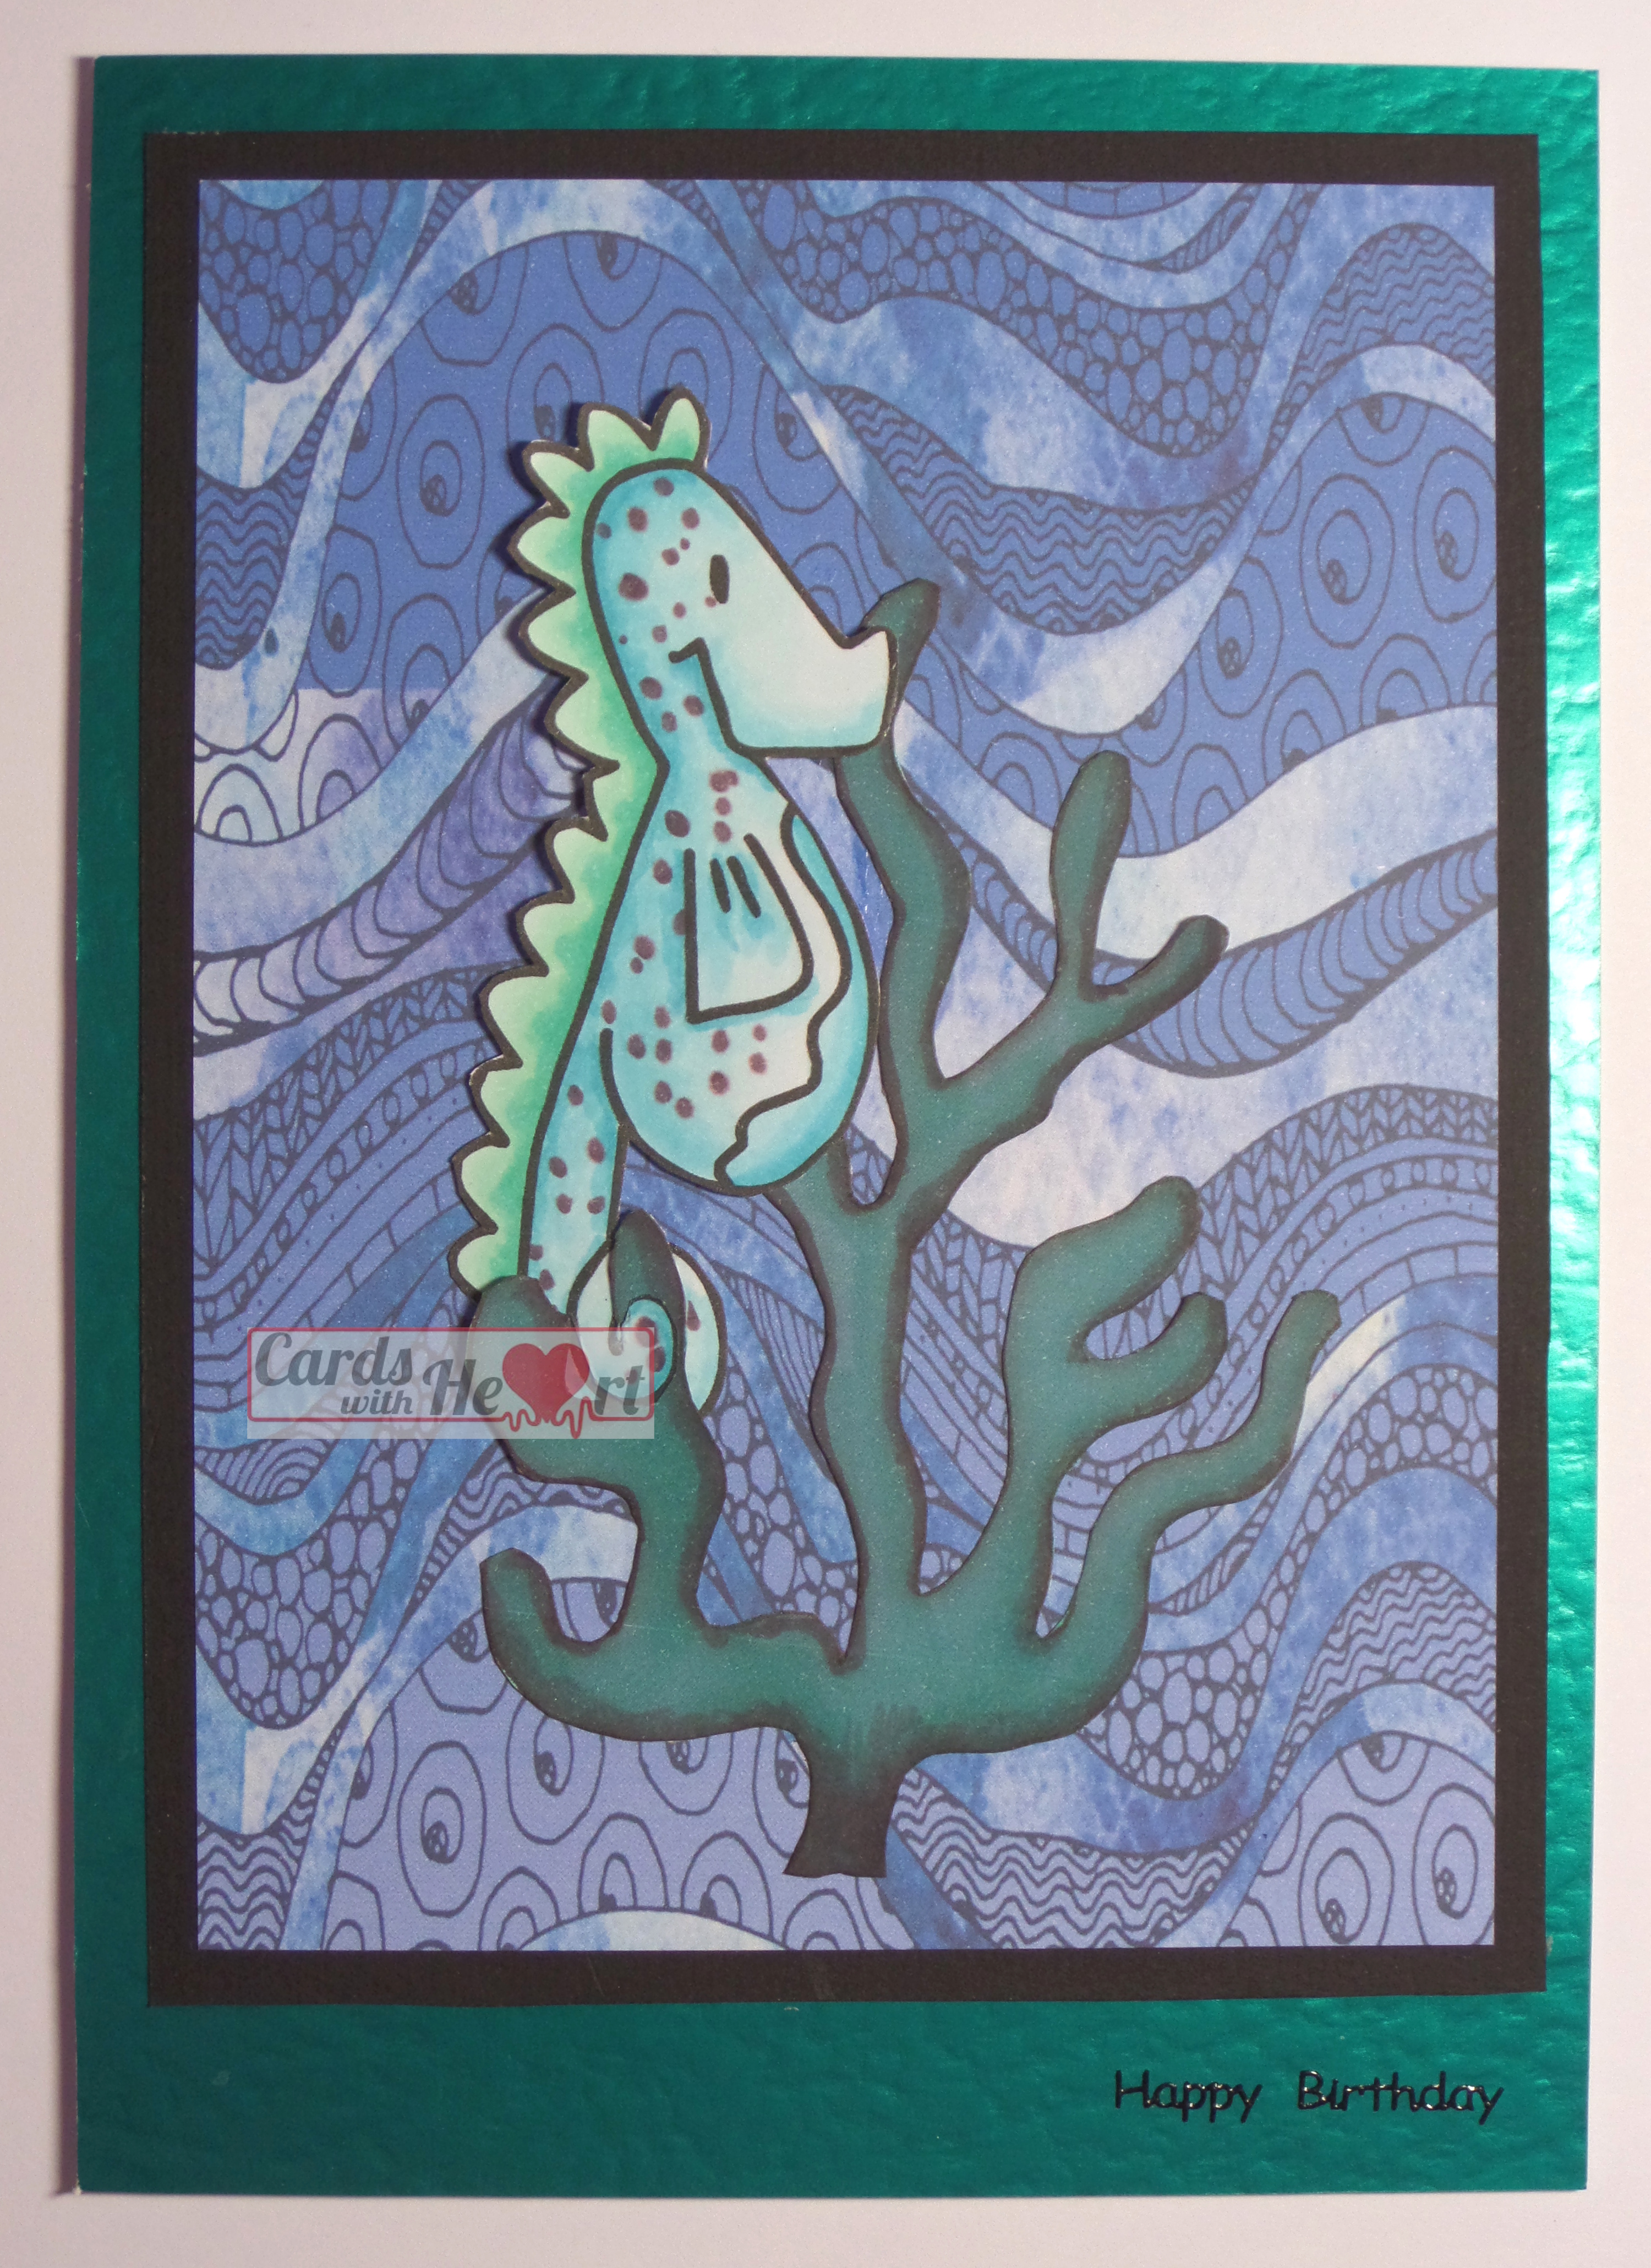
This is my take on it.
SAMSUNG CAMERA PICTURES

Materials used:
Bugaboo Stamps - Mini Set AKV Under the Sea
Imagine That Digi Stamp - Under the Sea (for the seaweed)
Décosse's Dynamite Doodles - A Taste of Summer Patterned Papers
black and metallic green card
A5 card blank
X-Press It card
Copics
black peel-off greeting


The seahorse image has been printed on X-Press It card and coloured with Copics. I have tried to pick out as many of the colours in the swatch as possible.

The seaweed image is printed on printer card and fussy cut. The wavy designer paper is printed on printer card.

The seahorse image has been fussy cut and attached to the seaweed and then they were both attached to the wavy designer paper. The topper is then matted onto black card and glued to the front of an A5 card blank covered with metallic green card.

Finally a black peel-off greeting is stuck at the bottom of the card.

Thank you for visiting today. Take care.

Pippa

I would like to enter my card into:
Bugaboo's Birthday Celebration Day 3 - Beachy Colours


Thursday, 8 October 2015

A cornucopia of blessings

The image for this month's progressive challenge at From the Heart stamps is a lovely cornucopia. A few months ago I would not even have considered colouring this image but practice has given me a bit of courage, so here it is!

Materials used:SAM_2328(watermarked)
From the Heart Stamps digi set - Cornucopia
Imagine That digi set - Subtle Harvest Kit
printer paper and card
stamping card
Copic pens
A5 white card blank

Method:
I printed out all the bits I needed for the topper, an extra image and two background papers from the Harvest Kit. I coloured both images and then cut my base image and sentiment to the size I wanted. I covered the front of the card blank with the leaves paper then matted my topper onto the purple paper before sticking it to the card front. Finally I fussy cut the main section of fruit and veg and the small bunch of grapes and pumpkin from the second image, shaped and attached them to the second image using gel glue.

SAM_2330(watermarked)

As I am trying to build up a little stash of ATC's I also made one with this image.

The marathon run of Harvest Services and suppers has now finished and all the apple pies have been eaten! I don't do Halloween so the next big celebration will be Christmas. Whoa! Not already! Where has the year gone? I guess I should be thinking about getting the 200+ cards that we need on the go. Something quick and easy I think!

Thanks for dropping in. Take care.

Pippa

I would like to enter my card into the following challenges:
From the Heart DOM Challenge - October
If You Give A Crafter A Cookie #29
Jo's Scrap Shack FFC #108
Simply Papercraft Challenges #14
Crafting With Dragonflies #44
2 Creative Chicks Showcase #3 Anything Goes!
Crafts Galore Encore - Make a card
Sisters of Craft - October
Your Scrapbook Place - October
613 Avenue Create #144
Lacy Sunshine's Color Your World

Wednesday, 23 September 2015

Apple Pie - Must be harvest time!

Being married to the Rector of 5 parishes means that this time of year there are a lot of Harvest Services and lunches/suppers. Every one of the churches has apple pie on it's menu every year so it is no wonder that I hardly ever make an apple pie during the rest of the year. There are only so many apple pies one can eat! Which brings me to my card for today.

Materials used:SAM_2270(watermarked)
Imagine That - Maggie's Apples
spotty designer paper
red brads
stamping card
acrylic greetings stamps
Copic pens


Method:
I printed out my image and coloured it in with Copic pens. I trimmed my image down to the size I wanted and then matted and layered it onto the two designer papers leaving a small border around the edge each time. I stamped out my greeting using two stamps and matted and layered it to match the topper. I then attached both to my card base before finally adding the red brads.

I did change the apple sign having made up the card because I wanted it to fit with the idea of the apples being a present to go with the sentiment so I crossed out the price!

Thank you for popping in. Take care.

Pippa

I would like to enter my card into the following challenges:
Imagine that DOM Progressive Challenge - September
City Crafter Challenge Blog #280 - Fall has arrived
Creative Card Crew #96 - Fall
Deep Ocean Challenge Blog #113 - Autumn
Ants in my Pantry Digital Challenge #9
Crafting From The Heart #78
Craft Your Passion #28
Love to Scrap Challenge Blog #62
If You Give A Crafter A Cookie #27

Saturday, 25 July 2015

Mmmm Cherries

While my youngest daughter was at university and had long summer breaks she got a job at a local cherry farm. I may be biased but Somerset cherries are the best cherries ever and those from Whitehouse Farm are the best of the best! That leads me into my card for this post, my entry for the Imagine That Design of the Month Challenge with July's image featuring lots of cherries.

Materials used:SAM_1816(watermarked)
Imagine That Digi of the Month - Treat Stand
Bugaboo Stamps - Make It Snappy Blank
White blending card
Copic pens
designer papers Papermania - Happy Days
A5 white card blank


Method:
I made the blank frame the size I wanted and added the cake stand and sentiment to it. Having printed it out I used the copics to colour it in. I drew in the tablecloth with a black pen. The frame border I coloured in to match, as closely as a could, the backgroundSAM_1817(watermarked) colour of the cherry designer paper. I cut out my image and matted and layered it onto the designer papers before attaching it to my card blank.

I used a coloured image from the set to make the paper for the card insert.

After a day of non-stop rain yesterday I am happy to say that today there is blue in the sky and the sun has made an appearance. Hopefully summer has returned to stay a while.

Thanks for visiting. Take care.

Pippa

I would like to enter my card into:
Imagine That July Digi of the Month Challenge - Treat Stand
Brown Sugar Challenge Blog #156 - Anything goes

Thursday, 9 April 2015

Sailing on

Over at Imagine That Digi's this month the stamp of the month is on a nautical theme. I have recently given into temptation, again!, and bought a new die which makes for an easy pop up card.

[caption id="attachment_1077" align="alignright" width="353"]SAM_1562 (watermarked) Inside view[/caption]

Materials used:
Imagine That digi set - My Sailmate and free papers
Stampendous Pop-up die set
printing paper
stamping card
dark blue card
sentiment stamps and memento Tuxedo Black ink pad
Copic and Spectrum Noir pens


Method:
I printed out the papers and elements onto the different papers depending on type. I used the pens to colour the boy, girl, life belts and wheels. I die cut the bubble paper twice to make the inside pop-up piece.

[caption id="attachment_1078" align="alignleft" width="326"]SAM_1563 (watermarked) Close up of inside[/caption]

I fussy cut my coloured images (cutting out the little bits from the life belts and wheels took a while). I stuck a snippet of left over bubble paper behind the life belts and wheels then attached them to the pop-up tabs before attaching the boy and girl to the larger tabs. I used the blue card to make an A5 card blank and glued my pop-up piece inside making sure not to get glue on the tabs.

[caption id="attachment_1076" align="alignright" width="300"]SAM_1558 (watermarked) Front view[/caption]

For the front of the card I used different elements from the kit to build up the scene then stamped the sentiments on the front. Finally I stamped Happy Birthday inside the card leaving the left hand side clear for writing on.

It is the first time I have had a go at a pop-up card but I don't think it will be the last!

Thanks for popping in. Take care.

Pippa

I would like to enter my card into:
Imagine That DOM challenge
Digitally 'Sweet' Challenge 134 - Sport