Monday 29 December 2014

From the Heart

I have just got time to squeeze in with my entry for this month's From the Heart Stamps progressive challenge.

Materials used:SAM_1285 (watermarked)
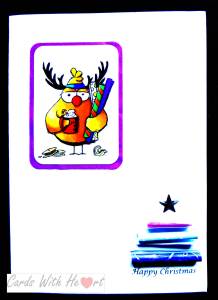
From the Heart - Christmas spirit Birdbrain
Happy Christmas stamp
rectangle die
Memento Tuxedo Black ink pat
White stamping card
snippets of Christmas design papers
Spectrum Noir pens


Method:
I printed out the image a couple of times onto white card and coloured them in with Spectrum Noir pens. One image I cut with the die. I cut Birdbrain's body from the second image and layered it onto the base image. I matted the topper onto purple paper from an old paper bag, then attached the whole thing to an A5 card blank. I used snippets from 3 designer papers to make rolls in different widths and stuck them to the card in a 'tree'shape. I added a star at the top and a greeting at the bottom.


As far as I know at the moment From the Heart stamps are continuing trading to EU countries which is a blessing. I was beginning to think my dalliance into the world of digi stamping was going to be very short lived as many of my favourite companies are giving up as a result of the new EU vat laws. I am still waiting for a response from my local MP but not really holding out much hope that things will change.

Thank you for visiting.

Pippa

I would like to enter my card into the following challenges:
From the Heart Stamp of the Month
Pixie's Snippets Playground - Week 156 & 157

Saturday 27 December 2014

Best laid plans of mice and (wo)men!

I had a cunning plan for the very last challenge at Deedee's Digis. I even printed out my design and made a start on the colouring. Unfortunately Christmas and the 'dreaded lurgy' caught up with me and everything came to a grinding halt. I do not want to miss the last challenge so plan B has been put into operation, I just hope I have not left it too late.

Materials used:20141227123042_SAM_1283 (watermarked)
Deedee's digi Happy BrrrrDay
printing card
Clarity stamps fir trees stamp
Memento Northern Pine ink pad
Birthday greetings stamp
circle die
A5 white card blank


Method:
This was a really quick make. I printed out my main image arranging the bears so they are holding paws and I also printed out a second image of the bears. I cut the main image out with the circle die and after stamping a ridge of trees onto the card blank, added the topper. Using the second image I cut out the jumpers and added them to the topper with 3d foam pads. Finally I added the greeting. Job done!

Thanks for dropping in. I hope you are still enjoying the Christmas season. Take care.

Pipppa

Wednesday 24 December 2014

Crackers are not just for Christmas!

Last week I shared a get well card with you, this week I have been struck down with a hacking cough - great timing it being Christmas Eve!

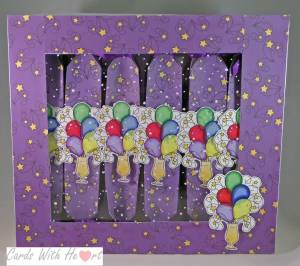
This week I want to share my penultimate project for Deedee with you. Some of you may be aware that the new VAT laws for the EU are causing the closure of many small digi stamp companies. Unfortunately Deedee is one and will cease trading with European countries at the end of this month and altogether at the end of January. The irony of this is that my project for this week is a box of crackers, though I am hardly in the mood for celebrating!

Materials used:SAM_1091 (watermarked)
Deedee's Fun and Festive set
Memory Keepers Candy Box Punch Board
white card
white stamping card
Spectrum Noir pens
snowy acetate


Method:
I printed out the glass with balloons motive several times (one for each cracker and one for the box) then coloured them with Spectrum Noir pens.


I priSAM_1097 (watermarked)nted out the starry design paper onto A4 card 7 times. I used six sheets to make up the crackers and one sheet to edge the box lid. The box itself is made from two sheets of A3 card, not quite big enough so I had to add extra pieces at the sides. I cut an aperture out of the box lid and lined it with the sheet of snowy acetate. The cracker ends are tied off with matching purple ribbon. At the moment they are empty but I do have snaps, mottoes, gifts and hats ready to finish them off. These are New Year crackers because of the motive I have used but crackers can be made for any occasion at any time of the year.
Thank you for visiting and I hope you have a blessed Christmas and a happy New Year.

Pippa

Wednesday 17 December 2014

Winter flu

Deck the halls with boxes of tissues, fa, la, la, la, la, fa, la, la, la.
'Tis the season for the sniffles, fa, la, la, la, la, fa, la, la, la!

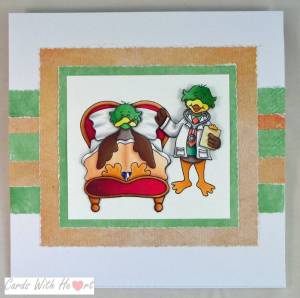
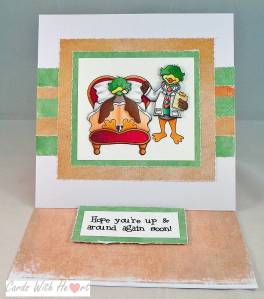
One of the disadvantages of working in a school is the seasonal sniffles. I work with the Reception and YR1 children so runny noses and coughing all over people is the order for the day. With winter being the peak time for colds and flu I decided a 'Get well' card would not be too out of place amidst the Christmas cards for my third design offering at Deedee's Digi Stamps.

Materials used:Sick Duck 1 watermarked
Deedee's Digi set Happy Healing
Spectrum Noir pens
Neenah card
9.5 cm square white easel card blank
coordinating backing paper


Method:
Having arranged the two images how I wanted them I printed them out 3 times, one for the topper base and two to add dimension. I then coloured the images with Spectrum Noir pens before cutting the two extra images up to decoupage. I matted and layered the topper onto the coordinating paper and also added strips of paper to the card front before adding the topper. I used the same papers to cover the inside of the card and to mat the sentiment which is used as the stopper. The thermometer has been glazed with clear embossing powder.

Sck Duck 2  watermarked

Thank you for visiting.

Pippa

Wednesday 10 December 2014

Guest designer week 2

Despite the growing popularity of e-readers people still like to give books as presents, especially to children. My second make for Deedee is great to go with a book and has an added bonus!

Materials used:SAM_1088 watermarked
Deedee's Digi Stamp: Little Readers
Spectrum Noir and Copic pens
aqua Hunkydory Adorable Scoreable Card
Die'sire Nouveau Stamping Frame Die
white stamping card


Method:
To make the card blank I first added the reading girl and the sentiment to the right hand side of card, sizing the images to the size I needed. Having printed out the images I made up the card base from the printed card folding it so that the back was 4.7cms longer than the front making the image visible. I then printed out 2 copies of the little girl reader sizing the image to fit in the die frame, and one copy of the quote. I then used the pens to colour in all the images.

I cut the frame from the aqua card with the die then cut my base image to the right size and matted it onto the frame, having first cut around the girls hand where she is holding the book. I then cut out the book from the second image and stuck it under the cut part of her hands with a 3d foam pad underneath to give it dimension. I then cut down the quote and matted it onto aqua card. I then stuck the topper and sentiment to the front of the card.

Now for the added bonus! Finally I ran down the right side of the card with a perforating blade 6cms from the edge so that the small image and sentiment can be torn off and used as a bookmark.

Because of the way the card is folded off centre it will not fit into a standard C5 envelope so I made a plain white one from A3 paper.

SAM_1086 watermarkedI know that not everyone has time or enjoys colouring so I made a second card in exactly the same way using the coloured images of the boy reader, (much quicker than the girl!)

Thank you for visiting. Take care.

Pippa

Wednesday 3 December 2014

Guest Designer Week 1

So the cat is out of the bag, as some say. I have been asked to be a Guest Designer Team Member for Deedee's Digis during December. My creations will usually be posted on a Wednesday on the website and my plan is to do a post here to coincide with it, allowing for continental time differences!

For my first effort I really pulled out all the stops so please do not be too harsh if the following weeks are not so good!

Materials Used:SAMSUNG CAMERA PICTURES
Deedee's Digi Stamps: Away in a Manger and Beauty of the Season
A3 white card
White stamping card
Gold mirri card
Spectrum Noir pens
Copic Ciao pens
Circle die
Gold glitter
Happy Christmas stamp


Method:
I made up a tri-fold square card using the A3 white card and layered the middle panel with gold mirri card. I printed out the whole of the Poinsettia image and 3 extra copies of just the flowers at the same size. I also printed out multiple copies of the manger line drawing version.

I cut the main poinsettia image to fit the middle panel of the card, slightly smaller than the gold layer then used a circle die to cut out just the part of the circle between the two ends of the line of flowers, I also cut a circle out of the middle panel lining it up with the circle from the image. Having glued the poinsettia panel to the card I was left with a circle going through the middle panel. (I hope all this is making sense, foolishly I forgot to take photos of the stages and describing it is somewhat tricky!) I used the remaining poinsettia images to decoupage the flowers adding some gold glitter to the centres.

Moving onto the manger images I coloured them in with Spectrum Noir and Copic pens. I used one image as the base and mounted it onto the right-hand side panel so that when the panel was folded in the manger image showed through the hole in the middle panel. I then used the other images to cut out and decoupage the bottom layer. I then used a fine black pen to draw in a dashed line around the cut out area and stamped the greeting at the bottom before gluing the two panels together.

SAMSUNG CAMERA PICTURESNearly there now. For the insert I used the same poinsettia image as on the front of the card, just smaller and a greeting from the sets.


Finally I made up an SAMSUNG CAMERA PICTURESenvelobox for the card, printed out the same poinsettia image cut it to size and stuck it to the front of the box. I added a dotty border and heart corners with a fine black pen and put envelop glue on the flap. Phew, all done!


I told you I had pulled all the stops out for this one. Believe me the rest are not nearly so complicated. Of course the beauty of Deedees images, as I think I may have mentioned before, is that they come as digi stamps and as coloured images so you can make your cards as simple or as complicated as you like. My card took quite a while to make and with all the layers needed a box to post it in. You could make it up as a single layer and also instead of colouring in the manger image print that one out already coloured. I chose to combine coloured and digi stamps to show off all the possibilities available (and also because I am not very good at colouring in flowers!)

Thanks for visiting. Take care.

Pippa

Friday 28 November 2014

Slow down please, I'm not ready

That time of year is rapidly approaching now with Advent just around the corner. Have I made the cards? Have I bought the presents? Am I ready? Don't be daft!

Anyway to take my mind off all the things I have not done, I have been working on anther challenge, this time the monthly one at From the Heart Stamps. Like Deedee's challenge it is another progressive one, if you enter you automatically get sent the image for the following month. The image this month is a lovely simple Christmas one and it fits the bill for a few challenges.

Materials used:SAMSUNG CAMERA PICTURES
From the Heart Stamps - Angel Joy (faithful friends)
Spectrum Noir and Copic pens
Wink of Stella Clear
White stamping card
gold pen
Centura Pearl White card
patterned paper and left over snippets


Method
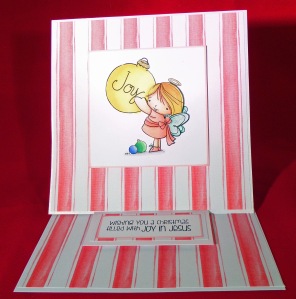
I used the centura pearl card to make a 14.8 cm square easel card base. I matted a 14.5 cm square piece of patterned paper to a 14.8 cm square of centura pearl card and attached this to the fold on card front. I printed out the image 4 times at the size I wanted then coloured them in with the pens.

[caption id="attachment_835" align="alignleft" width="260"]Close up of angel Close up of angel[/caption]

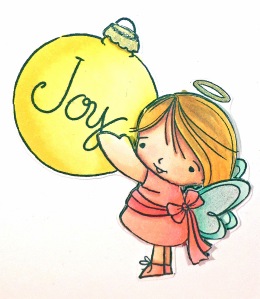
I cut the base image into a square and ran a pink Spectrum Noir pen around the edges. I used a second image and cut out most of the angel and the top of the large bauble which I stuck over the top of the first image using gel glue. I then stuck the topper to the front of the card. I printed out the sentiment and cut it to size. After running the same pink pen around the edges I matted and layered it onto patterned paper and centura pearl card. I lined the inside base of the card with patterned paper and added the greeting using 3d foam pads as the card stopper.

SAMSUNG CAMERA PICTURES

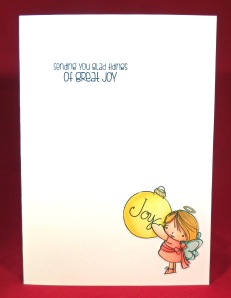
The remaining two images were cut out and decoupaged then added tothe front of a white A5 card blank which already had the sentiment printed onto it. Both angels then had wink of stella applied to their wings.

I think these two cards will cover a few challenges so off now to check the requirements. I know they fit the bill for Rudolph Day and as it is Sarn's final one I really want to get over there.

I hope your preparations for Christmas are going better than mine! Thanks for taking the time to visit. Take care.

Pippa

I would like to enter my cards into the following challenges:
Easel card: From the Heart Stamps Monthly Challenge
Outlawz Friday Coloring Challenge - Anything goes with optional Christmas twist
A5 card: Less is More Challenge - Week 199 Jingle all the way
Outlawz Monday Greetings Challenge - Anything goes
Both cards: Rudolph Day Challenge

Thursday 27 November 2014

Deedee's Challenge

I know it's been a while and I did say I was going to try to keep up with the Less is More challenge but life got in the way!  Today has seen a flurry of activity in the craftroom trying to make amends for the 'dry' patch. Spurred on by the realisation that the end of November is only a few days off  I have rustled up a couple of entries for progressive challenges that end on Sunday. If you enter you automatically get sent the free digi for the next challenge, so you can see why I did not want to miss out.

The first one I tackled was for Deedee's challenge. I really like the fact that the images come in  coloured and line drawing  versions. Being pressed for time I chose to use the coloured version for my make.

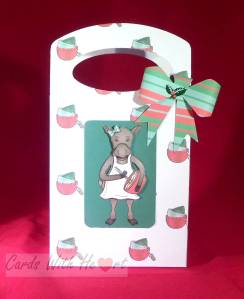
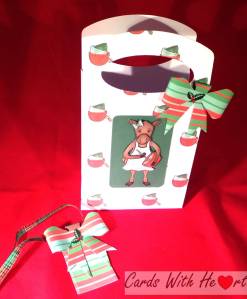
Materials used:Moose Bag (watermarked)
white printing card
Deedee's Digi Mix it up
2 holly brads
snippet of ribbon
X-cut bag die


Method:
I used a designer software programme to make the paper for the bag taking the stacked bowls image, reducing the size and repeating it across the whole A4 sheet. I printed out two sheets of my created paper, 1 sheet of Deedee's stripped paper and 1 sheet of the cooking moose with repeated images on it (I used the same programme to put one image onto a green background.

Moose Bag and Tag (watermarked)

I used the x-cut die to cut out my bag from my designed paper and also cut the tag and 2 bows from the stripped paper. I cut out the moose images and used four of the extra images to 3d decoupage the base image on the green background. I made up the two bows, 1 I attached to the front of the card with a holly brad and the other I attached with another holly brad to the top of the tag. Finally I threaded a piece of ribbon through the loop at the top of the bow on the tag.

Sorry the photos are not good, still trying to work out the lighting. I am not a photographer so any tips would really be appreciated.

Thank you for dropping in. Take care.

Pippa

I would like to enter this card into the following challenges:
Deedee's Digis: November Digi of the Month Challenge
Pixie's Snippets Playground - week 152

Thursday 13 November 2014

Making decisions

I have discovered a whole wealth of crafty challenges out there that I would love to participate in but unfortunately this week and the next couple of weeks are just too full and busy already. It is a shame because I have some ideas I would love to try. Hopefully it will calm down a bit, although with the all too rapid approach of Christmas I somehow doubt it!  I have decided that there are a couple of my favourites that I just have to keep going, no matter what, and Less is More is one of them. This week the theme is 'Starry, starry night' (I have been humming 'Vincent' all week!) The added challenge is that it is one layer. So here goes.

Bauble 2 watermarked

Materials used:
pine branch stamp: Dimension stamps
star and sentiment stamps: Creative Crafting magazine
nativity stamp: Clarity
bauble die: Spellbinders
memento ink: rich cocoa, northern pine
adirondack ink: pitch black, denim, archival black
versamark pad
clear embossing powder
stencil brushes


[caption id="attachment_815" align="alignright" width="300"]Bauble watermarked A closer look[/caption]

Method:
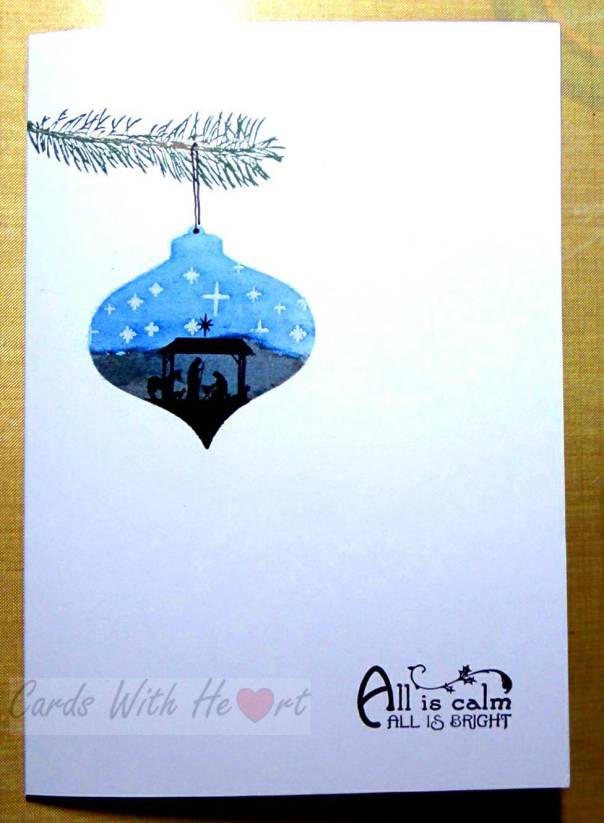
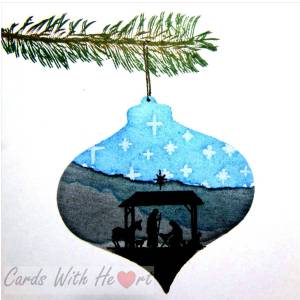
I stamped the pine branch at the top of an A5 white card blank using northern pine and rich cocoa. I then made an aperture mask of the bauble and used it to stamp the stars through with versamark and emboss with clear powder. Keeping the mask in place I then used denim and pitch black to stencil in the sky and ground. I stamped the nativity with archival black then darkened the bottom tip of the bauble with pitch black to make it look like a continuation of the stamp. I then stamped the sentiment at the bottom with black archival ink. Finally I added the hanger with a black miron pen and buffed up the stars with a tissue.

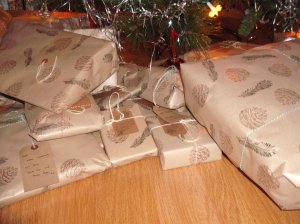
DSCF9060The design is a variation of one I used a couple of years ago for our Christmas card. In fact I have used both the pine branch and the little nativity a number of times now. The pine branch stamped on brown parcel wrapping paper along with the pine cone from the set makes great wrapping paper.

I am off now to see what wonderful cards have already been submitted for the Less is More challenge.

Thank you for visiting. Take care.

Pippa

I would like to enter my card into Less is More One Layer Week - Starry, starry night! week 197

Tuesday 11 November 2014

Word Art Wednesday

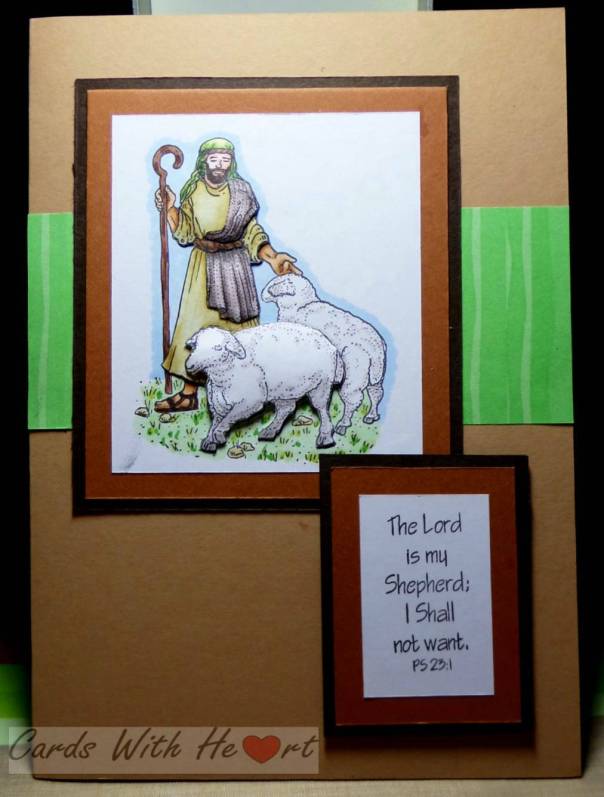
A long-standing member of our congregation at church is leaving soon and moving closer to her family so I was asked to make a card for the church members to sign. The design I eventually settled on also qualifies for the Word Art Wednesday challenge.

Shepherd (watermarked)

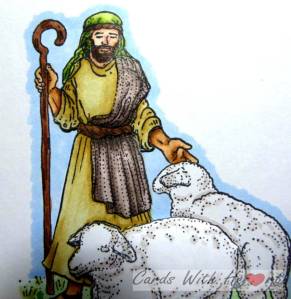
[caption id="attachment_808" align="alignright" width="291"]Shepherd Closeup (watermarked) A closer view of the shepherd[/caption]

Materials used:
Shepherd and verse stamps (origin unknown)
tuxedo black memento ink
stamping card
A5 kraft card blank
mid and dark brown card
snippet of green stripy paper
Spectrum Noir and Copic pens


Method:
I stamped the shepherd out three times and coloured the images in with the pens. One image I trimmed and matted and layered as the base of my topper, the others I cut different pieces out of to 3d decoupage on top of the base image.

I stamped out the verse and matted and layered that to match the topper. I placed a snippet of green paper behind the topper and then arranged the other items how I wanted them before sticking them to the card front.

Thank you for dropping in. Take care.

Pippa

I would like to enter this card into;
Word Art Wednesday Challenge 157
Pixie's Snippets Playground Week 150

Monday 10 November 2014

Autumn Colours

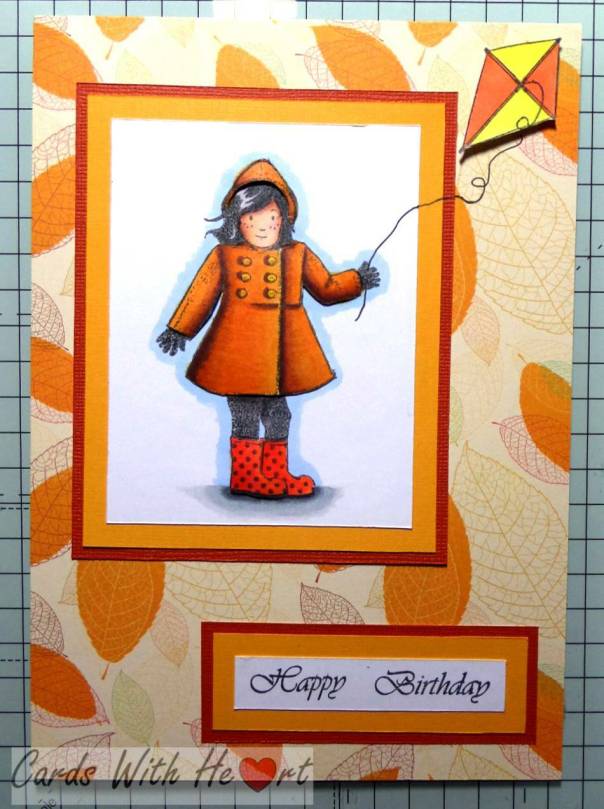
Today's card is one I did for the Outlawz Monday Greetings challenge. I was so late getting it done that I had to enter it before I had blogged it! The theme this time was Autumn Colours.

Girl With Kite (watermarked)

Materials used:
girl and kite stamps from Creative Stamping magazine
greeting stamp
A5 white card blank
tuxedo black mememto ink
coloured card
leaf backing paper
white stamping card
spectrum noir pens
black micron pen
copic pens


[caption id="attachment_803" align="alignright" width="221"]Girl  With Kite Close Up (watermarked) Closer view of the girl[/caption]

Method:
I stamped out the girl twice and the kite once. Using copics for the skin and spectrum noir pens for the rest I coloured all the images. I trimmed one image down to make the base then cut out the hat, coat and one boot from the other image and attached them with 3d gel glue. I also cut out the kite.

I matted the main image onto yellow and rust card to make my topper. I stamped the greeting onto white card then matted and layered it with bits of card left from matting the topper.

I used the patterned paper to cover the card blank and then glued my topper and greeting to the front. I attached the kite using gel glue and then drew in the missing string with a black micron pen.

Fortunately America is behind us in time so I did manage to get my entry in before the challenge closed. The new challenge for this week is up now so hopefully I can get that one done quicker!

Thanks for stopping by. Take care.

Pippa

Friday 7 November 2014

More or Less

I am really cutting it fine this week with my Less is More Challenge but it has been one of those weeks. This weekend the church has a flower festival, a concert commemorating WW1 in music and verse and the Remembrance Sunday services. I have been putting together the PowerPoint for the concert, not easily done as the running order kept changing!  Next weekend is the church's Christmas Fair and I have been busy making gift bags and boxes for my stall. Also it was back to school this week so the usual planning has had to be fitted in and a couple of meetings as well!  With all that going on is it any wonder that I managed to order the wrong ink for my printer (it is now completely dry!) and fall of a table!

So taking out a moment of calm I have made my entry for this week's Less is More challenge, I hope you like it.

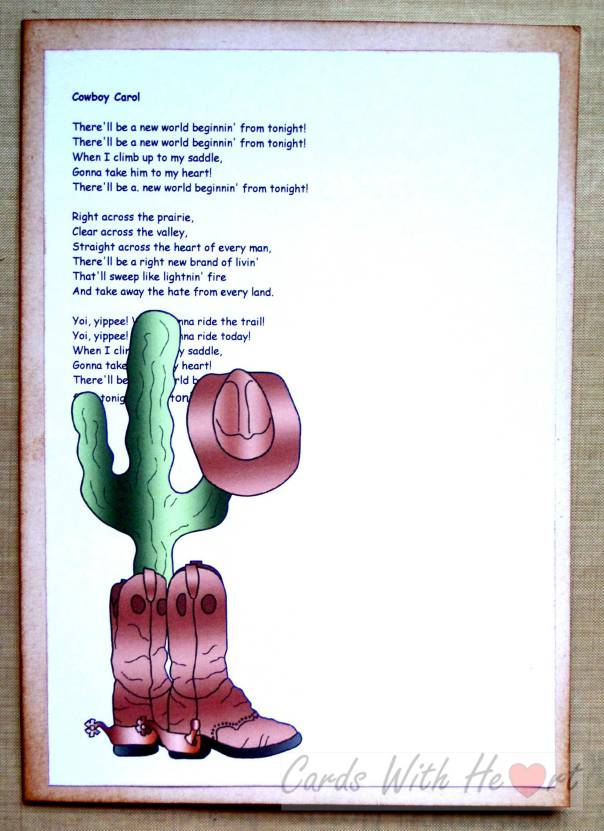
SAM_0897 watermarked

Materials used:
Deedee's Digi Stamps - Happy Trails
Printing card
A5 white card blank
Vintage Photo distress ink
type lyrics for the Cowboy Carol
Husbands printer! (Mine is dry remember!)


Method:
I needed a really quick card today so I used the coloured images rather than colour in the line images myself. The cactus is not as tall as that but with the boots in front of it I could make it higher on the page. Having arranged my words and images on the page I printed them out and trimmed them slightly smaller than the card blank.

Using the distress ink I inked around the edges of the card blank with a brush and also used a piece of cut and dry foam to ink the edge of the layer, which I then stuck to the front of the card blank.

The theme for the Less is More challenge this week is none traditional Christmas, no red or green, so I am hoping to get away with the green cactus (it's not really a Christmas green!) So fingers crossed.

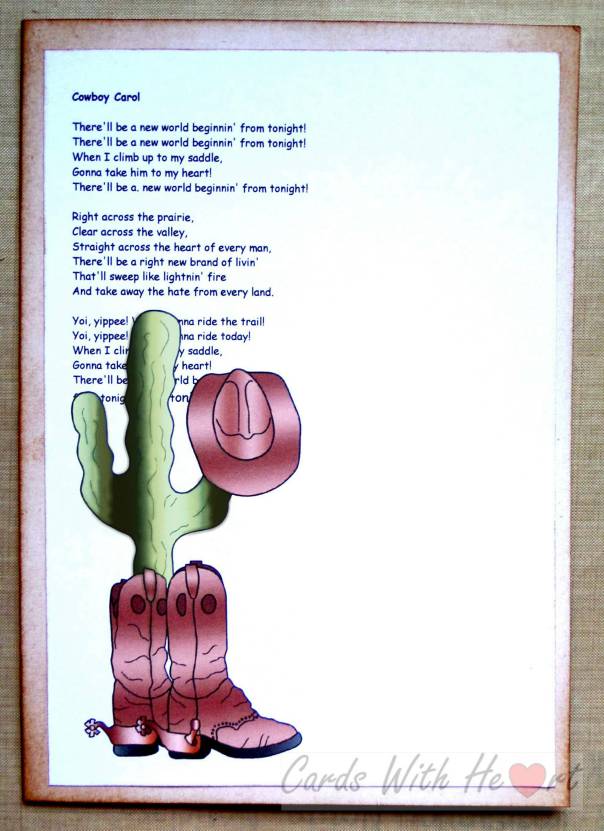
Here is the card again but this time I have tried to recolour the cactus so it is not so green. I was going to make it browner but with the brown hat and boots it was too much.

SAM_0897 recoloured watermarked

Thanks for visiting. Take care.

Pippa

I would like to enter this card into Less is More's Non-traditional Colour Christmas Card

Wednesday 29 October 2014

The versatile dove

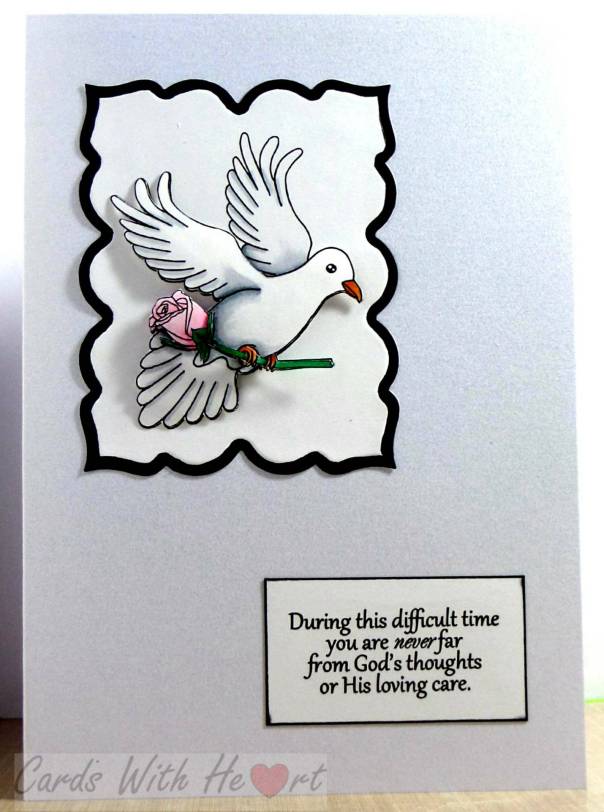
Doves are a great image, I am sure they can be adapted to suit any occasion. However today's card is a sympathy card for a friend who recently lost his mum to cancer.

SAM_0890watermarked

Materials used:
Deedees Digi Stamp Set Endless Beginnings
white stamping card
A5 card blank made from Centura Pearl card
Spectrum Noir pens
Spellbinders Die Labels 23


[caption id="attachment_794" align="alignright" width="243"]SAM_0891 watermarked Closer view of the dove[/caption]

Method:
I arranged my digi elements onto an A4 page and printed them out on white stamping card. I coloured in the images with Spectrum Noir pens. One image I cut out with the die as the base then used the other images to cut bits out of and 3D decoupaged them. I went around the edge of the die and the cut out sentiment with a black pen. Finally I arranged my topper and sentiment onto the front of the card and stuck them down.

I know that my friend has a very strong Christian faith which has sustained him during the final week of watching over his mother day and night so that she would not have to face death alone. And I know too that the coming days are going to be hard but that the love of God will continue to comfort him and the family in their grief.

Thank you for visiting. Take care.

Pippa

I would like to enter my card into:
Anything goes with a twist - pink
Word Art Wednesday

Tuesday 28 October 2014

BFG

My favourite film from a Roald Dahl book has to be 'The BFG' with David Jason voicing the BFG. I love the way he gets words mixed up and also his logical use of the English language, such as referring to the Queen as Majester (pronounced Majest - her!) Anyway all this rambling is just to introduce a card I made with the Docrafts BFG stamps and a page from a very tatty copy of the book.

SAM_0887  watermarked

Materials used:
page from old BFG book
Docrafts Roald Dahl stamps
Memento tuxedo black inkpad
Spectrum noir pencils
A5 white card blank
old purple paper bag


Method:
I managed to find a page in the book that had a blank space at the bottom so I could stamp the BFG into this. I coloured the image with greys and black Spectrum Noir pencils then tore the page into a panel. I matted the panel onto a piece of purple paper out of a bag from a shop then stuck the topper onto the front of the card. Finally I used the banner stamp and the words to put the greeting in.

[caption id="attachment_790" align="aligncenter" width="271"]SAM_0888 watermarked coloured with greys and black Spectrum Noir pencils[/caption]

Since I used newsprint, purple (my favourite colour at the moment and a snippet) and a greeting on the front, my card qualifies for several challenges so I am off to make the links! (I have thought of 4, which must be a record for me!)

Thank you for visiting. Take care.

Pippa

I would like to enter my card into the following challenges:
Less is More Recipe Week 195: Newsprint
Outlawz Greetings Card Challenge - OCTOBER 27th - Anything Goes
Your Scrapbook Place - black, white and your favourite colour
Pixie's Snippets Playground - Week 148

Monday 27 October 2014

Warning: Photo heavy post!

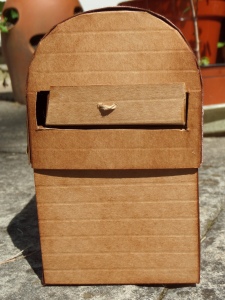
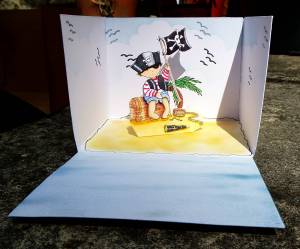
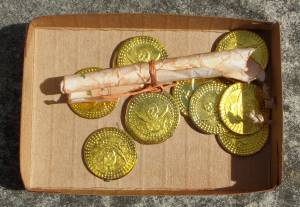
You may remember that months ago I gave a little tease about my entry into the Crafter's Inspiration Magazine competition, well at the risk of sounding as if I am blowing my own trumpet I earned a Highly Commended with it.  Since the original post was back in May I have forgotten what I did exactly to make it. I know I had to use something from the free kit that came with the magazine and that I used a digi stamp, coloured with Spectrum Noir pens, and some backing paper. I also used some other stamps from my stash and a lot of Kraft Card and a scoring board.  At the risk of boring everyone all I can do is to post a lot of photos - you have been warned!

[caption id="attachment_784" align="aligncenter" width="256"]SAMSUNG CAMERA PICTURES The outside[/caption]

[caption id="attachment_778" align="aligncenter" width="225"]Secret side drawer Secret side drawer[/caption]

[caption id="attachment_779" align="aligncenter" width="300"]Contents of secret drawer Contents of secret drawer[/caption]

[caption id="attachment_780" align="aligncenter" width="300"]Treasure map Treasure map[/caption]

[caption id="attachment_781" align="aligncenter" width="300"]Off comes the lid Off comes the lid[/caption]

[caption id="attachment_782" align="aligncenter" width="300"]Inside the chest Inside the chest[/caption]

[caption id="attachment_785" align="aligncenter" width="300"]The inside comes out The inside comes out[/caption]

[caption id="attachment_783" align="aligncenter" width="300"]All the pieces All the pieces[/caption]

[caption id="attachment_777" align="aligncenter" width="300"]A closer view of the inside A closer view of the inside[/caption]

I had a lot of fun making my treasure chest, trying to work out how to make the chest itself was the hardest part! I deliberately designed it so the inside pirate could come out so that the chest sides could be sealed up to make a useful chest for putting bits and pieces in. I am not sure that I will ever get around to making another one though!

Thank you for dropping in. Take care.

Pippa

Wednesday 22 October 2014

Little critters

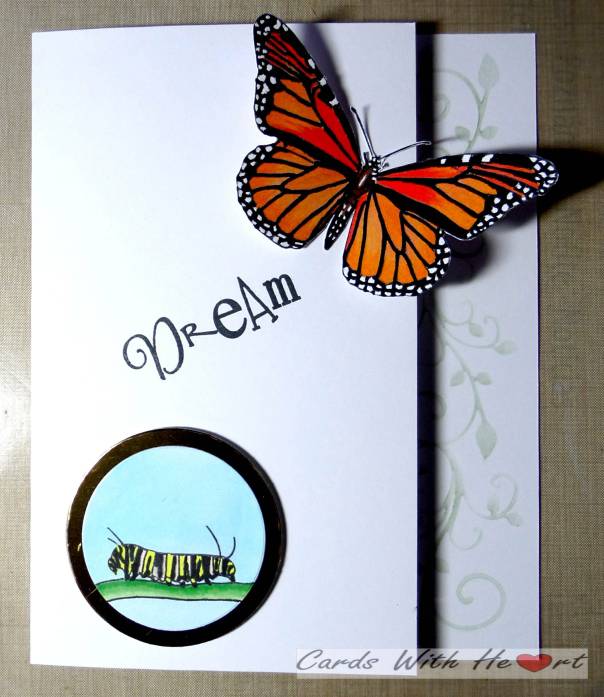
It's Less is More challenge time again and this time the theme is 'Little Creatures'. Just lately my life has been full of little creatures; the annual fly invasion has just finished and now the spiders are moving in and at school I have just done minibeasts with the children in science. I never cease to be amazed at the transformation of the humble caterpillar into a beautiful butterfly so have used that idea for my card.

SAM_0867.jpg with watermark

Materials used:
white stamping card
white card
snippet of gold mirri card
Memento tuxedo black ink pad
Adirondack meadow ink pad
set of 'educational' butterfly life cycle stamps (not exactly the best quality of stamp!)
Clarity 'Dream' stamp
circle dies
leafy swirl die
white gelli roll pen
Spectrum Noir pens


Method:
I used an A4 piece of white card to make the card blank, folding it so that the back was wider than the front. I cut swirly leaf out of the middle of a scrap piece of card to use as a stencil then stencilled down the right hand side of the card using the meadow ink.

On the stamped the butterfly and the caterpillar onto the stamping card with the black ink and coloured them in using the Spectrum Noir pens, highlighting the white spots on the butterfly with a white gelli roll pen and drawing in a stem for the caterpillar by hand. The butterfly stamp does not produce a crisp image so I went over it with a black Spectrum Noir pen.

I fussy cut the butterfly and used a circle die to cut the caterpiller, and a slightly larger circle die to cut a mat from the snippet of gold mirri card.

I matted the caterpillar image and stuck it at the bottom left of the card blank using 3d foam pads. I glued the body of the caterpillar at the top right of the front flap so the wings are dimensional. Finally I stamped 'Dream' across the middle of the card using the black ink.

The weather has started getting cooler now with the approach of winter so the minibeasts will all be hiding away somewhere warm soon!

Thank you for visiting. Take care.

Pippa

I would like to enter this card into the following challenges:
Less is More - Little Creatures
Outlawz Monday Greetings - Use your circles
Pixies Snippets Playground - week 147

Clear it out challenge - Orange/Black

Thursday 16 October 2014

Autumn's Harvest

I found a new progressive challenge at From the Heart Stamps so decided to give it ago. This month the image has a harvest theme, very appropriate as all the 5 churches in our Benefice have had their Harvest Festivals and Harvest Suppers. I am now all apple pied out until next year!


Materials used:
white stamping card
red and black card
Budding vine embossing folder
round and round scalloped dies
red pigment ink and red embossing powder
Apple Market digi stamp set - From the Heart Stamps
Just for you stamp
Spectrum Noir pens
Adirondack Meadow ink pad


Method
I printed out the line image to the size I wanted onto the white card and coloured with my Spectrum Noir Pens. On a spare piece of the white card I stamped and embossed the Just for You greeting before cutting it with a circle die and cutting a mat with the scalloped circle. I used the budding vine embossing folder to emboss another piece of the white card then highlighted the embossing with the green ink. I matted up all the elements on black card. I made an A5 card blank from an A4 piece of black card and attached a slightly smaller piece of red card onto the front. I then arranged my elements how I wanted them before sticking them down.

So just a teaser for you, how many pens did I use to colour in my image? Here is a clue.


Thanks for stopping bye.  Take care.

Pippa

Did you guess correctly, I used 39 pens!

I would like to enter this card into the following challenges:
From the Heart Stamps Digi Stamp of the Month
Outlawz Monday Greeting Card Challenge - Embossing


Wednesday 15 October 2014

Bean playing!

The challenge this week at Less is More is 'One layer with 2 of something on', this is my interpretation.


Materials used:
White stamping card A4
Deedee's Digi image: Jellybean Prayer
Spectrum Noir Pens


Method:
I put together the line image of the two jellybeans having first resized and placed them how I wanted them, then typed in my sentiment before printing it onto the white card. I used my Spectrum Noir Pens to colour in the jellybeans and add a border around the front of the card.

This was a really quick card to make, the colouring took the longest time but if you are not into colouring the images are also supplied within the kit as coloured ones. If you wanted to make a more elaborate card it lends itself to a bit of decoupage as well as matting and layering. The card is now going away until February next year!

Thank you for dropping in. Take care.

Pippa

I would like to enter this card into the Less is More Week 193 One Layer Card challenge

Friday 10 October 2014

Happy Holstein!

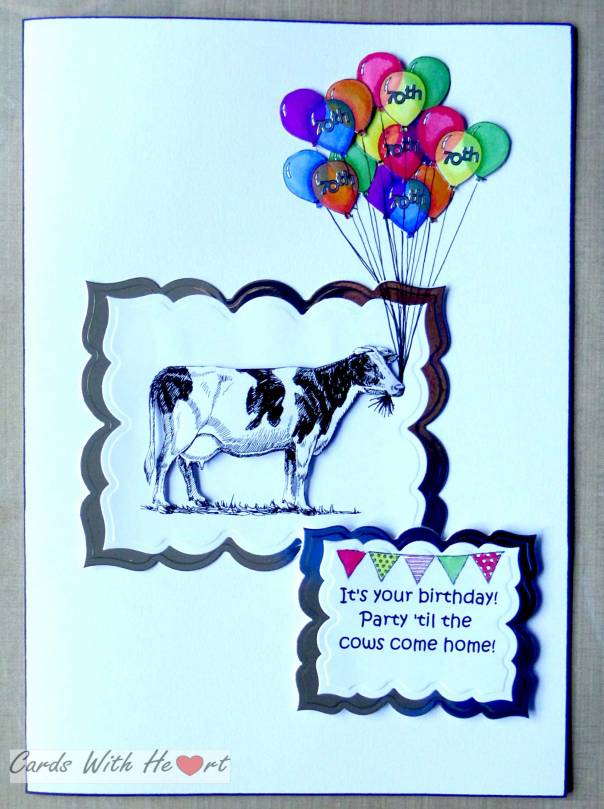
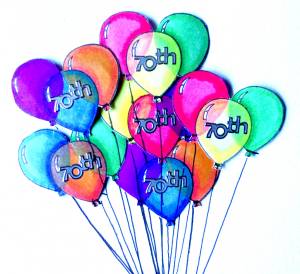
A good friend of ours will be celebrating their 70th birthday very soon. She is still working as the farm manager of a farm in one of the local villages and has not taken a holiday in years! Among the herd in her care are a number of Holsteins so I could not resist making this card for her.

SAM_0803.jpg watermarked


Materials used:SAMSUNG CAMERA PICTURES
Digi image and sentiment
balloon stamp from Creative Stamping magazine
Memento Tuxedo Black ink pad
black fineliner pen
Spellbinder dies
A4 white card blank
silver mirri card
Neenah solar white card
Spectrum Noir pens


Method:
I printed out the cow and sentiment to the size I wanted then cut them out with dies. I also cut mats from the silver card. I stamped the balloons several times and coloured them in with the Spectrum Noir pens before cutting them out. I attached the cow, sentiment and balloons on the card base using foam pads and gel glue on the balloons and sentiment to give depth to them. Finally I drew in the balloon strings with the black pen.

I have recently started a course at Kit and Clowder on skin and hair colouring but overdid the practice and ran out of ink on my favourite skin tone pen! At the moment I am waiting for replacements to arrive and getting frustrated so colouring the balloons has been a bit of therapy!

Thanks for visiting. Take care.

Pippa

I would like to enter this card into the Outlawz Monday Greetings Challenge - It's my Party

Wednesday 8 October 2014

Colour challenge: Autumn's Bounty

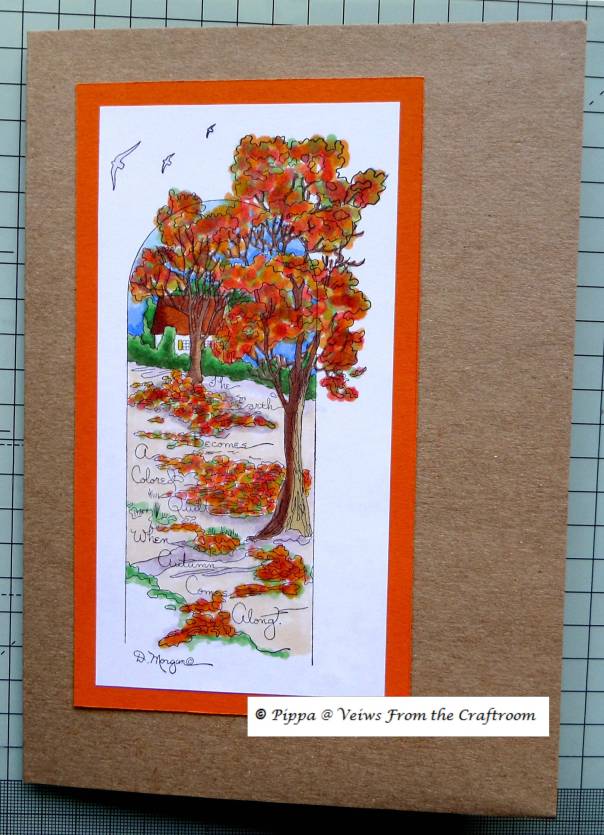
The 'Less is More' challenge this week is a colour one, autumn's bounty. I have a few stamps from Stamps Happen with designs by D. Morgan. One of them is a lovely autumnal one with the  inscription: The Earth Becomes A Colored Quilt When Autumn Comes Along. I love the picture guide on the front but I don't love colouring it in! When stamped it is a very sketchy outline. Anyway as it fits so well with the challenge I decided to give it a go.

SAM_0800.jpg watermarked


Materials used:
Memento Tuxedo Black ink pad
When Autumn Comes - Stamps Happen
A5 Kraft card blank
white stamping card
orange card
Spectrum Noir Pens


Method:
I stamped When Autumn Comes onto the white card with the black ink, coloured it in with the Spectrum Noir pens. I then trimmed trimmed it, matted it onto orange card and attached to the card blank.

Thanks for dropping in. Take care.

Pippa

I would like to enter this card into the Less is More Week 192 Challenge

Monday 6 October 2014

Deedee's Digis Monthly Challenge

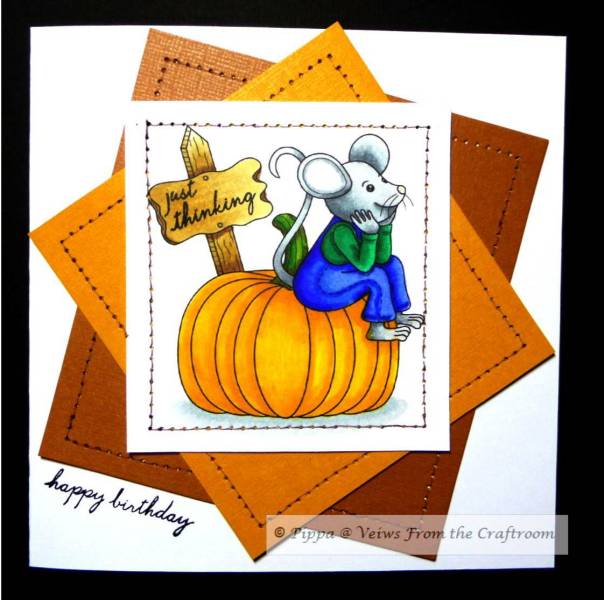
Deedee's monthly challenge this month features a lovely set of digi stamps entitled 'Thinking Spot'. I have a problem at the moment, because of excessive skin tone blending practice my FS2 Spectrum Noir pen has run dry and I am waiting for a refill bottle to arrive.  As I needed to colour on Sunday evening to unwind after a particularly hectic week I decided to start on the 'Thinking Spot' image and managed to finish a card in one afternoon and part of the evening.

watermarked SAM_0797

Materials used:
Deedee's Digis: Thinking spot
several greetings stamps
Neenah card
brown and golden brown cor'dinations card
black archival ink
pricking tool and ruler
white square card blank
brown fine line pen


Method
Having printed out the image I wanted to use I coloured it in with Spectrum Noir pens, trimmed and pricked around the edge. I cut two mats from the cor'dinations card and pricked around the edge of them also. With the brown pen joined up the holes to make faux stitching then mounted the image and two mats onto the front of the card blank. I used parts of several greetings stamps from the same collection to stamp 'just thinking' on the sign and 'happy birthday' at the bottom.

Thank you for visiting. Take care.

Pippa

I would like to enter this card into:
Deedee's Digis October Digi of the Month Challenge

World Card Making Day

(Whoops should have posted this on the 4th!)

Phew, it's been a busy day but I could not let it go by with out posting something for World Card Making Day!  So here is a card I made up from an image I coloured in quite a while back when I was practising with my Spectrum Noir Pencils.

SAM_0796


Not got time for a complete write up, just to say the Rosa stamp is a very old PSX stamp.

Thanks for dropping in.  Happy World Card Making Day to you.  Take care.

Pippa

Friday 3 October 2014

Just words

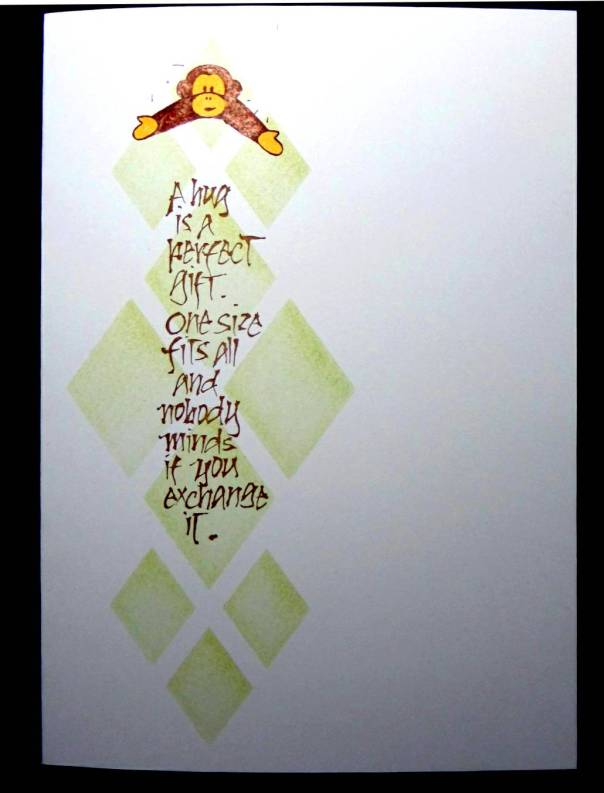
Over at Less is More the  Recipe this week is Mostly Words. I had just the stamp to make up a very quick card (it's been a busy week!)

SAM_0792

Materials used:
Anita's monkey hugs stamp
Penny Black A hug is . . . stamp
Stamps Away Patchwork Template
Distress inks: antique linen and iced spruce
Spectrum Noir pens and pencils
Whispers brown pen
Memento Rich Cocoa ink pad


Method:
Using the template and distress inks I stencilled in a background on the front of an A5 white card blank. With the memento ink I stamped the A hug is . . . on top of the stencilled panel. I used the brown pen to ink up one monkey from the Monkey hugs stamp and stamped it above the sentiment. I used the Spectrum Noir pens and crayons to colour in the monkey.

A really quick card this time because of lack of time, next week is starting to look busy too!

Thanks for popping in. Take care.
Pippa

I would like to enter this card into the following challenges:
Less is More Week 191 Recipe
Outlawz Greetings Card Challenge - September 29 - ANYTHING GOES!

Monday 29 September 2014

Seasonal Fairy

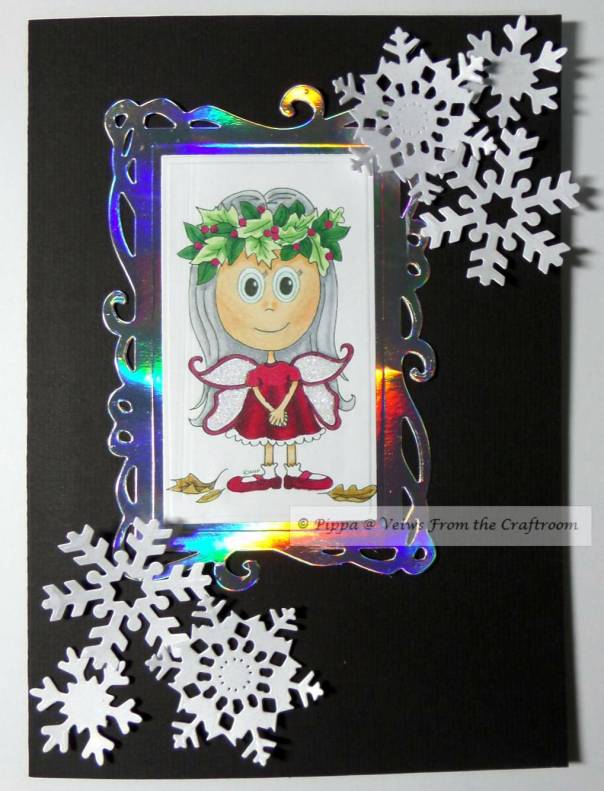
Kit and Clowder are running a competition with a free digi stamp, what more could a crafter want? The idea is to say which your favourite season is and colour in the fairy appropriately. My favourite season is winter.

SAM_0791.jpg with watermark


Materials used:
Fairy Fall image by Amy Doodle Stamp Co
white card
black A5 card blank
snippets of silver mirri card and white card
Die'sire Nouveau Stamping Frame die
mixture of Spellbinders and x-cut snowflake dies
crystal glamour dust
iridescent spray and sparkle
Spectrum Noir Pens


Method:
I printed out the fairy onto white card four times (it's good to have a spare or three to practice colours on!) Having coloured her in with the pens I used the Die'sire die to cut her out along with a silver frame and several snowflakes in white. I sprayed the snowflakes with Spray and Sparkle and left them to dry.

I mounted the image onto the frame and then attached to the card blank. I then used the glamour dust on her wings to give her a bit of sparkle. Finally I attached the snowflakes using gel glue.

Because she is a winter fairy I have dressed her in Christmas red and made her headdress a holly one. I have tried to keep her skin pale (not a lot of sun in the winter so not much tan.) The leaves on the ground are winter brown rather than green and her hair is grey for the end of the year. I have not added a sentiment yet because I am not sure if she is a Christmas or Birthday Winter Fairy.
Thank you for dropping in. Take care.

Pippa

I would like to enter this card into the following challanges:
Kit and Clowder Fall Fairy Colouring Competition

Pixie's Snippets Playground

Thursday 25 September 2014

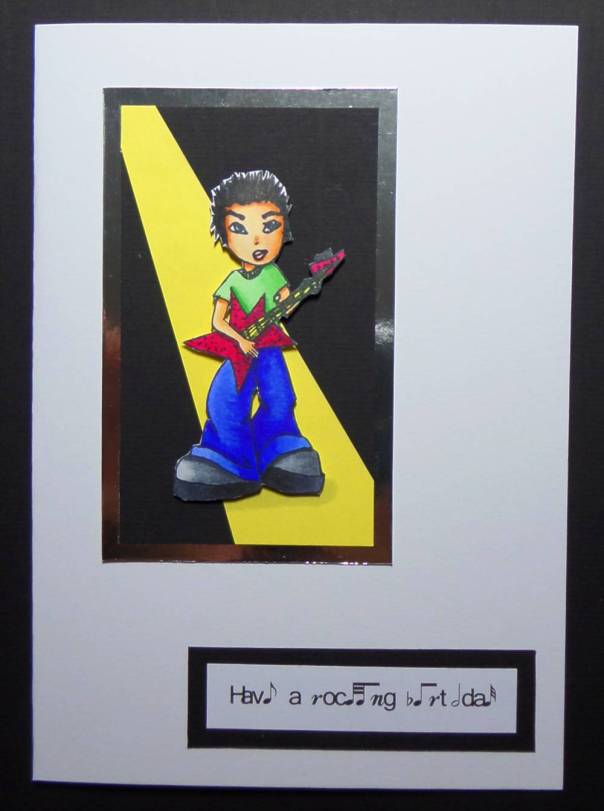
Rocking and rolling

The theme this week at Simply Less in More is 'Face the Music and Dance'.  With a son-in-law that plays the guitar I had to go for the rocker!

SAM_0789

Material used:
guitarist stamp - not sure where it's from
A5 white card blank
snippets of black and silver card
snippet of yellow paper
Neenah card
computer generated sentiment
Spectrum Noir pens
memento tuxedo black ink pad


Method:
I stamped the guitarist onto the neenah card and coloured him with Spectrum Noir pens before cutting him out. I made up the mat with black and silver card adding yellow paper to look like the light beam from a spotlight. I printed out the sentiment and matted it onto black card. Using 3d foam pads I attached the guitarist to the mat then attached the topper and sentiment to the front of the card blank.

Thank you for popping in. Take care.

Pippa