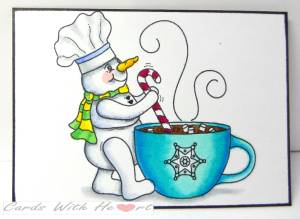
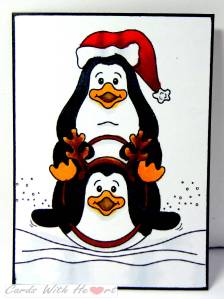
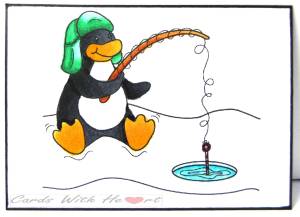
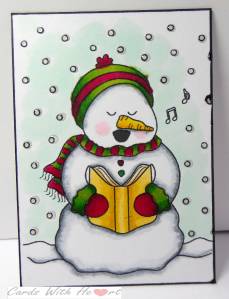
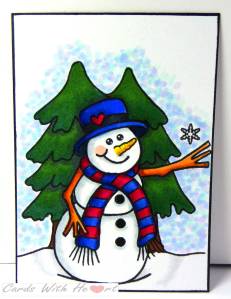
Deedee's stamp of the month challenge for January is a fishing penguin and it just so happened that the ATC swap theme for the group I am in is ''Tis the Season'. So I have made a set of 5 ATC's all using Deedee's images.
Images used:
Ice Fishing
Snowman Soup
Dashing Through the Snow
Caroling Snowman
Let it Snow
All the links are for the EU version, those of you who live outside the EU will need to go to the appropriate shop on Deedee's web site.
Time is running out on me to get this posted before the challenge closes so I am not going to give you an account of how I did them. They are all fairly straight forward, print, cut to size and colour.
Thanks for dropping in. Take care.
Pippa
I would like to enter my ATC's into the following challenges:
Deedee's Digi of the Month- January
Outlawz Friday Colouring
Saturday, 31 January 2015
Friday, 30 January 2015
Little Miss Christmas Girl - except she's not!
The stamp for the Outlawz Progressive Challenge this month was All Dressed Up's Little Miss Christmas 3, so I have used her on a winter birthday card!
Materials used:
All Dressed Up - 3 Little Christmas Girls
Die'sire Nouveau Stamping Frame
White stamping card
Grey card
A5 white card blank
Aqua card
White Fun Flock
Glitter
Spectrum Noir and Copic pens
Happy Birthday sticker
Method:
I printed out the image onto stamping card and coloured her in with the pens. I used the white fun flock on her hat and dress and when the glue was dry put glitter on the top.
Using the die I cut the image to size and then cut the frame from the aqua card. I ran the darkest of the blue pens used to colour the image around the edge of the card blank then added a piece of grey card slightly smaller than the blank to leave a blue border. I attacked the matted image. Finally I used the blue pen to colour the sticker and attached it to the card front.
I had every intention of making a more complex card but ran out of time and I really wanted to enter the challenge in order to qualify for next month's free digi.
Thanks for visiting. Take care.
Pippa
I would like to enter this card into the Outlawz Progressive Freebie Challenge
Sunday, 25 January 2015
Little Snowman
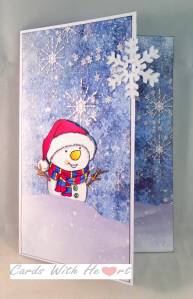
From the Heart Stamps have a lovely little snowman as the image for their progressive challenge. This is my take on him.
Materials used:
From the Heart Stamps - Little Snowman
Bearly Mine - Winter Swirls 17 (unfortunately no longer in business because of the new EU Vat laws)
Snowflake Die (Spellbinders)
Copic and Spectrum Noir Pens
Stamping card
Printing card and paper
Cosmic Shimmer Diamond Sprinkles
Wink of Stella Shimmer Pen - Clear
Method:
I printed out a panel of the Winter Swirls on the right hand side of piece of card before folding it into an A5 card blank with the printing inside. I cut the front panel down to 11 cms so that when the card is closed part of the printed inside shows. I then printed out two A4 sheets of the same Winter Swirls paper, one I used as an insert and the other as the front panel.
I printed out the Little Snowman onto stamping card and coloured in with the pens before cutting out the snowman and a small part of the snow under him. I put some wink of stella onto the pom-pom and trim of his hat. Taking the panel of patterned paper for the front I cut a slit along the snow drift long enough to slip the bottom of the snowman into. I inked the edges of the panel with black ink and then stuck it to the card front. The snowman is held in place by the part behind the paper.
Finally I die cut a snowflake from a snippet of paper and covered it with diamond sparkles before attaching it to the card front so that it overlaps the card opening.
When I finished the card I discovered that the front panel matches up to the back quite well, purely by chance. I was not so successful in matching the insert but it is not visible when the card is closed!
Thank you for popping in. Take care.
Pippa
I would like to enter this card into the following challenges:
From the Heart Stamps - stamp of the month challenge
Rudolph Day Challenge
Pixie's Snippets Playground (the snowflake cut from a snippet)
Outlawz Friday Colouring Challenge - Winter Wonderland
Wednesday, 21 January 2015
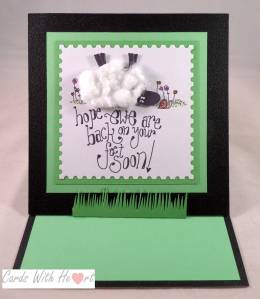
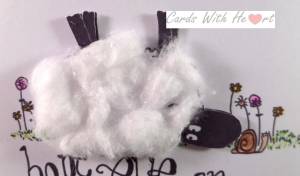
A quick get well card
Having over indulged on colouring lately, this card has hardly any colouring on it!
Materials used:
Tiddly Inks - Hope ewe get well digi stamp
Spectrum Noir pencils
cotton wool
white stamping card
2 shades of green card
black card
square white card blank
x-cut postage stamp die
Method:
I printed out the image 2x on white card and cut one using the postage stamp die. I coloured in the flowers and snail with Spectrum Noir pencils and then matted and layered it onto the green card.
I cut the ewe from the second imaged and stuck cotton wool on to make her wool before sticking her to the base image with gel glue.
I scored the front of the card black down the middle to make an easel card then stuck black card to the folded half and the inside of the card. I used a snippet of the green card to make a grassy card stop and stuck the matted and layered image to the card front.
This was a great card to do, not just because it was quick to make but also because of the fun sentiment. I made it for a friend and I hope that it will cheer them up.
Thanks for dropping in. Take care.
Pippa
Saturday, 17 January 2015
I think I am improving!
Maybe not with the frequency of posts but with my colouring. I have not made a finished project that I can share with you for a while because I have been busy practising colouring skin with my Copics. I cannot remember if I have already told you but I am working my way through a colouring course from Kit and Clowder under the direction of the very talented and extremely encouraging Alyce. This year to get everyone motivated again after Christmas she has started Boot Camp. Every two weeks an inspirational email comes in with handy tips and encouragement to keep going.
So I have been practising. I have a small problem with OCD and cannot move onto the next step until I am happy with the task I am currently doing. However as I am my own worst critic I am never satisfied which means I have coloured the same face 36 times and still counting! I think it is now time to move on. Looking at my first attempt compared to my latest attempt there is a vast improvement so maybe I can cut myself some slack.
Just to show you how bad it is here is a photo of some of my coloured images (only the skin is coloured because I have not yet got to the hair part of the course!)
You maybe wondering what has happened to the Spectrum Noirs. I still use them for the majority of my colouring, but for small images (the whole of this image is only 3.5cms) I do find the Copics easier to use because they have a much finer point on the brush nib.
Hopefully I will have a card done to share in the not too distant future, meanwhile back to the practising!
Thanks for dropping in. Take care.
Pippa
Tuesday, 13 January 2015
Butterfly Thanks
It has been a while since I last had an entry into the Butterfly Challenge. She now has two weeks to enter so with more time I decided to have a go. I also wanted to try my hand at the Polkadoodles Tic-Tac-Toe challenge. I needed a butterfly for the Butterfly challenge so found one from Poldadoodles which would then qualify for that challenge.
Materials used:
Polkadoodles Digi Stamp - Butterfly Flutter
Rubber Stampede - Thank you
Couture Creations Embossing Folder - Leaves
White stamping card
Spectrum Noir Pencils
Method:
I printed out several copies of the butterfly image onto white stamping card and coloured them with the Spectrum Noir Pencils. I opted for pencils rather than pens in an attempt to get a softer feel and veins on the wings. Using another A4 sheet of white card I dry embossed it with the leaves embossing folder then folded it to make the card blank.
Inside the card I stamped the sentiment and attached the base layer of the butterfly. I then cut two more images and used them to build up the wings on the butterfly in different layers.
For the Polkadoodles Challenge I have used the left hand column: sentiment, more than 2 layers (the butterfly's wings), and embossing (dry).
Thank you for dropping in. Take care.
Pippa
I would like to enter my card into:
Butterfly Challenge #21 Thank you with butterflies
Polkadoodles Challenge Week 1 - Tic Tac Toe
Materials used:
Polkadoodles Digi Stamp - Butterfly Flutter
Rubber Stampede - Thank you
Couture Creations Embossing Folder - Leaves
White stamping card
Spectrum Noir Pencils
Method:
I printed out several copies of the butterfly image onto white stamping card and coloured them with the Spectrum Noir Pencils. I opted for pencils rather than pens in an attempt to get a softer feel and veins on the wings. Using another A4 sheet of white card I dry embossed it with the leaves embossing folder then folded it to make the card blank.
Inside the card I stamped the sentiment and attached the base layer of the butterfly. I then cut two more images and used them to build up the wings on the butterfly in different layers.
For the Polkadoodles Challenge I have used the left hand column: sentiment, more than 2 layers (the butterfly's wings), and embossing (dry).
Thank you for dropping in. Take care.
Pippa
I would like to enter my card into:
Butterfly Challenge #21 Thank you with butterflies
Polkadoodles Challenge Week 1 - Tic Tac Toe
Wednesday, 7 January 2015
Dancing Queen
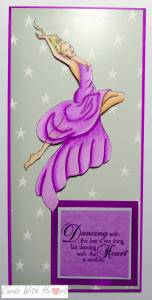
My youngest daughter has a birthday coming up soon. She just loves to dance and she is rather fond of fairies and so when I came across 'A spritely sprite' at Squigglefly I knew it was meant for her.
Materials used:
Squigglefly - A spritely sprite
Copic and Spectrum Noir pens
colouring card
snippets of silver, purple, black and patterned card
Wink of Stella Shimmer Clear
DL card blank
A5 card blank
Method:
I printed out my image to the desired size on card suitable for alcohol ink pens and coloured it in with the Copic and Spectrum Noir pens. I added some wink of stella to the wings then trimmed the image to size and matted and layered it onto silver and black card before attaching it to the card blank. I printed off the sentiment, matted it onto white card and attached to the card front.
(Detail showing the glimmer on the wings)
I coloured in a second image using purple instead of blue but the wings did not come out as I liked so I cut them off. Now I am not sure which one to send her! Her favourite colour is blue so I may send that one but then I am not sure if the wingless image looks the better coloured of the two. Her birthday is not until the end of the month so I have a couple of weeks to make a decision!
Thank you for dropping in. Take care.
Pippa
I would like to enter this card into the following challenges:
Your Scrapbook Place - anything goes
Pixie's Snippet's Playground - Week 158
Squigglefly Challenge 115 - glitter and/or sparkle
Pennys Challenge 209 - Anything goes
Materials used:
Squigglefly - A spritely sprite
Copic and Spectrum Noir pens
colouring card
snippets of silver, purple, black and patterned card
Wink of Stella Shimmer Clear
DL card blank
A5 card blank
Method:
I printed out my image to the desired size on card suitable for alcohol ink pens and coloured it in with the Copic and Spectrum Noir pens. I added some wink of stella to the wings then trimmed the image to size and matted and layered it onto silver and black card before attaching it to the card blank. I printed off the sentiment, matted it onto white card and attached to the card front.
(Detail showing the glimmer on the wings)
I coloured in a second image using purple instead of blue but the wings did not come out as I liked so I cut them off. Now I am not sure which one to send her! Her favourite colour is blue so I may send that one but then I am not sure if the wingless image looks the better coloured of the two. Her birthday is not until the end of the month so I have a couple of weeks to make a decision!
Thank you for dropping in. Take care.
Pippa

I would like to enter this card into the following challenges:
Your Scrapbook Place - anything goes
Pixie's Snippet's Playground - Week 158
Squigglefly Challenge 115 - glitter and/or sparkle
Pennys Challenge 209 - Anything goes
Thursday, 1 January 2015
Goodbye and thank you Deedee
I am a bit late with this post but we have had visitors coming and going over Christmas and New Year and as I have never been very good at organising scheduled posts it just did not get done.
Today's offering is my final design for Deedee's Digis. From today, Deedee, along with several other companies, are no longer selling to EU member states because of the change in the Vat Laws. I have really enjoyed the challenge of coming up with different projects for the past five weeks and it is quite ironic that my final effort was thought of before Deedee announced her decision to close up shop. So this is a 'Thank you' to Deedee as much as anything.
Materials used:
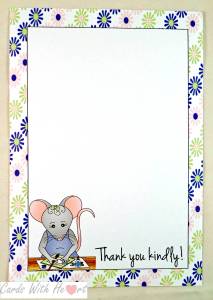
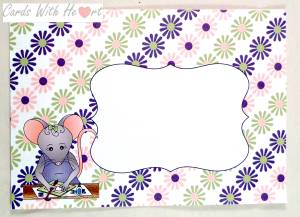
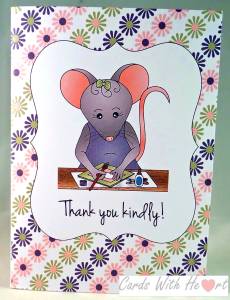
Deedee's Digis Handmade Happiness
printer paper and card
envelopes
Method:
This is a very quick set to make, all done on the computer and using the pre coloured images. I used a simple graphics program to design an A5 sheet of writing paper, an A6 notelet and the matching envelopes using the mouse image and a sentiment from the set. If you wanted to make your 'thank you's' more elaborate you could always use the line images and colour them yourself. There is also scope to decoupage the images as well. I stuck to a simple print out one because after Christmas there are a lot of thank you letters to write!
Thank you for dropping in and I wish you a Happy New Year.
Pippa
Subscribe to:
Posts (Atom)