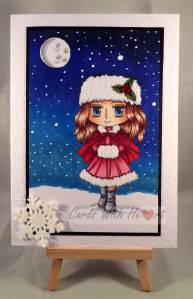
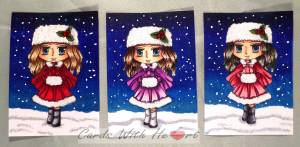
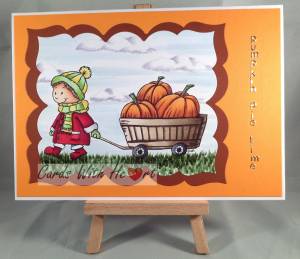
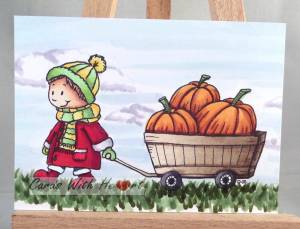
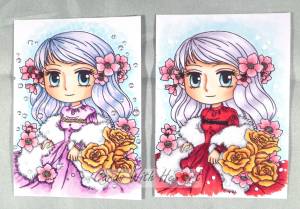
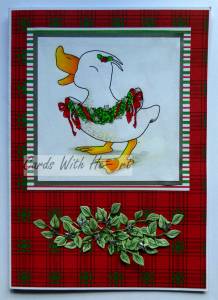
Every month on the Dragons Lair Designs Facebook Page there is a progressive challenge. A free image is made available and the only stipulation is that if you request the image then you are agreeing to make a project with it for the challenge. If you do not make the project you forfeit your entry to the next challenge. This time around it was a bit of a scramble as there was not much time to do it and it was over Christmas but I managed, it was too cute an image to miss out on.
Materials used:
Free image from Dragons Liar Designs Facebook Group
stamping card
designer paper from stash
grey card
shimmer paper
white A5 card blank
Britannia dies leaf die
silver star embellishments from stash
Polychromo pencils
Copic pens
sliver pen
Method:
Print out the image at the required size and colour with Polychromo pencils. Cut the image to size then mat with grey card and layer onto designer paper leaving a narrow border each time.
Cover the front of the card blank with a slightly smaller piece of designer paper.
Attach the topper to the card front.
Cut several sets of leaves from the shimmer paper and colour with Copic pens. Arrange in decorative swag and attach to the card front below the image. Add a scattering of silver star.
I was trying to get my leaves to mimic the swag that the little duck/goose is holding but I did not have any ribbon narrow or light enough to add to it.
Thank you for visiting. Take care.
Pippa
I would like to enter my card into the following challenges:
Crafty Girls Creations #11
Craft for the Craic - Christmas Cheer
Digitally Sweet #145 - Winter
Simply Papercraft Challenges #20
That's Crafty! - Anything Goes
Tuesday, 29 December 2015
Saturday, 26 December 2015
File the old and make space for the new!
As the new year approaches there are exciting opportunities waiting in the wings, some of them I already know about and some will be surprises! I have been invited to join a couple of DT teams from January, exciting times ahead.
Meanwhile Imagine That! Digis by Kris is also having a few changes in the new year so this month is the final progressive freebie challenge, I could not miss the last one!
Materials used:
Imagine That! Digis by Kris - Happy Howlidays
green and red mirri card
red glossy card
blending card
square white card blank
decorative square die
Happy Christmas acrylic stamp from stash
Copic pens
Diamond Sprinkles
Method:
Print out the image at the required size and colour with Copic pens.
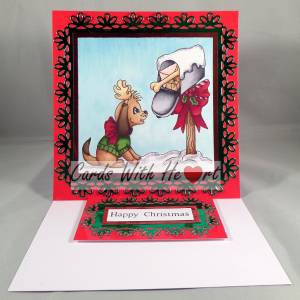
Fold the card blank to make an easel card. Cut a square of red glossy card to size and attach to the fold on the front of the card blank.
Die cut a decorative edged square from green mirri card and a mat for the image from red mirri card. Cut the image down to the correct size then mat and layer it onto the red and green card before attaching to the card front.
Use the Diamond Sprinkles to high light the snow.
For the stopper die cut a matching rectangle from the green mirri card a red matt. Stamp out the greeting and cut to size. Mat and layer it all up and attach inside the card with 3d foam pads.
The little dog looks very happy to find a bone in his mail box!
Thanks for dropping in. Take care.
Pippa
I would like to enter my card into the following challenges:
Imagine That! Digis by Kris - December DOTM
Crafting From the Heart #91
Our Crafty Corner #4
A Snowflakes Promise #12
Creative Card Crew #103 - Anything Goes
Deep Ocean Challenge #113 - Anything Goes
Holly Jolly Christmas Challenge - Anything Goes Christmas
Ike'sworld Challenges #53 - Santa is Coming
2 Creative Chicks Showcase #5
Crafts Galore Encore - Merry Christmas and Anything Goes
CHNC Challenge Extra for December 2015
Crafty Time - December
Just Keep on Crafting December 2015 Anything Goes Link-up
Sisters of Craft December - Anything Goes
Wednesday, 23 December 2015
From the Heart Progressive Freebie Challenge
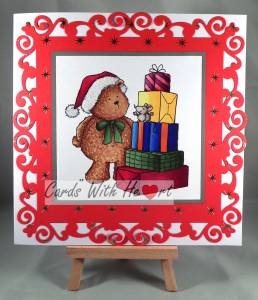
This month From the Heart have provided a great bear and presents image which would work well for both Christmas and December birthdays. That reminds me, it is a special little lady's 4th birthday on the 27th, better get organised for it!
Materials used:
From the Heart Stamps - Gift Stack Teddy Bear
red gold foiled star card
silver grey card
large square white card blank
decorative frame die set
blending card
Copic pens
glitter
Method:
Print image to desired size and colour with Copic pens.
Cut a large decorative frame from the red foiled card and use this to cut the image to the right size with a slightly larger mat cut from the silver grey card.
Assemble all the elements onto the front of the card blank.
Finally add glitter to the fur on the bear's hat.
I have not added a sentiment to this card yet because I am still undecided whether it will be a Christmas card or a birthday card!
Thanks for stopping by. Take care.
Pippa
I would like to enter my card into the following challenges:
From the Heart Stamps Progressive Freebie
A Gem of a Challenge #159 - Anything Christmas Goes
Crafty Friends #21- Anything Goes
Crafty Hazelnuts Christmas Challenge 260 - Anything goes as long as it's Christmas
613 Avenue #155 - Anything Goes
Lucy Sunshine Color Your World - Anything Goes
Tuesday, 22 December 2015
Sugar Cookies With Sprinkles
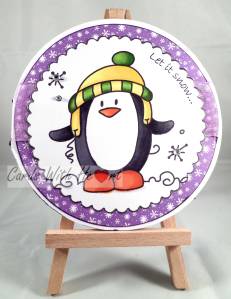
I wish! Day 5 of the Christmas Chaos and pick a treat time so I chose 'Sugar Cookies with Sprinkles - Make your card a shape other than Square or Rectangle, 3 pieces of Bling & Ribbon' and also make it funny.
Materials used:
Bugaboo Stamps - Little Penguin Winter
Bugaboo Stamps - Digi Paper: Purple Blue Winter
acrylic 'Let it Snow' stamp
black archival ink pad
blending card
Copic pens
purple sparkly ribbon
gems
scalloped edge die
circle cutter
white square card blank
Method:
Print out the image at the desired size and colour in with the Copics then cut with the scalloped edged circle die. Stamp 'Let it Snow' and edge the scallop with black ink.
Use a circle cutter or large circle die to cut the square card blank into a circle one, not forgetting to overlap the edge for the fold.
Print out the backing paper and cut a circle fractionally smaller than the card blank. Edge it with black ink.
Position the ribbon where you want it and stick it to the back of the circle paper before attaching it to the card blank.
Attach the topper to the card then add the gems to the snowflake shapes.
To make sure your card stands up cut a small piece from the bottom of the back of the card to act as a rest.
Have I ever said that I love penguins, they are my favourite animal/bird and have been for years. I find I cannot look at a penguin without smiling!
Thank you for visiting. Take care.
Pippa
I would like to enter my card into the following challenges:
Brown Sugar Challenge #177 - Anything Goes
Craft for the Craic: Christmas Cheer
Digitally 'Sweet' Challenges #145 - Winter
Simply Papercraft #20 - Anything Goes
Beccy's Place: December
Your Scrapbook Place December- Anything Goes (with Bugaboo)
2 Creative Chicks #5 - Anything Goes
Sweet Stamps December - Anything Goes
Inspiration Destination #64 - Anything Goes
Monday, 21 December 2015
I did do them all in time - honest!
Well you may have been wondering where I have been and why I did not finish the 'Catch the Bug Christmas Chaos' challenges. Actually I did get all seven done before the deadline but our internet went down for two days so I could not post them in time. On the bright side I still have four projects to share which will tide me over the Christmas period.
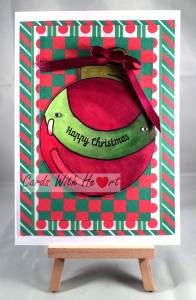
The fourth challenge was a recipe.
Materials used:
Bugaboo Stamps - Ornament
Deedee's Digis - Christmas Cuties (Deedee is closing the shop at the end of the year and is having a 75% off sale)
acrylic greetings stamp from stash
black archival ink pad
white A5 card blank
snippet of red ribbon
gems
Copic pens
blending card
gold pen
Method:
Print out the ornament to the desired size onto blending card. Also print out three sheets of backing paper from the Christmas Cuties set.
Colour in the ornament with the Copics and gold pen and fussy cut it out then stamp the sentiment across the middle.
Cut the backing paper into 3 different size mats and layer up on the card front.
Use a shaping tool to emboss the back of the ornament to 'puff' it out then stick to the card with foam pads. Tie the ribbon into a bow and attach to the top of the ornament. Finally add two gems.
It was certainly a challenge trying to work out how to incorporate all the elements needed to meet the criteria of the challenge.
Thank you for dropping in. Take care.
Pippa
I would like to enter my card into the following challenges:
2 Crafty Girls #8 - Anything Goes
Cardz 4 Galz Challenge #12 - Christmas
Crafting With An Attitude #10 - Anything Goes
Wednesday, 9 December 2015
Day 3 of Christmas Chaos
On the third day of Chaos, Catch the Bug gave to me, an interesting colour challenge! I do recall having a go at a colour challenge before but it was a while ago.
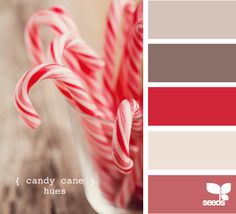
I see brown greys and dusky rose pinks in this so that is the colour scheme I have used for my card.
Materials used:
Bugaboo Stamp - Christmas SB Ornament
15 cm square white card blank
grey card
2 designer Christmas papers from stash
white stamping card
fancy edge cutting die (freebie from a magazine but I think it is Die'sire)
Copic pens
small snowflake stamp (Creative Stamping Magazine)
black archival ink pad
Method:
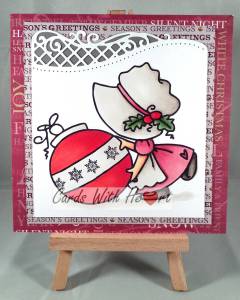
Print out the image to the desired size and colour in with the Copics. (I have tried to stick as close to the colours in the photo as I could, but the holly had to be green!) Stamp out the little snowflakes in black ink along the middle of the bauble.
Use the die to cut the top left corner then cut the image square from that corner. Back onto grey card cutting around all the edges.
Cover the front of the card blank with one paper and mat the image onto another. Attach the matted image to the front of the card.
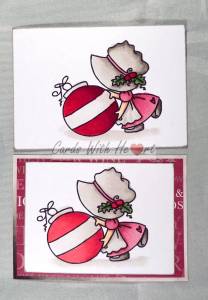
I also made a couple of ATC's using the smaller images I had printed to test the colours on.
I am now only two days behind so I may catch up in time! Thanks for popping in. Take care.
Pippa
I would like to enter my card into the following challenges:
Catch the Bug Christmas Chaos Day 3
Crafts Galore Encore - Christmas
Crafty Hazlenuts Christmas Challenge Extra
Creative Craft Cottage #53
Creatalicious Challenges #81 - Merry Christmas
The Sisters of Craft- December
A Gem of a Challenge #159 - Anything Christmas goes
Tuesday, 8 December 2015
Day 2 of Christmas Chaos
On the second day of chaos Catch the Bug gave to us a sketch!
I have not attempted many sketches but was determined to give it a go in my effort to get as many of the challenges done as I could.
Materials used:
Bugaboo Stamps - Christmas Doodles
white card to make up a three panelled card blank
designer Christmas paper from stash
circle dies
Quickie glue pen
Copic pens
narrow ribbon
black glitter
Method:
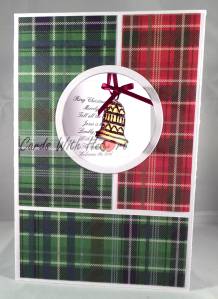
Print out the design and a reversed image at the required size. (I only wanted to use the bell so I cropped the image first). Colour in with Copics and fussy cut them out.
Use the glue pen to add glue over the drawn decorative parts of the bell and add black glitter.
When the glue is dry stick the bells back to back.
Make up a three panel card blank from white card (if you do not have one already made). Cut a circle from the middle panel. Cut the designer paper to size and attach to the card.
Attach a length of ribbon through the ring at the top of the bell and use it to hang the bell in the aperture attaching the ribbon on the back of the centre panel. Add a bow from the same ribbon at the top of the bell.
Fold the right hand panel in and attach to the middle panel to complete the card base.
Print out the words you want to use to put behind the aperture and cut with a circle die. Attach to the back inside of the card or to the insert if using one, so that it shows through the aperture.
I enjoyed making this card even though it was a bit more complicated to construct than most of my cards.
Thank you for visiting. Take care.
Pippa
I would like to enter my card into the following challenges:
Catch the Bug Christmas Chaos Day 2
Beccy's Place - December
Stamping Sensations December - Anything goes with stamp and ribbon
Artistic Inspirations #146
Come and Get It Challenges - December
Pile It On #95 - Anything Christmas/Winter
That Craft Place - Christmas
Deedee sponsoring the Clear it Out Challenge
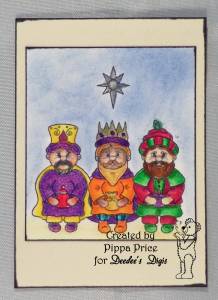
Deedee's Digi's is sponsoring the latest Clear It Out Challenge with the theme of anything goes. For my sample I used the Wise Men set to make a card and an ATC.
Materials used:
Deedee's Digis - Wise Men
Derwent colouring paper
Polychromo pencils
silver and gold pens
black pen
artists chalks in blues and yellows
black , cream and blue card
small greetings foam stamp
Method:
Print out the image to the size required. Colour the wise men with pencils and the background with chalk. Trim and edge with a silver pen. Add silver and gold to the star, the middle wise man's crown and accents on the presents.
Trim the coloured image to size and mat onto black card.
Cover the front of the card blank with blue card slightly smaller in size to leave a white border around the edges. Attach the topper at the top of the card and stamp the sentiment underneath in the middle.
For the ATC print out the image at the correct size and colour as before. Edge the image and a cream ATC blank with a black pen and attach the image to the ATC card.
Sadly Deedee is closing down at the end of the year so if you like her images you need to get them now, there is even a 75% sale going on so what are you waiting for?
Thank you for visiting. Take care.
Pippa
I would like to enter my card into the following challenges:
Brown Sugar #175
Creative Fingers #99
Funday Friday Challenge #117
Pattie's Creations #117
Simply Papercraft Challenges #19
Sunday, 6 December 2015
A week of chaos at Bugaboo!
Bugaboo stamps have just started a week of chaos with a challenge every day for a week. This year I am hoping to get an entry in for each one so be warned it could mean more than one post on a couple of days!
The first challenge is Anything goes with a 'Here comes Santa Claus' theme. I chose to make a quick and easy ATC card.
Materials used:
Bugaboo stamp - Sign it Santa
acrylic greeting stamp
black archival ink
Stamping card
Copic pens
Method:
Print out the image at the required size, colour in with the pens then cut to ATC size.
Use black ink and the greeting stamp to add a sentiment to the sign Santa is holding then run a black pen around the edges.
I did say it was a quick project but it was all time allows. As Christmas approaches it does get busier and the past few days have been spent editing the film of our Key Stage 1 Nativity. It's quite a fiddly job lining up the right narration with the right clips in the right order but I think I have cracked it now!
Thanks for dropping by. Take care.
Pippa
I would like to enter my card into:
Bugaboo's 3rd Annual Christmas Chaos Day 1
Crafting With An Attitude #10
Crafty Girls Creations #10
Beccy's Place - December
2 Creative Chicks Showcase #5
Artistic Inspirations #146
Inspiration Destination #62
Tuesday, 1 December 2015
Art By Mi Ran Progressive Freebie Challenge
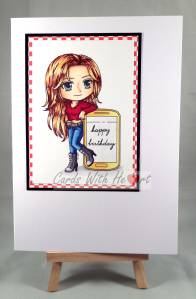
Just for a change the image for this months Art By Mi Ran challenge is not harvest, thanksgiving or Christmas although it could be used for any of them!
Materials used:
Art by Mi Ran image - Apply via Facebook Page
stamping card
white A5 card blank
blue, black, red chequered card
Copic pens
Method:
Print out the image at the required size and colour with Copics.
Trim image to size then mat and layer onto blue and black card leaving a narrow border around the edges each time.
Attach topper to card base.
I have not added a sentiment to this card. The image will work for so many different occasions that I decided to leave it blank for now so that I have an emergency one to hand if needed!
I made a second card using red chequered card for the mat. This time I took out the phone image and stamped a greeting in it's place.
Thanks for dropping in. Take care.
Pippa
I would like to enter my card into the following challenges:
Art by Mi Ran Facebook page progressive freebie
Crafty Girls Creations
Your Scrapbook Place - December
Crafting With Friends #11
Creative Fingers #98
Sunday, 29 November 2015
Deedee's Sponsoring Outlawz
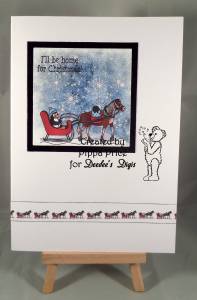
Today Deedee is sponsoring the Outlawz CAS Challenge with the theme the mode of transportation you'd use to travel to see family or friends for the holidays or any occasion. Deedee produced a new set for the occasion.
I have always wanted to go for a sleigh ride on snow so choosing which image to use for my sample was easy, and it has penguins too!
I used the precoloured image for my card.
Materials used:
Deedee's Digi Set - Here Comes Christmas
Bearly Mine Background Papers (out of business)
white A5 card blank
black card
printing card and printing paper
black pen
Method:
Using a graphics programme assemble the background paper with the sleigh and sentiment on top at the required size. Trim and then matt onto black card.
To make the paper ribbon use the graphics programme to produce a line of small sleigh images. Cut into a strip at the size you need and run a black pen along the top and bottom of the strip.
Attach the ribbon and and the matted image onto the front of the card.
If my card has inspired you why not head over to the Outlawz Challenges and have a go yourself.
The weather forecast for the UK is not hopeful for getting snow this winter, but then again forecasters are not always accurate with their predictions.
Thank you for visiting. Take care.
Pippa
Friday, 27 November 2015
Playing with photographs
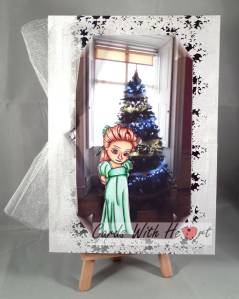
Sometimes it is difficult to find just the right background for a project. I wanted to use the girl from the progressive freebie image from Dragons Lair and put her in front of a tree. Of course I did not decide this until after I had printed her out and coloured her in which made finding a suitable tree somewhat tricky. Then I remembered that I took some photographs of Stourhead (a local National Trust property) decorated for Christmas last year. Problem solved!
Materials used:
Dragons Lair Free Digital Image
blending card
Copic pens
designer card from Trimcraft Silent Night pad
printer card
white tulle
A5 white card blank
Method:
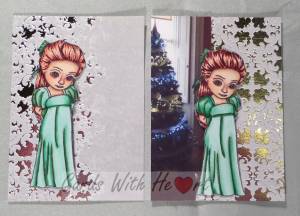
Print out the image to the required size and colour in with the Copic pens. Fussy cut the image (I cut the fairy off mine because I did not want to use it this time.)
Print out the background photo to the required size and trim.
Cover the front of an A5 card blank with the designer card then attach the photo.
Glue the girl to the card with 3d glue or foam pads.
Finally tie a knot in the middle of a length of tulle and glue to the left side of the card.
I also made a couple of ATC's while I was at it. I usually print out a smaller size of the image I am using to try out colours on. Most of the time these smaller images now turn out not too bad and make good ATC's.
Thank you for dropping in. Take care.
Pippa
I would like to enter my card into the following challenges:
Dragons Lair Designs Facebook Challenge
Christmas Card Challenge #51
Lil Patch of Crafty Friends #22
Always Playing With Paper #52
Crafting From The Heart #87
Craft Your Passion #289
The Cutie Pie Challenge #93 - Cute and Christmassy
Make My Monday - Oh Christmas Tree!
A Snowflakes Promise #10
Tuesday, 24 November 2015
Awe and wonder
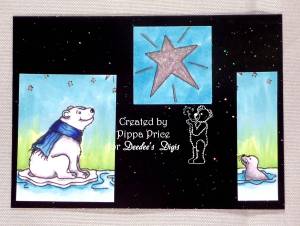
I have always wanted to see the Northern Lights, there is something truly amazing about the spectacular light show. Now I know that scientists will be able to explain exactly what is happening and why but for me it just shows the amazing creativity of God when he established the physical laws of the universe.
My card today uses the image for the current DOM at Deedee's Digis (I did say it would be back!) If you like this image then now is a good time to hop on over to Deedee's shop because there is a big sale going on now so don't miss out.
Materials used:
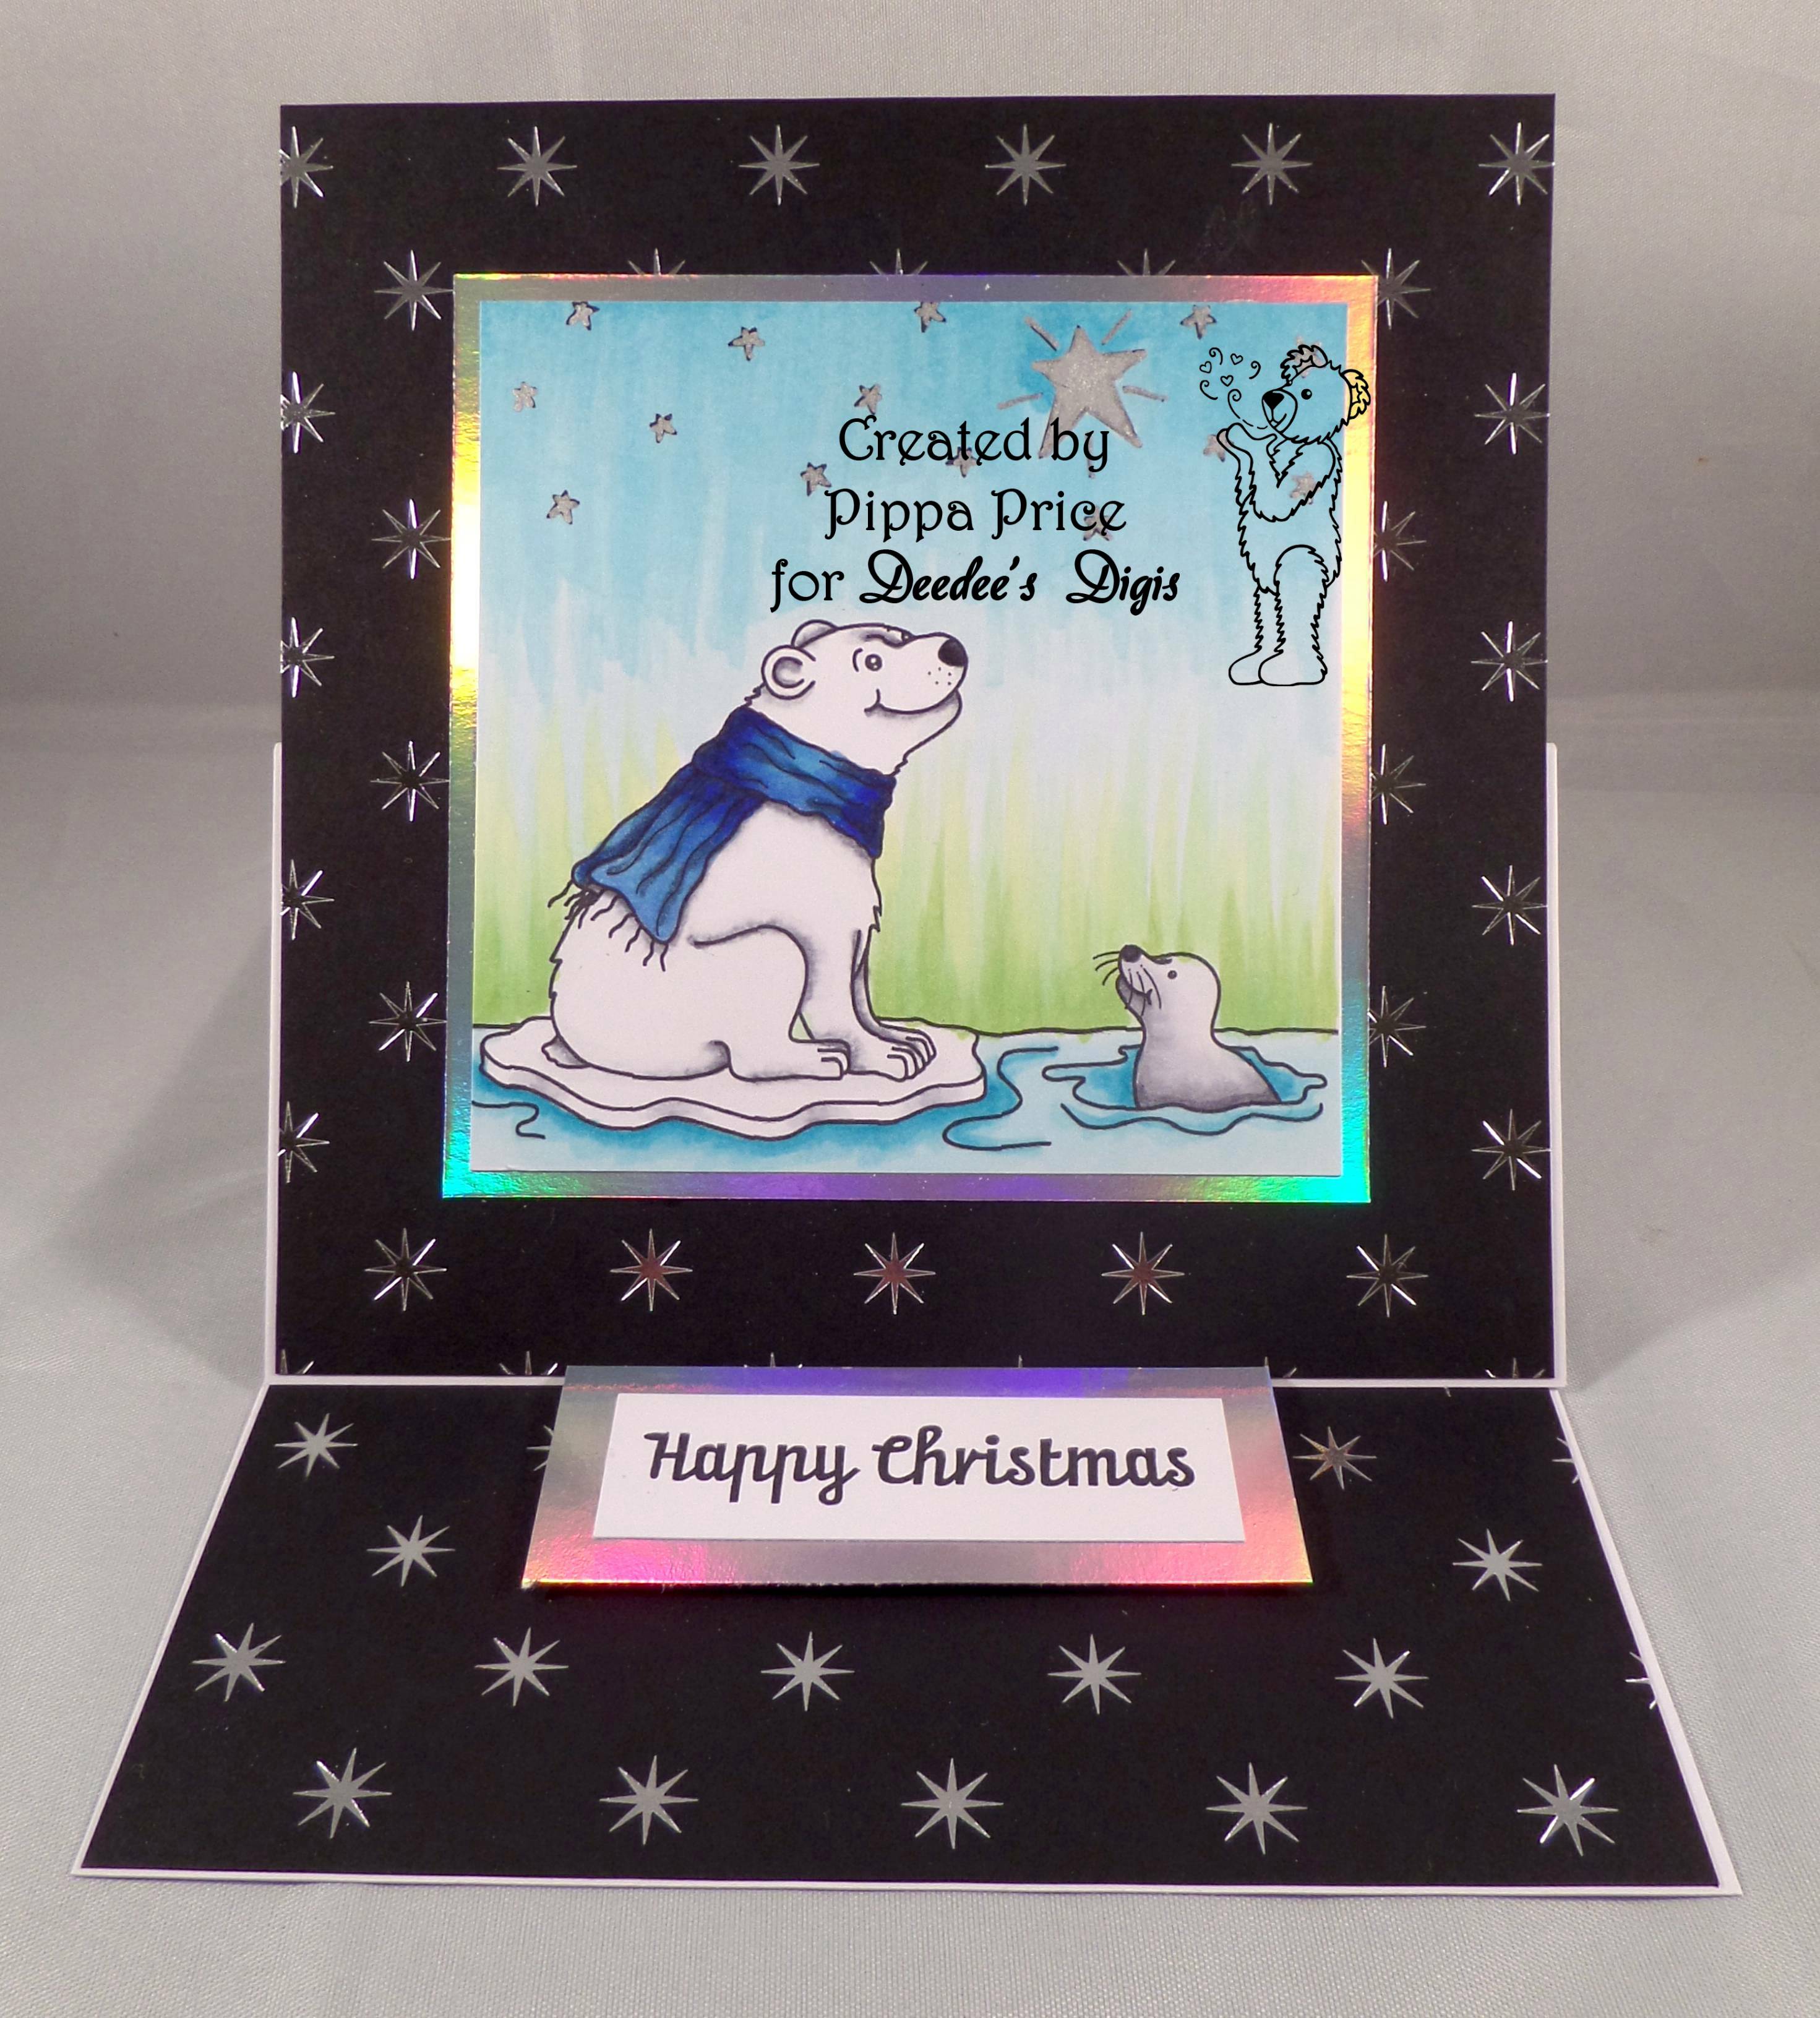
Deedee's Digi Set - Polar Peace
stamping card
15cm square white card blank
silver mirri card
black foiled silver star card from stash
acrlyic greeting stamp
archival black ink pad
silver pen
Copic pens
Method:
Print out the image at the required size and colour with the Copics. Trim and matt onto silver mirri card.
Fold the card blank to make an easel card. Cover the front of the card blank (sticking down only at the bottom) and the inside face with the foiled card.
Stamp the greeting onto a scrap of white card and matt onto silver mirri card. Attach to inside of card to make the stopper using foam pads.
As I type this the temperature is dropping rapidly as sunset approaches. In fact here in the UK the weather has at last caught up with the season and become chillier, there was even a frost the past couple of mornings. Maybe the flowers will stop behaving as if it is spring and go back to sleep now!
Thank you for stopping by. Take care.
Pippa
I would like to enter my card into the following challenges:
Crafty Girls Creations #9
Crafting With An Attitude #9
Brown Sugar Challenge #173
Crafting With Friends #11
Creative Fingers Challenge Blog #98
Simply Papercraft #18
2 Creative Chicks #4
Sisters of Craft - November
Lil' Patch of Crafty Friends #22
Inspiration Destination #60
Wednesday, 18 November 2015
Path of Positivity - Gratefulness
The theme for the current challenge at Path of Positivity is Gratefulness. So often we loose our happiness in life through the green-eyed monster jealousy which then steals our awareness of how much we really have. If we are constantly comparing ourselves to those who are richer, look nicer, have better jobs, are famous, are healthier, and so on then we will always be miserable and never grateful. Once we start to see those who are actually worse off than us the gratitude flows and happiness increases as we become more and more aware of how much we have to be grateful about. It does not take much effort or imagination to find those who are struggling in life and who have so much less than us, you only have to read a newspaper or watch or listen to the news especially in recent times. As I was thinking about this challenge there were a series of terrorist attacks going on all over the world. In Beirut a suicide bomber claimed 43 lives and injured 239, stabbings of Israelis in Italy and Israel and of course the most recent attacks in Paris claiming 129 lives. There are wars going on in many areas of the world and famine is once again stalking African countries. Many communities are on the move trying to escape war and terror leading to the largest migration of people in living history.
Looking at the bigger picture puts our problems into perspective. Yes you may not have much money, yes you may be stuck in a dead end job and taken for granted, yes you may be suffering from illness and disease but in comparison to so many others you are rich indeed. So look outwards at what you do have and practice gratitude instead of envy and be happier.
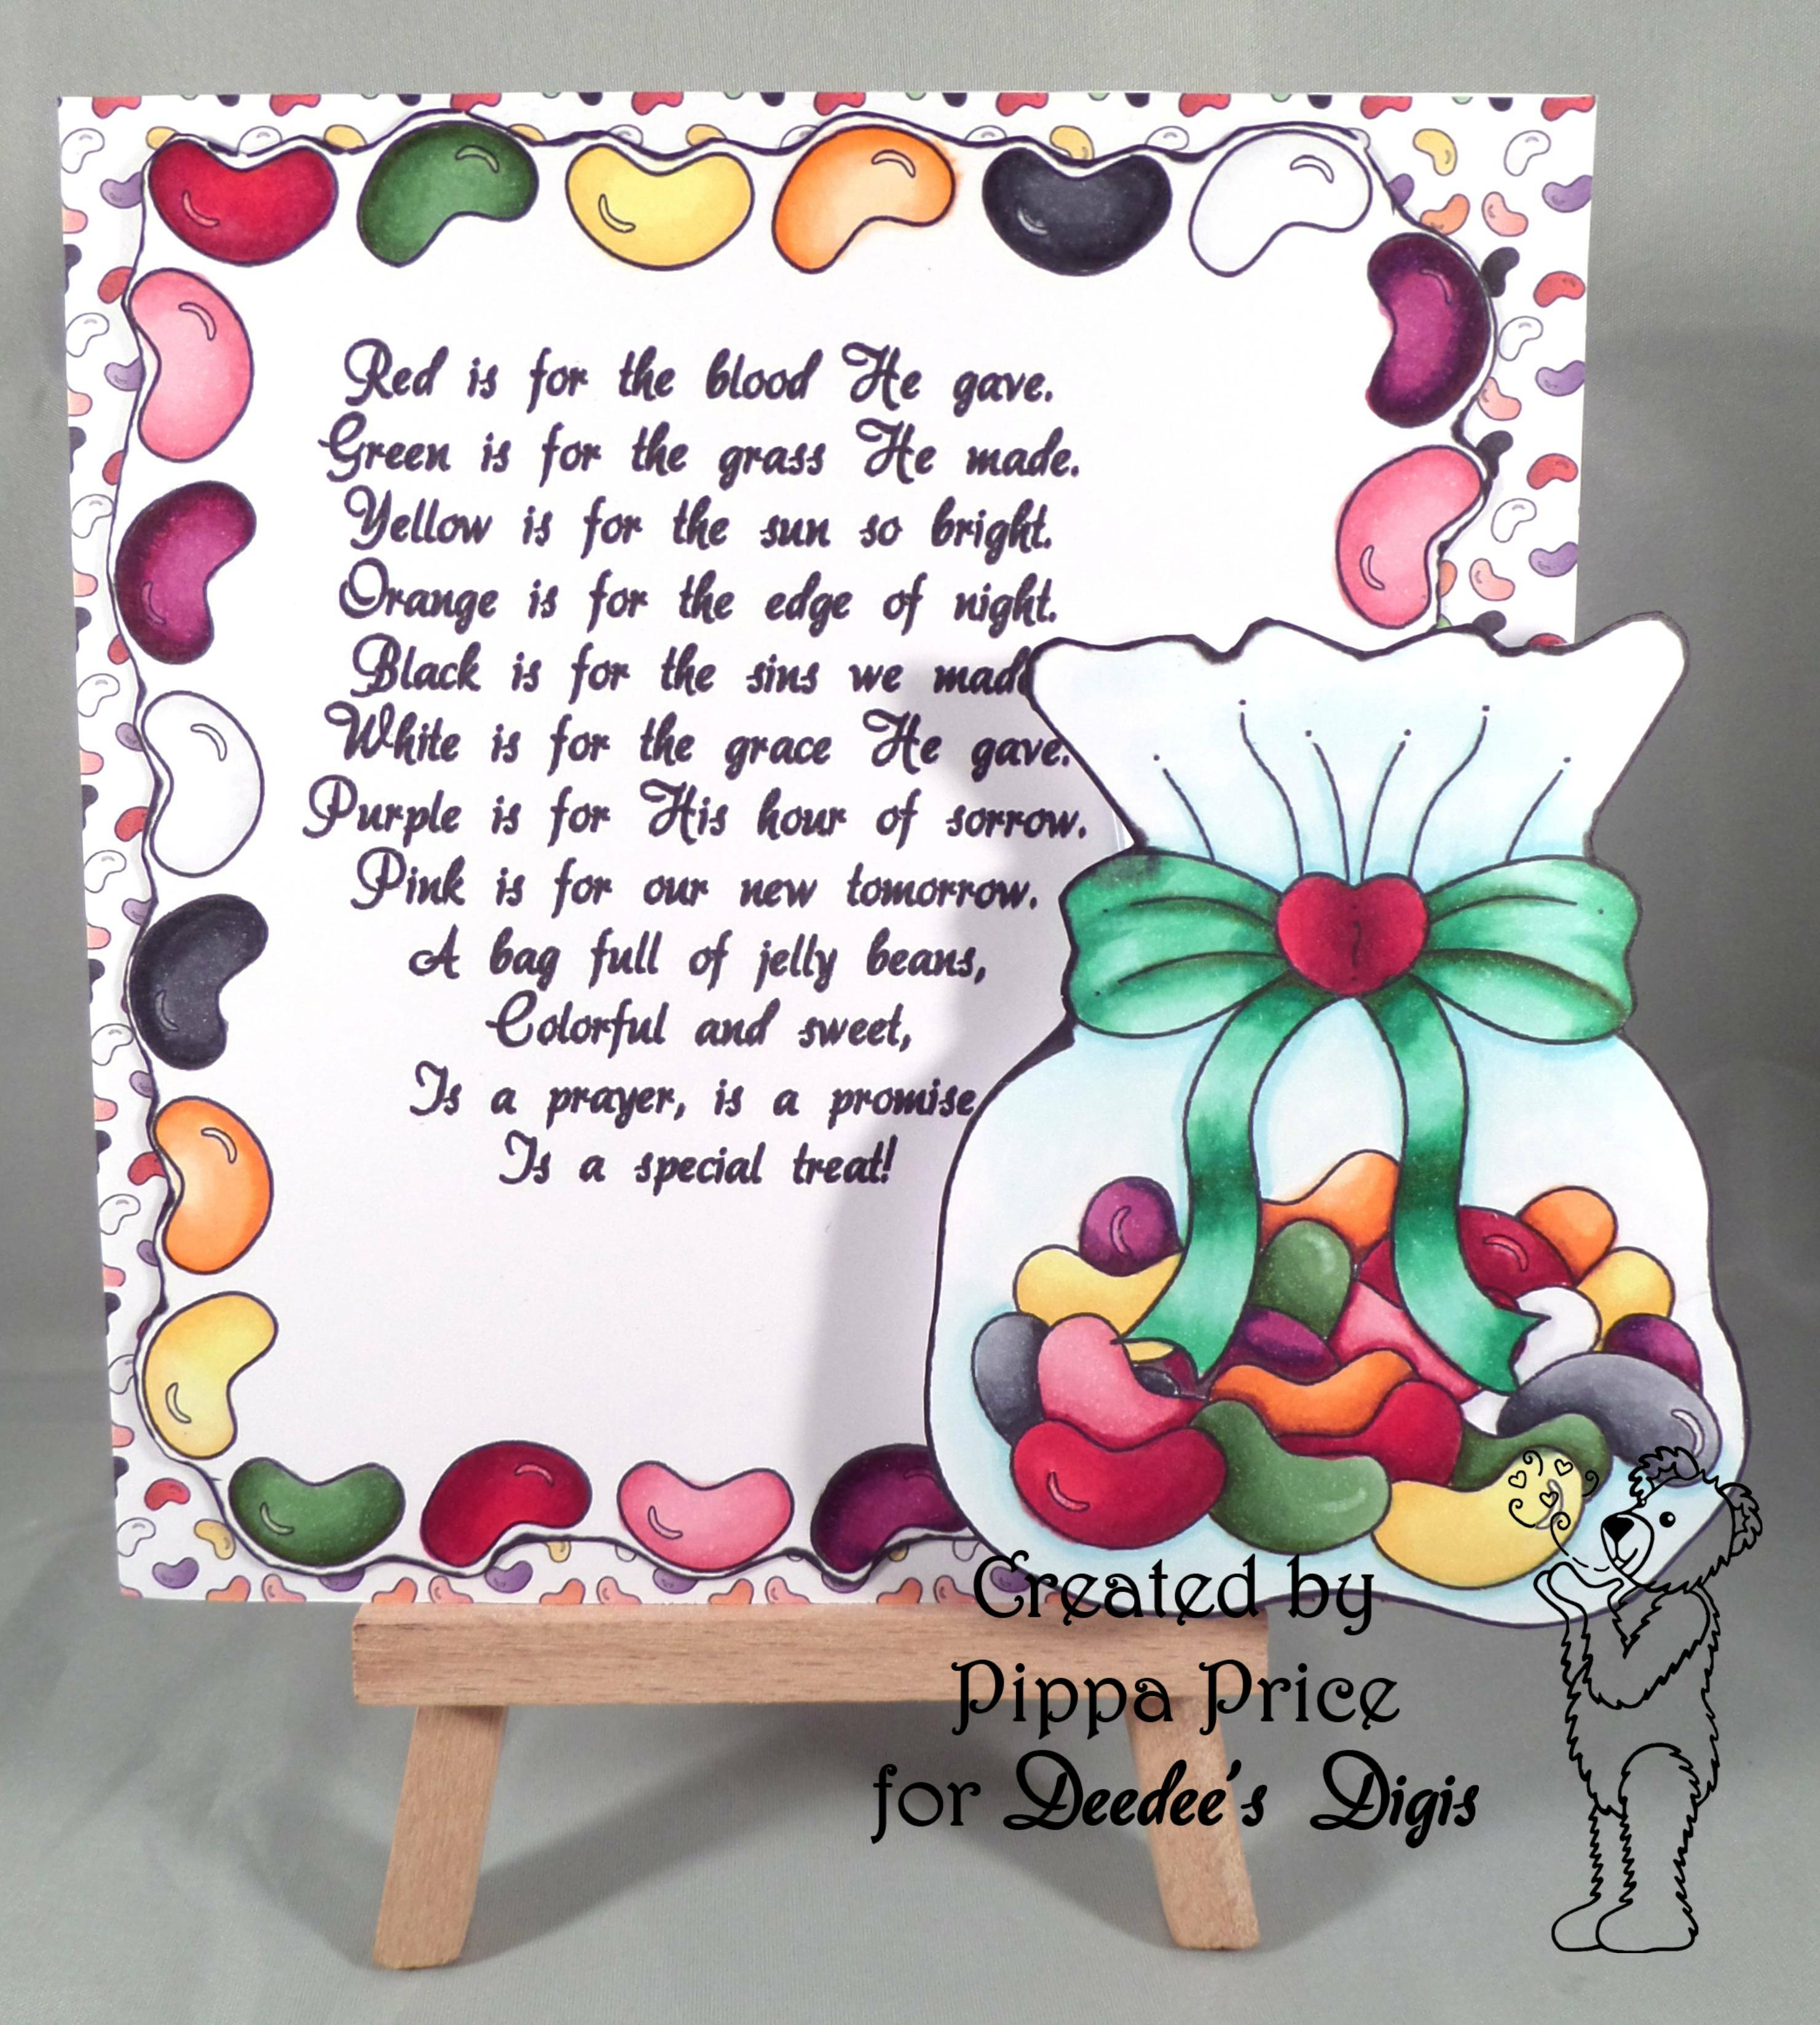
So what have I got to be grateful about? So much it is hard to know where to start. Deciding what to focus on to illustrate with a card was really difficult so I decided to focus on the thing that I am most grateful for, God's love for his world and for me put into practice when his son Jesus died to take away my sin and the sin of the world. So I know that no matter how desperate a situation is, be it personal or world wide, God is in control and his plan is working itself out for the world even if we do not understand it.
Materials used:
Deedee's Digi Set - Jellybean Prayer
stamping card
printer paper
white square card blank
snippet of scrap white card
Copic Pens
Method:
Print out the required images to the correct size. (I made the frame for the verse using the jellybean border, cropping it to size then copied and pasted it flipping the image on alternate sides.) Colour all images in with Copics.
Print out a sheet of the jellybean backing paper that comes with the set.
Cut around the outside edge of the framed verse and edge with a black pen. Do the same for the bag of beans image.
Cover the front of the card blank with the printed patterned paper and attach the verse to it.
Take a strip of scrap white card and snip along both the long edges. Fold both snipped edges in leaving a narrow part between them. Bend the snipped card around the jellybean bag image and trim to length then glue the tabs to the back of the image. When dry glue the tabs on the other side to the front of the card. Your jellybean bag should now be able to hold a small bag of jellybeans.
This card would be great for Easter with some jellybeans inside the bag. The tricky part will be finding the right coloured beans!
I hope your week brings plenty of opportunities for feeling and expressing gratitude. Thank you for visiting. Take care.
Pippa
I would like to enter my card into the following challenges:
Path of Positivity #32 - Gratefulness
Lil Patch of Crafty Friends #22
Crafting From the Heart #86
Craft Your Passion #288
Love to Scrap Challenge Blog #66
2 Creative Chicks Showcase #4
Monday, 16 November 2015
I've got my silly head on today!
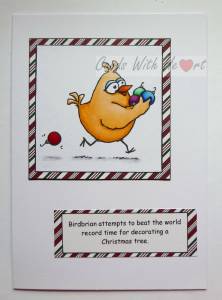
Birdbrain features in this month's image for the free stamp of the month challenge over at From the Heart Stamps. For some reason this image just tickled my sense of humour!
Materials used:
From the Heart - Deck the Halls Birdbrain
white stamping card
patterned paper and card from stash
A5 white card blank
Copic pens
square dies
Method:
Print out the image and sentiment to the size you require.
Colour image with Copics then die cut the image and trim the sentiment to size and edge with a black pen.
Die cut a mat slightly larger for the image and cut a mat for the sentiment out of patterned paper and again edge with a black pen before attaching image and sentiment.
Attach both toppers to the front of the card.
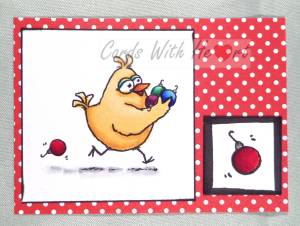
For the ATC print and colour images as for the card. (I cropped out the bauble and resized it to make the inchie.) Cut images to size and edge with a black pen.
Cut and ATC blank from patterned card and attach toppers to it.
Hopefully you are not groaning at the terrible humour! Thanks for stopping for a while. Take care.
Pippa
I would like to enter my card into the following challenges:
From the Heart Free Stamp of the Month - November
2 Creative Chicks Showcase #4
Creative Craft Cottage #51
Your Scrapbook Place - November
Creative Moments #81
Inspiration Destination #59
Crafting With An Attitude #9
Crafting With Friends #10
Creative Fingers #97
Jo's Scrap Shack FFC #114
Saturday, 14 November 2015
Anything but a card.
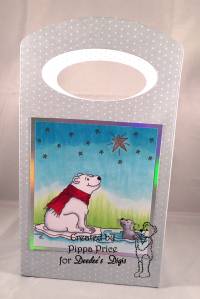
Deedee's Digis is sponsoring the Allsorts Challenge which runs for a week from today. The theme this week is 'Anything But a Card'. My DT samples for this challenge are a gift bag and a couple of very quick ATC's.
Materials used:
Deedee's Digi Stamp Set - Polar Peace (still at special offer price)
1" square punch
stamping card
silver mirri card
black sparkle card
Trimcraft Silent Night designer card
x - cut gift bag die
Copic pens
silver pen
Method:
Print out the images at the desired size onto the blending card and colour in with the Copics and the silver pen (for the stars).
Use the die to cut the bag out of designer card. Glue the two parts together but do not make up the bag, keep it so it still lies flat.
Mat the image onto silver mirri card leaving a narrow border around the edges. Then attach the matted image onto the front of the bag.
Join the last edge of the bag and secure the bottom with glue.
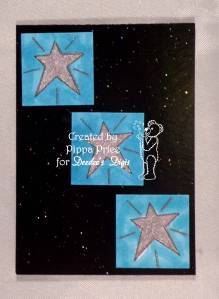
For the ATC's print out a smaller image and colour in. Trim down to make up the two panels.
To make the stars crop the image so that you only have the star and resize accordingly. (I made mine so they would fit on an inchie.) Colour the stars with the silver pen and punch them out.
Cut the ATC blanks from black sparkle card and arrange the elements on the front before sticking them down.
This will not be the last outing for this particular set from Deedee there is still one more make to come before the end of the month!
Thanks for dropping by. Take care.
Pippa
I would like to enter my project into the following challenges:
A Snowflakes Promise #9
Fan-Tastic Tuesday #111 - Anything goes with a twist: something beginning with B (bag!)
Inky Chicks #59 - Silent Night
Papertake Weekly Challenge - Christmas Critters
2 Creative Chicks Showcase #4
Inspiration Destination #59
Thursday, 12 November 2015
Wow, where did that week go?
I cannot believe that it is over a week since my last post! I have the feeling things are only going to get busier with the run up to Christmas and wedding invitations to make as well! Still one of the perks of organizing the Christingle Service at church is that I get to order 2.5 kgs of dolly mixtures and jelly tots!
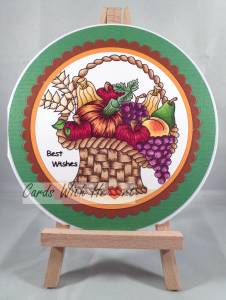
Today's card continues the harvest/thanksgiving theme with a lovely basket of goodies from Imagine That. It is the freebie image for taking part in the progressive challenge last month. If you want to join in the fun you can purchase it at a special price, just follow the link below.
Materials used:
Imagine That - Harvest Basket
stamping card
green, brown and orange card
15cm square white card blank
circle die
scalloped circle die
manual circle cutter
black peel off greetings stickers
Copic pens
Method:
Print out the image at the required size on stamping card and colour with the Copics.
Cut image with circle die and cut brown scalloped mat with the scalloped circle die.
Cut circle card base from a 15cm square white card blank and a slightly smaller circle of green card using the circle cutter. Snip a small bit of the bottom of the card blank and the green mat so that the card stands up.
Assemble image and mats and attach to card blank.
Attach stickers to make up greeting.
For those of you who do not know Imagine that images they are supplied with coloured versions which are useful for quick makes and also if you do not enjoy colouring.
Thanks for dropping in. Take care.
Pippa
I would like to enter my card into the following challenges:
Imagine That DOTM -November
Crafting With Friends #10
Art By Mi Ran Challenge #44
Creative Fingers #97
Simply Papercraft #17
Not Just Cards #26
2 Creative Chicks Showcase #4
Inspiration Destination #59
613 Avenue Create #149
Lil Patch of Crafty Friends #21
Crafting From the Heart #85
Outlawz Friday Colouring Challenge - Cooking/Food
Wednesday, 4 November 2015
Beautiful boxed butterflies on a dreary dismal dank day!
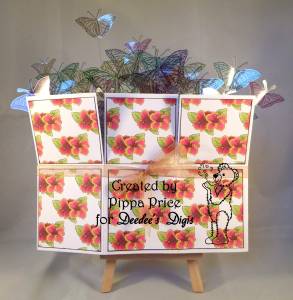
For the last couple of days we have been experiencing Autumn weather, fog, drizzle, rain, wind and just to add to the misery it gets dark so early. Actually today it did not really ever get light with all the grey cloud and drizzle about. So what better way to cheer up a cheerless day than with a box of butterflies!
[caption id="attachment_1859" align="alignleft" width="293"] Closed box[/caption]
Materials used:
Deedee's Digi set- Bloom and Grow and Framed Comfort
exploding box die set
white card
white printing paper
printable acetate
construction weight acetate
pastel orange organza ribbon
gold peel off letters and numbers
Method:
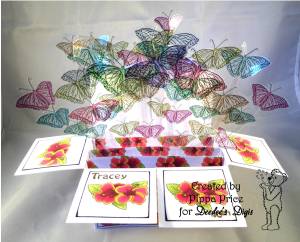
I used one of the flowers from the Bloom and Grow set to make a sheet of backing paper on the computer and printed it off. I used the die to cut the exploding box elements twice from white card and constructed a double size one. I cut panels from the backing paper to cover the outside of the box and the inner 'shelves' of the box.
[caption id="attachment_1860" align="alignright" width="300"] Opened box[/caption]
Using a basic graphics programme I made up a sheet of 40 butterflies of different sizes and recoloured them in different pastel shades. The butterfly image came from the Framed Comfort set. I printed the butterflies onto the acetate and cut them out. I then used strips of construction acetate and attached one to each butterfly. I then arrange my butterflies on their holding strips inside the box, sticking them to the inner strips. Finally I added the gold letters and numbers to make my greeting. When the box is folded flat it is kept together with the orange ribbon tied with a bow.
With so many butterflies to fit into the box and even with using a double sized box I still had butterflies sticking out when it was folded flat. They acted as a teaser as to what else might be in the box! As the butterflies are acetate the light shines through them and makes them look ethereal. I made the card for the 40th birthday of our former youth worker, hence the 40 carefully cut out butterflies!
Thanks for stopping by. Take care.
Pippa
I would like to enter my box of butterflies into the following challenges:
2 Creative Chicks Showcase #4
Sisters of Craft - November Challenge
Artistic Inspirations #143 Anything Goes/twist birthdays
Crafting From the Heart #84
Craft Your Passion #286
Get Creative Challenges #27 - Birthday
Not Just Cards #26
Doodle Pantry Ants in my Pantry #11
Papertake Weekly Challenge - Anything Goes
Creative Card Crew #99 - Off the Edge
Through the Craftroom Door November 3-11
Little Claire's Monthly Digi Stamp Challenge #11
Monday, 2 November 2015
Who's walking who?
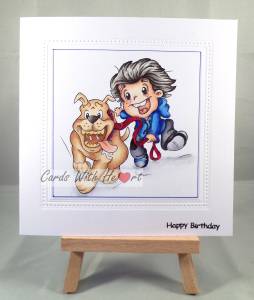
My brother's birthday is coming up this month and I usually make him a card with something relating to cars on it. However he also has a mad dog so when I saw this image at The Paper Shelter, I just had to use it. I did do a bit of genetic engineering on the dog because my brother's dog is more lab/retriever than rottweiler!
Materials used:
The Paper Shelter Digi Set - My Cute Rottweiler
white stamping card
white A5 card blank
Spellbinders Die - Triple Floral
Copics
black Happy Birthday peel-off
Method:
I printed out the line art version of the image onto stamping card and coloured it with the copics. I tried to make the dog the right colours but did not have a photograph so it is guess work. My brother is a tad older than the lad in the image so I have done the greying hair to try to make it more realistic! (He'll love me for that but then he is younger than me.)
I cut the card blank down to make a 15cm square card then used the die to emboss the border. I trimmed my image down to fit and edged it with a blue pen before attaching it to the front of the card.
As he does not read my blog there is no danger of spoiling the surprise by posting this before his birthday, I just hope he likes it!
Thanks for stopping in. Take care.
Pippa
I would like to enter my card into the following challenges:
Crafts Galore Encore - Use a stamp or digi image
Sisters of Craft - November
Your Scrapbook Place
613 Avenue Create
Glitter 'N' Sparkle Challenge #161
Lil Patch of Crafty Friends #21
Art By Mi Ran #44
Crafting With Friends #9
Creative Fingers #96
Jo's Scrapshack FFC #112 "Anything Goes"
Outlawz Friday Colouring Challenge
Not Just Cards #26
2 Creative Chicks Showcase #4
Sweet Stamps - November
Inspiration Destination #57
Wednesday, 28 October 2015
Path of Positivity - Resiliency
I really enjoy the Path of Positivity Challenges, they always have a theme that gets you thinking. The problem is they do not get many entries, I suspect because the unusual themes put people off. But really it is not too difficult to think of something that fits and your project does not have to be exclusively about the theme, it could be something that goes with your ideas on the theme as mine does this time around. I probably am not explaining it very well so why not pop along to the website (link at the bottom of this post) and take a look. It would be really great to have more entries in the challenge.
So on with my take on this month's theme - resiliency. Looking at my life and the lives of friends and family I could think of lots of examples of resiliency but decided to use our Rebecca Claire Rose. While we are living in a vicarage we rented out our little cottage so we could keep paying the mortgage and have somewhere to live when my husband retires. In the garden was a small but healthy Rebecca Claire Rose. The rose means a lot because we bought it when our daughter, Rebecca Claire, was young and although the variety was a prize winner in the past they dropped out of favour and it is really hard to get hold of one now. What we had not thought of was that over the years some of our tenants would not be so caring about one little rose so it got neglected. By the time we realized what was happening our poor Rebecca Claire was reduced to just one small twig. Between tenants we managed to lift the rose out and move it to the vicarage, but with only one twig and hardly any roots I was doubtful that it would survive. We replanted it in our veg patch, the only part of the garden with any decent soil, made sure it was watered in the dry weather and kept bug and pest free as much as possible.
It has been a few months now and that rose has proved to have an amazing amount of resiliency. Not only does it have several stems on it but it even managed to produce a few blooms in the summer. I really should have taken a photo of it in bloom but back then had no idea I would need one, so instead I have a photo of it as it is now in it's winter coat. It might not look like much but from just one little twig it has made a remarkable recovery.
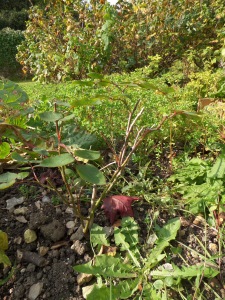
As I am writing this I can think of a time when our daughter Rebecca Claire also made a come back. In her late teens she went through a bad patch, gave up her job at an animal sanctuary because some of the staff were upsetting her with the way they treated the animals, and drifted for the summer, not knowing what to do next. She had always wanted to work with animals but was given bad advice by the careers officer at school and as a result had not finished her A levels and thought she had wrecked her chances. Then at the end of August she asked if we could help her buy some books, she had enrolled in an animal care course and had got a job at a local vets. From that first course she went on to do an animal nurse course then changed veterinary practices to a training one and is now a fully qualified and registered Veterinary Nurse. She too has displayed resiliency and turned her life around. I ought to just point out that at the time she had already moved out to live with her boyfriend, now husband, who was and still is very supportive of her.
Now that I think of it our youngest daughter also has resiliency as a quality. Despite an eating disorder which developed while at university and suffering from panic attacks she managed to complete her dissertation, sit all her exams and finish with a good degree. She is now on placement at a Baptist Church in Bristol as a youth worker and engaged with the wedding set for next August. I am so proud of both my girls.
My card to go with this has to have a rose on it and I have tried to make it look like a Rebecca Claire but could not quite get the exact shading.
Materials used:
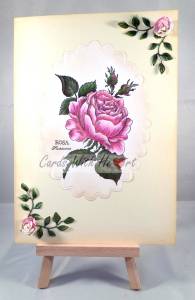
PSX stamp - Rosa
black archival ink pad
polychromo pencils
sketching paper
tea dye distress ink
dark cream card
A5 white card blank
Britannia dies leaf strip
x-cut scalloped oval dies
paper roses from stash
green Copics
shimmer white paper
Method:
I stamped out the image onto sketching paper and coloured it in with polychromo pencils. I cut it out and embossed it with the scalloped oval die then used a blending tool to blend tea dye distress ink around the edges and up as far as the image. I covered the front of the card blank with dark cream paper and blended the edges with tea dye ink. I cut out 4 sets of leaves from the shimmer white paper and coloured them with Copics. I attached my image to the centre of the card and the flowers and leaves to the top right and bottom left corners.
With the dark cream card and the tea dye ink I was trying to get a vintage feel like the coloured book plates in old books.
If you have made it to the end of my rambling well done! Please do go over to the Path of Positivity and have a look at what the DT have done by way of inspiration. It may be a little late for this month but why not put it on your list for next month.
Thanks for dropping in. Take care.
Pippa
I would like to enter my card into the following challenges:
Path of Positivity - Resiliency
Brown Sugar #169
Art By Mi Ran #43
Crafting With Friends #9
Creative Fingers #96
Simply Papercraft #16
Beccy's Place - October
2 Creative Chicks Showcase #3
Sweet Stamps - October
Inspiration Destination #57
If You Give A Crafter A Cookie #30 ( I have picked out the colour from the picture and the idea of recovery with the story of the rose)
Sunday, 25 October 2015
Deedee's DOM Reminder
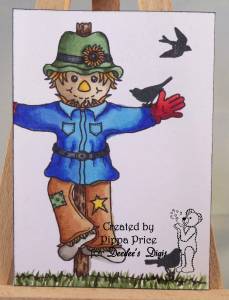
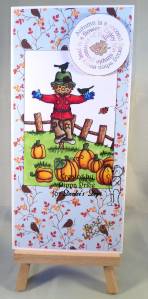
Deedee is posting a reminder for this month's DOM on her blog today so here is the sample I made. You will recognise the design because I have already posted a card I made, this is the smaller ATC version!
Materials used:
Deedee's Digi Set - Pumpkin Patch
Clarity Stamps - Birdhouse Garden
Stamping card
Archival Black ink pad
Copics
Method:
I printed out the scarecrow image onto white stamping card and coloured the image with Copics. I then trimmed it to the size I wanted then edged it with the black ink pad. I added the crows to his arm and the sky using the Clarity stamps and black ink.
There is still time to have ago at the challenge yourself. Don't forget if you enter this month you get the image for next month absolutely free, so everyone's a winner!
Thanks for dropping by. Take care.
Pippa
I would like to enter my card into:
Scrap-Creations - Pumpkins
Papertake Weekly Challenge- All about the base
Through the Craftroom Door
Addicted To Stamps #167
Inspiration Destination #56
Not Just Cards #25
Saturday, 24 October 2015
Here be Dragons!
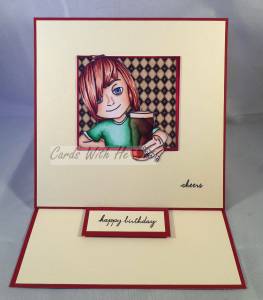
Not so much dragons more Dragons Lair Designs Facebook Challenge. This is a new progressive challenge I came across while catching up with various groups and friends on Facebook. The Dragons Lair Fan Page is a closed group so you need to request to join. You then request the image on the understanding that you will make and post a project using it. If you do not enter you will be excluded from the next freebie image. The image for the current challenge is a great one for those tricky male cards.
Materials used:
Dragons Lair Image from Facebook Group
acrylic greetings stamps
black archival ink
red, black, and cream card stock
stamping card
15cm white square card base
various designer papers from stash
Copics
Method:
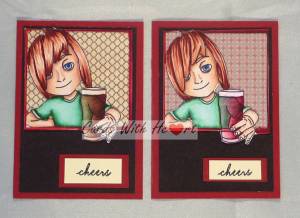
I printed out my images to the required size, one for a card and two for ATC's, then coloured them with the Copics. I cut the background from the centres of the images and backed them using designer papers then cut around the outer edge of the images to form my toppers.
For the card I used the card blank to make up an easel card and covered the front and inside with the red and cream card leaving thin border of red one each edge. I attached the topper to the front then stamped 'cheers' in the bottom right corner. I stamped 'happy birthday' onto a scrap of the cream card and matted it onto a slightly larger piece of red card then attached it inside the card with foam pads to make the stopper.
To make up the ATC's I cut the blanks from red card then added a smaller piece of black card on top before attaching my image. I used the 'cheers' stamp on cream card matted onto red card and attached it to the bottom of the ATC.
If Dragons Lair is new to you, why not visit their page and check out what they are up to. There is plenty of inspiration and it may even encourage you to have a go at the challenge yourself.
Thanks for dropping in. Take care.
Pippa
I would like to enter my card into the following challenges:
Dragons Lair Designs Facebook Group Challenge
Beccy's Place Challenge - October
Not Just Cards
2 Creative Chicks #3
Sweet Stamps October Challenge
Inspiration Destination #56
Penny's Paper-Crafty Challenge #250
613 Avenue Create Challenge #146
Tuesday, 20 October 2015
Wrapped up warm and cosy for Winter
Here in the UK the temperature has definitely been dropping over the past few days. We are still enjoying sunny days and blue skies but the sun is loosing it's warmth and the days are ever shortening. It's time to unearth those woolly jumpers, hats, gloves, scarves and thermals that have been languishing in the back of drawers and dark corners of cupboards over the Summer. The little girl in the image for this month's progressive freebie challenge on the Art By Mi Ran Facebook page is well and truly wrapped up against the cold.
Materials used:
Art By Mi Ran digi - Reserved listing
blending card
A4 white card
x-cut snowflake die
A4 snowflakes embossing folder
white fun flock
Hunkydory Diamond Sparkles - Fairy Daydreams
Cosmic Shimmer Glitter Jewels - Diamond Sprinkles
black card
Copic pens
white paint pen
glossy accents
[caption id="attachment_1786" align="alignright" width="300"] The 3 ATC's[/caption]
Method:
I printed out my image to the size I wanted along with 3 ATC sized images and coloured them all in with the Copics, using the paint pen to add the stars in the sky. I trimmed my imaged and matted it onto black card. I fun flocked her hat, muff, cape and dress trim and added Diamond Sparkles to her hat and muff. I covered the holly sprig with glossy accents to that it did not get lost in the fun flock.
Using the A4 white card I embossed it with the snowflakes embossing folder and folded it into an A5 card blank. I mounted my topper onto the front of the card. I die cut a snowflake from a snippet of white card, covered it with Diamond Sprinkles and attached it to my card.
I have not put a greeting on the front of the card so that it could be used for a winter birthday or Christmas once I have decided which to go for!
Thank you for visiting. Take care.
Pippa
I would like to enter my card into the following challenges:
Art By Mi Ran Progressive Freebie Challenge - October
613 Avenue Create Challenge #146
Lacy Sunshine Colour Your World Challenge
Come and Get It Challenges - Keep Warm
Lil Patch of Crafty Friends #20
2 Creative Chicks Showcase #3
Your Scrapbook Place - October
Beccy's Place - October
Not Just Cards Challenge - October
Monday, 19 October 2015
Outlawz Progressive Challenge for October
There are still a lot of harvest and pumpkin images about and this month's image for the Outlawz Progressive Challenge is no exception.
Materials used:
Gerda Steiner Digi Stamp - Big Load (available on registration from Outlawz Challenges)
blending card
brown and orange card
white A5 card blank
small gold peel-off letters
Copic pens
Spellbinders labels dies
Method:
I printed out my image and coloured it with the copics before cutting it with the dies. I also cut a larger mat from the brown card. I covered the front of the card blank with a slightly smaller piece of orange card and then added my matted image. Finally I added the letters to spell out the sentiment.
While I was at it I also made a couple of ATC's.
Thank you for popping in. Take care.
Pippa
I would like to enter my card into the following challenges:
Outlawz Progressive Freebie Challenge - October
Crafting With An Attitude #8
Crafty Girls Creations #6
If You Give A Crafter A Cookie Challenge #29
Art By Mi Ran #43
Crafting With Friends #8
Crafty Catz #297
Creative Fingers #95
Jo's Scrap Shack FFC #110
Simply Papercraft Challenges #15
That's Crafty Challenge Blog - Boys Will Be Boys
Digi Designs Challenge Blog - Too Cute To Spook (Halloween or Harvest Related images/colors)
Friday, 16 October 2015
Imagine That Progressive Challenge
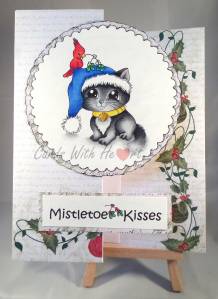
It's not long now until Christmas although at the moment most craft challenges are focusing on Halloween or Thanksgiving. However Imagine That Stamps have come up with a cute Christmas image for this month, purrfect for cat lovers!
Materials used:
Imagine That Digi Stamp - Mistletoe Kitty
Polychromo pencils
scalloped circle die
white A4 card
Canson Mi-Teintes white paper
Do-Crafts Christmas 12x12 designer paper
Method:
Using the A4 white card I made a Z fold card blank then covered the top flap and the right hand side part with the designer paper. I managed to cut the paper so that the design from it went down the side and along the bottom. I printed out my image, and two smaller ones for ATC's, along with the sentiment onto the Canson paper then coloured my images in with the Polychromos. I used the scalloped circle die to cut out my image and then drew around the outside edge of the same die onto the left over designer paper and cut it out with a knife to make a mat. I ran a black pen around the edges of the image and the mat before sticking them together. I then trimmed and matted the sentiment. Finally I arranged my two elements onto the card front and stuck them down.
The great thing about Imagine That Digi sets is that you get the outline images and the coloured ones in the same set, which means if you are not a colourist you can still make great cards with the pre-coloured images. The current challenge runs until the end of the month so why not join in, there is still plenty of time. If you enter this month you will get the image for next month free and so on for as long as you keep going. If you manage to enter every month at the end of the year you will have 12 free sets to play with as well as any extra freebies that pop up now and then with the challenge posts. So what are you waiting for, everyone's a winner!
Thanks for dropping in. Take care.
Pippa
I forgot to say, I gave my kitty a blue hat because it reminded me of my youngest daughters blue Christmas hat, although hers was somewhat more sparkly!
I would like to enter my card into the following challenges:
Imagine That Progressive Challenge - October
Beccy's Place October Challenge
Christmas Card Challenges #45
Lacy Sunshine Colour Your World
Lil Patch of Crafty Friends #19
Crafting From the Heart #81
Craft Your Passion #283
A Snowflake Promise #7
Ants in my Pantry Digital Challenge #10
Sweet Stamps October Challenge
Through The Craftroom Door
Inspiration Destination #55
Word Art Wednesday #205
Thursday, 15 October 2015
Deedee at the Crafty Girlz Challenge
This month Deedee is sponsoring the Crafty Girlz Challenge with the theme anything goes. This is my sample for the challenge.
Materials used:
Deedee's Digi Set - Pumpkin Patch
Imagine That - Subtle Harvest Kit
Clarity Stamps - Birdhouse Garden
designer paper from stash
DL white card blank
Stamping card
circle die
Archival Black ink pad
Copics
Method:
I printed out the scarecrow image and the saying onto white stamping card and coloured the image with Copics. I then trimmed it to the size I wanted then edged it with the black ink pad. I added the crows to his head and arm using the Clarity stamps and black ink. I covered the front of the card blank with the designer paper leaving a small border around all the edges. I cut out the saying with the circle die, arranged my toppers on the front of the card as I wanted them and then stuck them down.
So why not go and look at Deedee's blog and the Crafty Girlz Challenges for more inspiration and have a go yourself.
Thank you for visiting. Take care.
Pippa
I would like to enter my card into the following challenges:
Crafting With Friends #8
Creative Fingers #95
Simply Create Too #96 - Halloween Colors
Simply Papercraft #15
My Time To Craft #306 - Autumnal Colours
Scrappers Delights #49 - Fall/Halloween
Suzy Bee's Bloomin' Challenge #101 - Anything goes with a twist: something beginning with S - my twist is the scarecrow
Thursday, 8 October 2015
A cornucopia of blessings
The image for this month's progressive challenge at From the Heart stamps is a lovely cornucopia. A few months ago I would not even have considered colouring this image but practice has given me a bit of courage, so here it is!
Materials used:
From the Heart Stamps digi set - Cornucopia
Imagine That digi set - Subtle Harvest Kit
printer paper and card
stamping card
Copic pens
A5 white card blank
Method:
I printed out all the bits I needed for the topper, an extra image and two background papers from the Harvest Kit. I coloured both images and then cut my base image and sentiment to the size I wanted. I covered the front of the card blank with the leaves paper then matted my topper onto the purple paper before sticking it to the card front. Finally I fussy cut the main section of fruit and veg and the small bunch of grapes and pumpkin from the second image, shaped and attached them to the second image using gel glue.
As I am trying to build up a little stash of ATC's I also made one with this image.
The marathon run of Harvest Services and suppers has now finished and all the apple pies have been eaten! I don't do Halloween so the next big celebration will be Christmas. Whoa! Not already! Where has the year gone? I guess I should be thinking about getting the 200+ cards that we need on the go. Something quick and easy I think!
Thanks for dropping in. Take care.
Pippa
I would like to enter my card into the following challenges:
From the Heart DOM Challenge - October
If You Give A Crafter A Cookie #29
Jo's Scrap Shack FFC #108
Simply Papercraft Challenges #14
Crafting With Dragonflies #44
2 Creative Chicks Showcase #3 Anything Goes!
Crafts Galore Encore - Make a card
Sisters of Craft - October
Your Scrapbook Place - October
613 Avenue Create #144
Lacy Sunshine's Color Your World
Saturday, 3 October 2015
World Card Making Day and Deedee's Tic Tac Toe Game
Today is World Card Making Day and to celebrate Deedee has got a fun competition going with the opportunity to win prizes, so why not go and have a look at Deedee's Digi's where you can find how to play, the prizes on offer and inspiration from the DT.
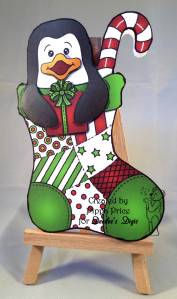
For my sample I used one of the Stocking Pals which you can win by taking part.
Materials used:
Deedee's Digi Stocking Pals Set (one of the prizes)
printer card
Black Pen
Method:
This is a really easy card to do. I printed out the pre-coloured image at the size I wanted twice. I then cut out one image attached it to a white card blank and cut round it making sure to leave some of the side fold in place so that it would open (otherwise you end up with two shapes and no fold).From the second image I cut the part of the penguins flippers holding the present with the present as well and the beak. I then used a glue gel to attach them to the main image giving some dimension. Finally I ran a black pen around the outside edge to finish him off.
This has to be the quickest card I have made in a while and surprise surprise no colouring! Of course you can use the same method to make gift tags and because it is a digital image you can make it any size you like depending on the size of your present.
So I hope you pop along to Deedee's site and look at all the wonderful samples from other members of the team and be inspired to have a go yourself.
Thanks for dropping in. Take care.
Pippa
Thursday, 1 October 2015
Thoughts of Winter
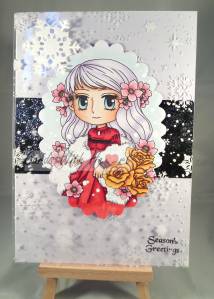
I know it's only just Autumn but the image for the Art By MiRan Facebook Challenge is very wintry!
Materials used:
Art By MiRan Digi - Flower Diva Adoncia (See Facebook page for details
stamping card
Copic pens
white fun flock
Hunkydory Snowflake acetate
silver paper
shimmer white paper
Crafters Companion Snowflake Flutter embossing folder
X-cut scalloped oval die
X-cut snowflake die
acrylic greetings stamp
Adirondak black archival ink pad
white paint pen
white A5 card blank
Method:
I printed out my image, and two smaller versions to make ACT's from, then coloured them all in with Copics. I added white fun flock to her stole to make it look fluffy and used a white paint pen to highlight the snowflakes on the image.
I used the stamp and black ink to stamp my greeting at the bottom of the card blank. I embossed a strip of silver paper with the snowflakes embossing folder and attached it across the front of the card and die cut a snowflake from Shimmer White paper. I then used the acetate to make a wrap adhering it to the back of the card and adding a small piece of stick tape to the front underneath where the topper is. Finally I added my topper and the snowflake on top of the acetate.
[caption id="attachment_1727" align="alignleft" width="300"] The ATC's[/caption]
As I am typing this post up the sunset is making the sky outside my window a beautiful orange colour and there is a little bat flying around, probably after the last of the flies. It is all very restful after a busy day.
Thank you for popping in. Take care.
Pippa
I would like to enter my card into the following challenges:
Art by MiRan Facebook Progressive Challenge
Crafty Girls Creations #5
Beccy's Place October Challenge
Digitally Sweet Challenges #143
Crafting With Friends #7
Ike'sworld Challenges #47 ATC's with anything goes
Inspiration Destination #53
Penny's Paper-Crafty Challenge #247
Crafting with an Attitude #8
Outlawz Monday Greetings
Outlawz Friday Colouring Challenge
Wednesday, 30 September 2015
Dedication
The theme for Path of Positivity this time is Dedication. Ever since reading the post I have had Roy Castle's song 'Dedication' from the TV series 'Record Breakers' running round my head. Those of you reading this who live in the UK may remember it!
When it came down to actually getting something together for the challenge I did have a bit of a problem deciding what to do. Did I go for my eldest daughters dedication in getting qualified as a Veterinary Nurse or my youngest daughter getting her degree despite illness and panic attacks. In the end I decided to do one of my own.
I have always loved mountains and climbing them. However having been born with heart defects over the past few years it has become increasingly difficult to walk up a hill never mind a mountain. So although I have been up Snowdon in the past my mountain climbing days came to an end in August 2005.
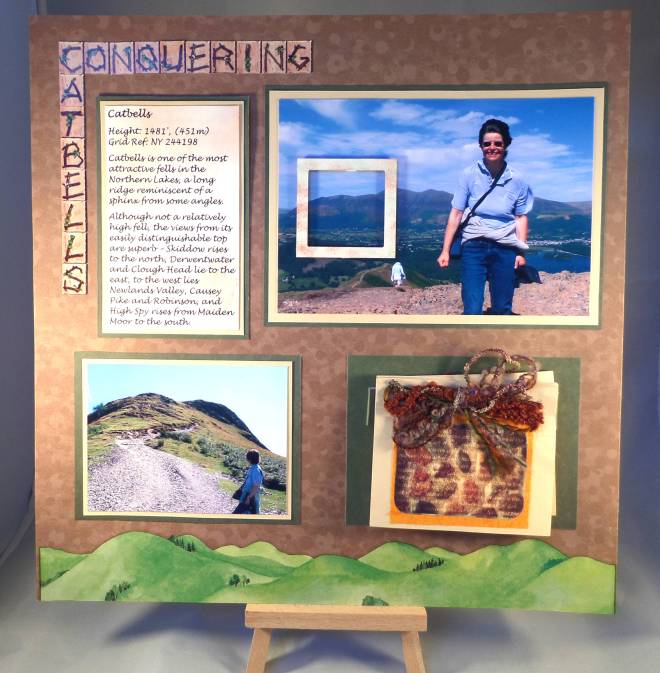
I remember the day well, we were visiting friends in Cumbria and they suggested going for a walk up Catbells, one of the smaller but very beautiful hills in the Lakes. Needless to say by the time we were two thirds of the way up I was holding everyone back. So I persuaded the others to carry on up with out me while I stayed to look at the view and await their return. However when they were out of sight I thought to myself that if I went at my own pace I could get a bit further up so that is what I did and I carried on going at my own pace until I managed to surprise myself and everyone else by reaching the summit. I was so thrilled to have achieved it and as a result made a rare scrapbook page of the event.
So here are some photos of the page and of some of the contents of the little book I made to put in photos of the amazing views and thoughts on the climb.
Maybe one day, if the dedicated team at Bristol Heart Institute can do anything, I might be able to make it to the summit of another hill and who knows maybe even a mountain and not by train but on my own two feet!
Thank you for visiting. Take care.
Pippa
I would like to enter my scrapbook page into the following challenge:
Path of Positivity #30 - Dedication
Subscribe to:
Posts (Atom)