Wednesday, 26 March 2014

A challenge within a challenge

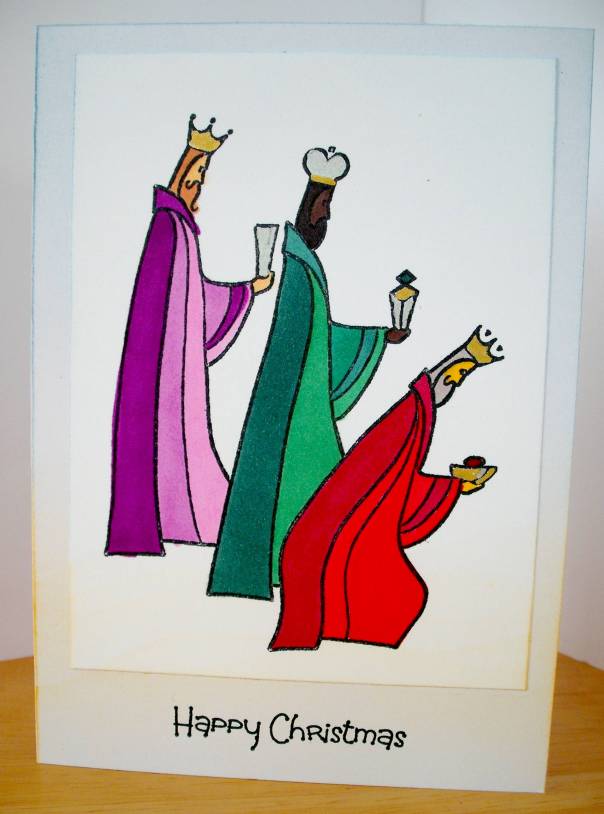
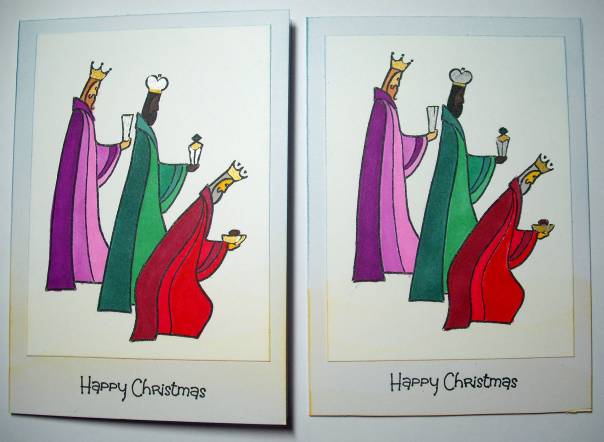
I don't have a lot of time this week so thought I would try to combine challenges with one entry.  Yesterday was Rudolf Day with Sarn and the Less is More challenge is for three things on the card.  The obvious answer to combining Christmas and three is the Kings/Wise Men.  Sorted!

Materials used:
Stamp:Hobby Arts - three wise men
white card
Memento Tuxedo Black
Distress Inks: Scattered Straw and Stormy Sky
Gold and Silver pens
Spectrum Noir pens


Method:DSCF9065
I stamped the wise men onto a panel of Neenah card and coloured them in with the metalic and Spectrum Noir pens.  There is no blending to add definition because the stamp is a stylised design and I wanted to keep it that way.   Using a hill stencil I added a faint hint of Scattered Straw at the base and Stormy Sky at the top to ground the wise men.

On an A6 card blank I used the distress inks to add ground and sky again matching up with the topper placement as much as possible.

I mounted the panel onto the front of the card and added a stamped greeting underneath.

I have been making our Christmas cards every year for over 20 years and with 200+ to do I try to keep the design as quick and simple as I can.  I have a feeling that this one maybe our card for this year!

I am off now to visit Sarn at Rudolp Day and the Less is More challenge.  Many thanks for visiting.  Take care.

Pippa

Whoops! Forgot I need two cards for Rudolph day.  Fortunately I did make more than one.
DSCF9066

I would like  to enter this card into:
Rudolph Day challenge
Less is More challenge
Monday, 24 March 2014

Austrian Memories

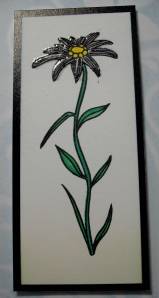
I love Austria, the peace, the clean streets, the invigorating air, the mountains, what is there not to love?  So when the Clarity New Design Club stamp arrived earlier this month and it was an Edelweiss it immediately sparked fond memories of past visits there.  So in homage to Austria here is my Edelweiss card.


Materials used:
Clarity Design Club Edelweiss stamp
Clarity Leafy Swirl stencil
Theuva card
Black card
Adirondack inks: Cloudy Blue, Lettuce
clear embossing powder
embossing pen
Spectrum Noir pens


Method:
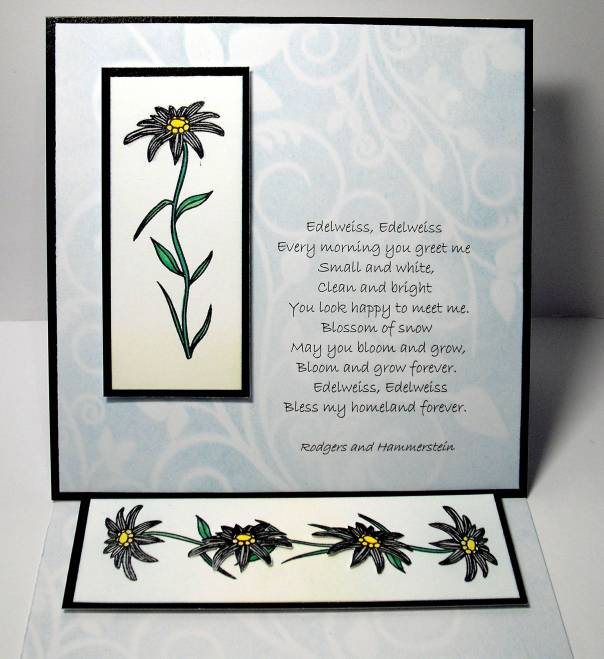
Firstly I made a 15cm square easel card base with Theuva card and a separate square for the panel.


[caption id="attachment_412" align="alignleft" width="159"]Single flower Single flower[/caption]


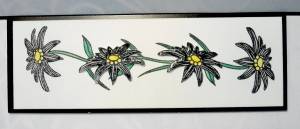
I then stamped the Edelweiss onto left over bits of Theuva card; 1 single flower, 2 stem to stem and 2 flower heads only.


[caption id="attachment_410" align="alignright" width="300"]Stem to stem flowers Stem to stem flowers with added flower heads[/caption]


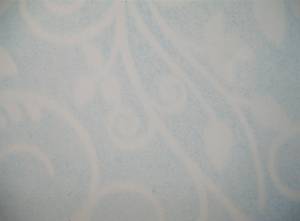
I printed the Edelweiss song words onto the panel before laying the leafy swirl stencil on and brushing cloudy blue ink through.                         


[caption id="413" align="alignright" width="300"]Detail of stencilled background. Detail of stencilled background[/caption]


I used Spectrum Noir pens to colour the stem, leaves and centres of the flowers before embossing the petals with clear embossing powder. I then brushed on some lettuce and cloudy blue ink to give a hint of grass and sky.


I cut the single flower and the stem to stem flowers into panels then matted them and the card panel onto black card.


Inside the card blank I used the leafy swirl stencil and cloudy blue ink to match the front panel.


I then used 3D foam pads to attach the flower panels to the card. I cut out the separate flower heads and stuck them to the flower panel inside the card.


[caption id="411" align="aligncenter" width="604"]The finished card The finished card[/caption]


The  Clarity  challenge this month is Flower Power so I think I will head over there and enter this one.  Nothing ventured nothing gained.


Thank you for visiting, come again soon.  Take care.


Pippa


I would like to enter this card into the Clarity Challenge

Sunday, 23 March 2014

A fluttering of wings

Another day, another challenge or maybe two.  My entry for The Butterfly Challenge would also make it into the Snippets Playground, so as soon as I have posted this I shall be heading their way.

The Butterfly Challenge this time is to include stitching, either real or faux, on your card. Those who know me, know that sewing is my  bĂȘte noire and I am an expert at avoiding it, hence the buried sewing box in my study!  So it has taken me almost the two weeks to come up with this.  There is one bit of real stitching on it but I am not saying where, yet!

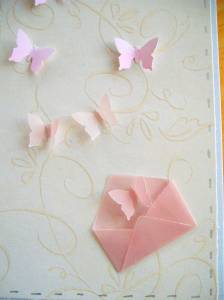
[caption id="attachment_399" align="alignright" width="225"]DSCF9050 Detail of envelope and emerging butterflies[/caption]

Materials used
White A4 card blank
two butterfly punches
X-cut small envelope die and nesting flower dies
Cherry Lyn Mini Fanciful Flourish die
backing paper
a silver pen
snippets - pink vellum, pink paper, pink card


Method

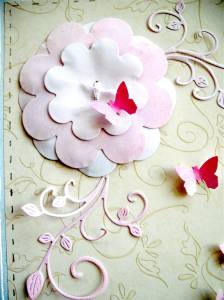
[caption id="attachment_400" align="alignleft" width="225"]Detail showing flower and flourishes Detail showing flower and flourishes[/caption]

The front of the A4 card is covered with a slightly smaller piece of backing paper. All the elements were cut from left over snippets of pink vellum, paper and card left over from a previous project. The flowers are shaped slightly before being attached together and stuck to the top left of the card front. Two flourishes are added. The mini envelope is stuck to the bottom right of the card and vellum, paper and card butterflies arranged as if they were coming from the envelope. The butterflies get bigger as they go up the card to the flower. The final butterfly is stuck to the flower. I stuck the butterflies on the body part only so that the wings were free to give some dimension to the card. Also some leaves on the flourishes are left unstuck.


[caption id="attachment_398" align="aligncenter" width="604"]The finished card The finished card[/caption]

Have you spotted the stiching? The faux stitches are around the edge of the backing paper made with a silver pen and the real stitches are in the centre of the flower.

I am off now to visit the Butterfly Challenge and have a quick go on the slide in the Snippets Playground. Thanks for popping in. Take care.

Pippa

I would like to enter this card into the following challenges:
The Snippets Playground Challenge
The Butterfly Challenge

Friday, 21 March 2014

Trying something different

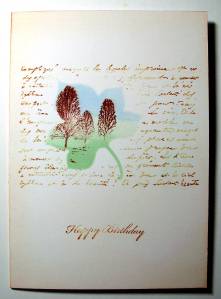
I am running close to the wire with this one for the Less is More challenge.  The theme this week is Stencils and Masks and I have managed both in this card.  It is a different style for me but I am quite pleased with the results.

Materials:
Clarity small leaf stencil
Hills and Mountains stencil
Inkylicious Stamps - Handwritten Script, The Coppice
Free Birthday Greeting stamp
Distress Inks - Vintage Photo, Old Paper
Adirondack Inks - Meadow, Denim
Archival Sepia
A4 White card blank 


Method:
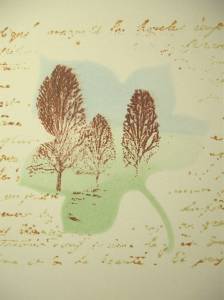
I used the leaf cut from the stencil to block out where I wanted the void to be on the background and then stamped the script stamp over it with Vintage Photo and Old P aper.

DSCF9044 

Using the stencil to cover the script I stamped the Coppice stamp through it onto the leaf shaped void. Keeping the leaf stencil in place I used hills and mountains stencil to brush in the grass and sky with Meadow and Denim ink. I then brushed Vintage Photo ink around the edges of the card and very faintly over the script areas.  Finally I stamped the birthday greeting at the bottom.

DSCF9045


Job done, now off to the Less is More challenge before the deadline tonight!

Thank you for visiting, hope to see you again sometime.  Take care.


Pippa


I would like to enter this card in the 'Less is More' challenge.

Thursday, 20 March 2014

Just go for it!

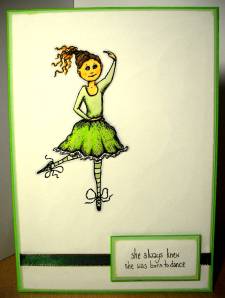
Big question - do I wait until I have finished my Spectrum Noir Colourist Course before entering the Spectrum Noir Challenge or do I just go for it?  I think I'll just go for it especially as I have just the card for the job.

The criteria for this month is that there must be some green somewhere.

DSCF9038

Materials used:                                                                                                                                                            Doo Lally Pip Arabella stamp                                                                                                                                       black Memento ink pad                                                                                                                                                   white Neenah card                                                                                                                                                             green card in two shades                                                                                                                                                 A5 white card blank                                                                                                                                                         piece of green ribbon from a Christmas chocolate box                                                                                   Spectrum Noir Pens

I stamped Arabella onto an  A5 piece of the Neenah card and onto a piece of scrap Neenah card.  Using the pens I coloured in the whole of the image on the A5 card and just the dress on the other image.  I trimmed the green card and stuck together leaving a small border .  I also trimmed the white card but before mounting it on the green wrapped a piece of green ribbon around the bottom.  The sentiment was stamped onto Neenah trimmed and double mounted on the green card before sticking onto the base card.  I then cut out the dress on the second image and decoupaged it on top of the card image using gel glue.  

I do apologise for the quality of the photograph, I am having trouble with the camera today, not to mention the lack of light!

My  youngest daughter is always dancing so I think this card will eventually be heading her way.

Thanks for popping in.  Take care.

Pippa

I would like to enter this card into the Spectrum Noir Challenge                       

Wednesday, 19 March 2014

All things ATC

So here I go, first post on the new site.  I have not managed much crafting over the past couple of day for a variety of reasons, the least not being that I lost a battle with a potato peeler and took a slice to the thumb.  You don't realise how much you use a thumb until it is handicapped in some way. With a big dressing on I cannot operate a pair of scissors!

Because I want to get to know the workings of Wordpress I am cheating and posting some ATC's already made.  I cannot even claim the photos, which is why they are so good. Our hostess at the ATC swap sets them up for her husband to photograph.

The ATC Swap UK has a Facebook page where you can join in the fun.  There is a different theme each month so you have plenty of time to get ATC's made.  All the information you need is on the Facebook page.

Here are a few of my creations for the swaps.

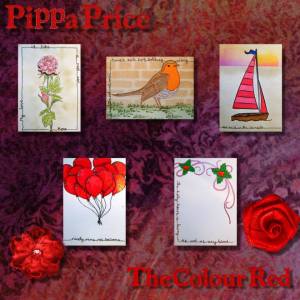
April 2013 February 2013 February 2014 March 2013 May 2013 October 2013 September 2013

So if these have inspired you why not join in the fun.

Thanks for popping in,  Take care.

Pippa

Sunday, 16 March 2014

A Bit Potty!


The excitement and enthusiasm after my Spectrum Noir workshop is still alive and thriving! So much, in fact, that I have taken the practising to extremes! I think I might have become a bit obsessive but as work calls tomorrow I have made the most of the weekend as you will see.

So we were sent away on Wednesday to work on blending to achieve dimension and then colour in the flower pot on the accreditation test. The first thing I did was to make some practice sheets up so I could print them out onto Neenah card.


  This is the result of lots of practice. On the course we were issued with selected sets of pens which restricted the blends a little. These are all done using pens from the browns set. (Sorry about the bleed through at the bottom, my pots were far too big to start with so I turned the card over and printed the smaller ones on the other side.)


These are my favourites. For the middle pot I used some of my older pens with the newer ones.


Having practised a lot of pots I moved on to other shapes. I found the cylinders the easiest to do. The spheres, on the other hand, still need a lot of practice!
        

               I really like the way the gray one turned out.


It took me a while to work it out but the gray one reminds me of an ultra sound scan!


Thanks for popping in. Take care.

Pippa

Friday, 14 March 2014

Waste? Not!

I recently acquired a couple of sets of Doo Lally Pip stamps; well with a name like Pippa how could I not! Like many clear stamp sets they came on an acetate sheet which had the image printed on. Sometimes the image is in colour as a guide but these were just the black outlines. Big confession - I usually throw the sheet away once I have put the stamps in my storage binder. This time, though, the Snippets Playground came to mind so I thought I would make use of the 'waste'.

Materials Used:
white card
backing acetate from Doo Lally Pip stamp set
text stamp from Life Sentiments from Kaiser Craft
Spectrum Noir pens
The coloured acetate image

Method:
I made a 4" square card blank from the back of a card that 'went wrong beyond redemption'! Using Spectrum Noir pens I coloured the acetate image. Because it is acetate you cannot blend the pens but as the image has a lot of shading in the image anyway I don't think it matters too much. 


The finished card


I then cut the image out and used Glossy Accents to attach it to the card blank. The sentiment was added to the bottom corner and the card edged using a Spectrum Noir Pen. 

My thanks to Di at Pixie's Crafty Workshop for the sentiment stamps.


I am off now to the Snippets Playground, if I can see my way through the fog!

Thanks for popping in. Take care.

Pippa


I would like to enter this card in the Snippets Playground Challenge


Thursday, 13 March 2014

Thank you Craftasmic

Craftasmic, my local(ish) craft shop is holding Spectrum Noir Colourist Workshops over the next four months. The first one was yesterday and it inspired me to be a bit more ambitious with my colouring. This card is the result.

Materials Used:
Stamps - Daffodil and Spring is Sprung - Dimension Stamps
Adirondack Inks: Slate, Stonewashed, Lettuce
Memento Inks: Tuxedo Black
X-Cut Dies: Scalloped Oval
Spectrum Noir Pens: DG1, DG3, CG2, CT1, CT2, CT3, CT4
Neenah white card

A close up view of the flower head
to show the shading.

Method:    
I made an A5 card blank from the Neenah card, a mask of the daffodil stamp and an oval mask using the die and a piece of paper. I positioned the aperture in the paper mask on the card blank and stamped the daffodil through it. Keeping the aperture mask in place I covered the daffodil with its mask then used Stonewashed and Lettuce inks with a brush and make up sponge to place the grass and sky.


The coloured daffodil and oval frame


I then used the pens to colour in the daffodil before masking it off with the oval shape cut from the aperture mask. Using Slate and a stencil brush I brushed around the mask to try to get a 3D effect. Finally I stamped the words underneath.


The finished card


Thank you for dropping in.  Take care.

Pippa


I would like to enter this card into the Les is More Challenge: Single Layer - Spring Flowers

Tuesday, 11 March 2014

And now for something completely different

I must confess I am not a big fan of Shabby Chic or Grunge styles so this card is really out of my style - what ever my style is! I am in charge of sorting out the birthday cards at the school where I work, and this year decided to make them myself. Our part-time music teacher, who plays the violin, has a birthday coming up and I had just the right stamp to use but it has an unusual background that I  have never really liked. In the part I have tended to use just the main picture from the middle detached from the background. This time, however, I was determined to do something with the whole stamp and it turned out to be 'something completely different'.

Materials Used:
A4 white card
kraft card 
light brown card
distress and Adirondak inks in variety of colours
Stamps Happen "Overture" stamp
music score background stamp
greetings stamp
black Enamel Accents

Method:
Close up of central image
Using the distress and Adirondak inks and stencil brushes I coloured a sheet of white card before stamping the "Overture" stamp on it and twice more on white card. I cut a piece of kraft card larger than the stamped image and stamped the music background onto it. 

I painted the music and violins using a damp paintbrush and picked up ink from a blending mat. Once dry I cut the music and violin from one image and just the violin from the other and layered them on top of the first image. I then mounted the topper onto the stamped kraft card and then stuck that onto the card blank.

I stamped the greeting onto a scrap of the card I had made for the background and then stuck it on the card blank. I used Black Enamel Accents to make the faux brads in the corners.


The finished card

Although I was way out of my comfort zone with the style of this card I was actually pleased with the result. 

Thanks for visiting. Take care.

Pippa

Sunday, 9 March 2014

Butterflies, Buttons, Bows and . . .

Time for the second Butterfly Challenge from Mrs A and this time she has 'upped the ante' by adding Buttons and Bows into the mix.  So I decided to add another 'B' with Bag.

A few weeks back I treated myself to a couple of the new We R Memory Keepers punch boards, having done a make and take at a local craft show.  As it is about time I put the gift bag one to the test, hope you like the result.

Materials used:
We R Memory Keepers gift bag punch board
A4 white card
A4 white paper
snippet of white card
flower, background, wings stamps from Dimension Stamps
black wire
black bead
3 small black buttons
black satin ribbon and organza ribbon
black inkpad
strip of acetate.

Method:
First I measured and cut out the bag following the instructions that come with the board.

Stamping on the bag base.
Lace and ribbon added.


I then stamped 3 flowers onto white paper and stamped these and the bag base with the background stamp in black before folding the score lines on the bag and cutting the petals out to make up the flower.  The edges of the petals have some fine glitter on. 

The rose made up and glittered.


The completed butterfly.


Because I do not have a large butterfly stamp I used the wing stamps to make a butterfly.  The body is twisted black wire with a bead added at the top to form the head and the ends of the wires bent around to make the antennae. The body is defined using the black buttons. The wings are stuck to a small circle of black card before attaching the wire body on top. The whole butterfly is then stuck to the end of piece of acetate.


With all the elements made the next task was adding the lace and black ribbon around the bag and the bow at the top before sticking the bag together.  The rose was stuck on the front and the acetate with the butterfly on stuck inside the box so the butterfly hangs over and looks as if it is about to land on the rose.  Black organza ribbon handles finish off the bag.

The finished article.

I am actually pleased with how this all worked, for once everything seemed to fall into place and the plan worked!  I have it sitting on my desk at the moment and I have to confess the butterfly just has to be played with, it really dances over the rose on it's acetate 'spring'.

Thank you for dropping in.  Take care.

Pippa


I would like to enter this bag in Mrs A's Butterfly Challenge #2

Thursday, 6 March 2014

Cats and dogs!

This time I am not referring to the Somerset weather but the challenge over at 'My Time To Craft'. Having looked at the wonderful samples by the DT and the early entries, I decided to go completely different with my Tiger entry.

Materials Used:
Clarity Stamps - tiger and pine forest
Adirondack inks - lettuce and meadow
Distress ink - dried marigold
Memento ink - tuxedo black
Spectrum Noir pens
embossing pen
Spellbinders - labels 23
clear embossing powder
A5 white card blank
A4 white card

Method:

The background showing the pine forest stamping

I started by printing the verse of the poem onto the A4 card. I then stamped the tiger underneath in black before using the die to cut out a topper. To create the background for the main card and the tiger topper I stamped the pine forest stamp multiple times all over the card taking the ink from a blending mat for some of the images and sponging ink onto the stamp for others.  (The tiger was masked off for this). The background for the tiger is deliberately more distressed. I used both meadow and lettuce inks for this. I then used dried marigold around the edge of the topper and also around the edge of the card blank.

The coloured and embossed tiger


I then coloured the tiger using Spectrum Noir pens before going over the image with the embossing pen and embossing it with clear embossing powder a couple of times.


I cut a piece of card from the stamped background card slightly smaller than A5 and glued this onto the card blank before mounting the topper with 3D foam pads.


The finished card

Thanks for popping in, and thank you to all who have left encouraging comments on previous posts.  Take care.

Pippa


I would like to enter this card into My Time to Craft Challenge - Cats and Dogs.

Tuesday, 4 March 2014

Green and Yellow

Over at Less Is More the challenge this week is Green and Yellow.  I have four rose stamps by PSX in my collection that I love because they all work as individuals and in combinations.  For this challenge I went with the 'spray'. One day, perhaps, I will show you the others in the set.

Materials used:                                       

PSX rose spray stamp
Happy Birthday stamp
Archival Sepia inkpad
A5 white card blank
Watercolour paints
Pale green Spectrum Noir pen
Snippets of Papermania card 


The rose is stamped with sepia ink then painted with watercolour paints. The pale green edge is a Spectrum Noir pen.

The Papermania card was white with green squares so I painted it with a wash of yellow watercolour.  On one piece I mounted the rose, on another strip I stamped the greeting in sepia. Both elements were then stuck to the card.

The photo is not quite accurate with the colours, the yellow is much paler in reality!


I confess I usually avoid anything with straight lines on because it does tend to show up every cutting mistake.  I can see where the cutter has been less than accurate but I am hoping I can get away with is this time!  Because I have used snippets on the card I think I will pop along to the Pixie's Snippets Playground as well.

Thanks for popping in.  Take care.

Pippa


I would like to enter this card into the following challenges:
Less Is More - Colour - Yellow and Green
Pixie's Playground Snippets

Saturday, 1 March 2014

Mad March Hares

Can you believe it, two months of this year gone already! Time to post the page for March in my Art Journal for the challenge. 

Firstly I painted my two page spread with white acrylic paint to strengthen the pages and give some texture.  I then used Adirondack inks in greens and blues with a moon mask and hill mask to create the background. I stamped a bare tree from the Pilkington Wood set using Memento Rich Cocoa ink.


The next task was to create my hares. I do not have a stamp so resorted to using a digital image. I changed the colours for a mixture and made the 'Sunday hares' slightly bigger. My plan was to have each Sunday surrounded by a family of six other hares, it sort of worked!


The cloud was made using a clarity mask and white acrylic paint. March is stamped in Memento Tuxedo Black using the Clarity letterbox set and the birds, also Clarity, added to the sky. 


Finally the tree had it's leaves added using a selection of Spectrum Noir pens.


All ready to record the exciting events of March, hopefully sunshine and flowers rather than floods and leaks!

Thanks for visiting.  Take care.

Pippa