Ok, I have spent a few days blog-hopping. It does not expend as many calories as walking but the weather in Somerset . . . . .
Anyway being a bit slow on the uptake I have only just realised that you can combine challenges which means that the fact that this week has been busier than usual means I can enter the cards I managed to make into two challenges!
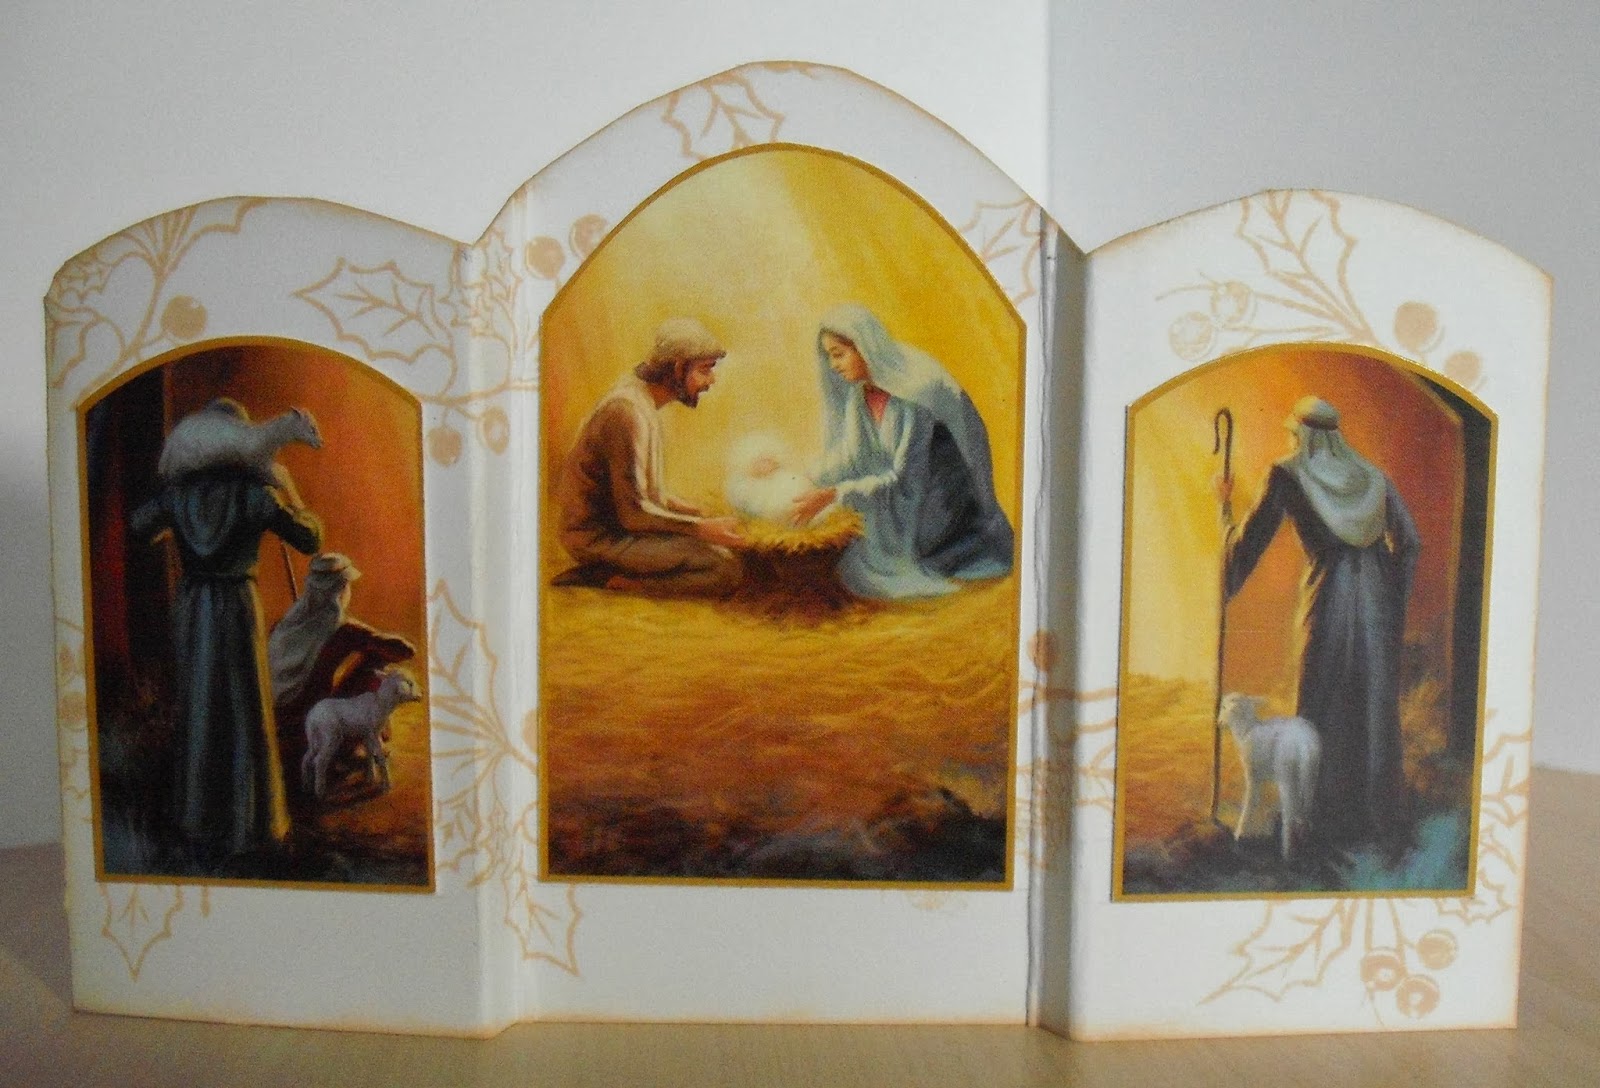
So here are my two cards for the Rudolph Day Challenge which also qualify for the Snippets Challenge.
Materials Used:
old Christmas card
bit of silver mirri card
greetings stamp
Centura Pearl card left over from another card
Adirondack archival black ink pad
iridescent glitter
Materials Used:
old Christmas card
holly sprig stamp (from Creative Stamping magazine)
Adirondack Latte ink pad
strip of white card cut off
Two fairly simple cards that use up two of those hundreds of Christmas cards saved because I may get around to doing something with them one day!
Thanks for taking the time to pop bye. Have a good day.
Pippa
I would like to enter these cards into the following challenges:
Pixies Snippets Playground - Week 109
Stamping for Pleasure Rudolph Day
Friday, 31 January 2014
Saturday, 25 January 2014
New Beginnings
This year is turning out to be one of new beginnings in many ways. The resurrecting of the blog started it, then there has been Pixie's Snippets Challenge. Now I think I shall be really brave and try my hand at the Clarity Stamp Challenge.
Just to make it more difficult for myself I have got out my Gelli Plate. I am still new at all this so please be gentle with any comments.
Ok, here goes. Firstly I apologise that there are no photos of the various stages but acrylic paint dries very quickly, as I am discovering, and then I got so engrossed in what I was trying to do that I forgot to take any!
The theme for this month's challenge is 'New Beginnings'. Looking at the art work already submitted and the ideas from the design team there are a lot of new home, new baby, wedding ideas so I thought I would go a bit obscure and do Spring. Having decided that the rest evolved as I got going. I did make one change in that my original plan was to do an ATC but I was not sure if this was allowed so mounted the ATC onto a bigger background and made it a card.
So here is what I did. First the Gelli Plate print background was made using a 6 x 6 Gelli Plate, Clarity Leafy Swirls template, green, yellow, white and blue acrylic paint and a piece of the Clarity card made for the Gelli Plate. I am still in the experimental stage with my Gelli Plate and I think I may have let the paint dry a bit too much but the resulting print was very subtle and I liked it so decided to stick with it.
I trimmed down the print to leave a narrow white border then rounded the corners. To remove the white border I blended it with Adirondak Mushroom which is the nearest colour I have to the brown of the Kraft Card. This was then mounted onto a card blank with rounded corners.
Next I made the ATC. I stamped a Clarity bare tree with Adirondak Rust slightly to the left of the middle of the card then put in the green hills and blue sky using Adirondak Lettuce and Stonewashed, a stencil brush and a piece of torn paper. It gives a much gentler colour wash than the brayer, more spring like. The blossom on the tree is done with Spectrum Noir pens PP3 and PP4. The ATC was then mounted onto a piece of kraft card with a narrow border. This was attached to the card blank on the left before I used the Clarity Letter Box Kit and Adirondak Rust to stamp 'spring' straight onto the card front - a bit brave there!
So there you have it, sorry it has turned into an essay! It would have been so much less wordy with photos, maybe next time!
I guess I should show you the finished card. Hope you like it.
Thanks for taking the time to read this. Take care and God bless. Pippa.
Just to make it more difficult for myself I have got out my Gelli Plate. I am still new at all this so please be gentle with any comments.
Ok, here goes. Firstly I apologise that there are no photos of the various stages but acrylic paint dries very quickly, as I am discovering, and then I got so engrossed in what I was trying to do that I forgot to take any!
The theme for this month's challenge is 'New Beginnings'. Looking at the art work already submitted and the ideas from the design team there are a lot of new home, new baby, wedding ideas so I thought I would go a bit obscure and do Spring. Having decided that the rest evolved as I got going. I did make one change in that my original plan was to do an ATC but I was not sure if this was allowed so mounted the ATC onto a bigger background and made it a card.
 |
| The Gelli Plate print background |
I trimmed down the print to leave a narrow white border then rounded the corners. To remove the white border I blended it with Adirondak Mushroom which is the nearest colour I have to the brown of the Kraft Card. This was then mounted onto a card blank with rounded corners.
 |
| My favourite part showing the blended edge |
 |
| The ATC |
So there you have it, sorry it has turned into an essay! It would have been so much less wordy with photos, maybe next time!
I guess I should show you the finished card. Hope you like it.
 |
| First attempt at the Clarity challenge |
Thanks for taking the time to read this. Take care and God bless. Pippa.
Wednesday, 22 January 2014
Pixies Snippets Playground - Week 108
So here I am again with another snippet card for the challenge at Pixie's Crafty Workshop. This time I have used up some left over snippets from the huge stash of Hunkydory kits I am slowly working my way through. The problem being that every time I make another card there are lots of left over bits to use up! The 'dream' is stamped using Clarity Stramps letterbox kit., embossed with silver embossing powder and then cut out and mounted onto the card. The card blank is 4 1/4 inch square. It's a quick make this time because now that term is well under way life is getting busier.
Thanks for popping in. Take care and God bless.
Pippa
Thanks for popping in. Take care and God bless.
Pippa
Sunday, 19 January 2014
The ATC that fathered the Snippet
A couple of days or so ago I told you about my entry for the Snippet Challenge. The bit of snowy scene I used came from an ATC which I was making for the ATC Swap UK monthly swap. The theme this month is Winter Wonderland. Just a reminder of the Snippet.

This is the ATC from which the stamped snippet came (off the right hand side).
The stamp is Let it Snow from Stamps Happen, stamped with Memento Tuxedo Black and painted with watercolours.
The swap can be anything up to 5 ATC's and is just for fun. It is great getting work from other people for inspiration. I keep all my swaps in special collectors pockets in a folder and when stuck for inspiration have a flick through.
I also made some scenic ones using my new Clarity Snow Scene stamps and the Pine Forest from the Clarity New Design Club.

I have used the same stamps but different inks to produce the different colours; Adirondak - Pitch Black,Denim, Stonewashed, Slate, Mushroom and Lake Mist.
For the fifth ATC I did something completely different, a winter fairy! The stamp was a free one with Cardmaking and Papercraft magazine and I coloured her in with Spectrum Noir pens and mica powders.
Thanks for taking the time to pop by. Take care and God bless.
Pippa
Friday, 17 January 2014
What a difference a day makes
There is something quintessentially British about talking weather. However I could not miss this opportunity, especially as I do not have any finished crafty projects to share with you.
Along with most of the UK, Somerset has had more than it's fair share of rain but yesterday afternoon we had this:
No, not a leaky bean bag, hail stones. These were outside my garage when I got home from work and showed no signs of thawing.
That was yesterday, today we went for a walk along the old railway line from Donyatt to Ilmister and came across these:
Good to know that despite rain and hail, Spring is on the way.
Thanks for visiting. Take care. Pippa
Wednesday, 15 January 2014
Just a snippet
Time for a challenge, I feel. Having enjoyed myself last week making the Seasons Greeting for the Snippets Playground challenge I thought I would have another go. I was making some ATC's for an exchange the theme of which is Winter Wonderland, but the stamp I used for one of them was larger than the ATC size so I had some snippets to use. This, then, is my entry for Pixies Snippets Playground - Week 107.
Items Used:
Stamps:
Let it snow - Stamps Happen
Let is snow text - Get Stamping Magazine
Snippet of snowflake background paper
The small stamped area in the middle is cut from the large Let it snow stamp and painted with watercolours. Then I mounted it onto a bit of snowflake paper left over from making Christmas present boxes. The whole topper is fixed to the card blank using 3D foam pads and Let it Snow stamped at the bottom. Job done.
I do wish it would snow - anything but more rain! So goodbye for now from Soggy Somerset!
Saturday, 11 January 2014
Off the needles
We are in the middle of celebrating Christmas for the third time! Our youngest daughter, Rachel, was working over Christmas and New Year so has not been home until now. The tree and decorations are still up and tomorrow is presents! Needless to say there has not been a lot of time for craftiness so I am cheating and sharing a project I finished last year.
Rachel wanted a red jumper to replace a much loved bought one that had worn out. So the challenge was to find a pattern and get it knitted in time. Unexpectedly finding a pattern was the hardest part, in the end I had to adapt one. Thankfully it was done in time for Christmas and was one present that Rachel could open on Christmas Day itself - we delivered it a couple of weeks before hand.
So here is a picture of the finished jumper, knitted in 4 ply. The collar does fold down over her shoulders if she wants it too.
Thursday, 9 January 2014
Snippets
Di very kindly left a message on a previous post inviting me to her blog Pixie's Crafty Workshop. Her 'Snippets Playground' challenge looked intriguing and a bit different so I thought I would give it a go. This is the card I came up with.
Those of you who have veiwed my post about the cover for my Art Journal Calendar might recognise the theme. The card is made from the left over bits from that project.
Materials used:
Embossing folders:
Craft Concepts - Woodgrain, Cottage Floral, Budding Vine
Cuttlebug - Ice Crystals
Stamps:
Letters - Panduro
Seasnon's Greetings - Creative Stamping Magazine
Ink:
Sepia Archival
Card:
Core'dinations offcuts from previous project
White card blank
Kraft card off cuts
Paper string off cuts
Method:
I folded one half of the card blank in halves to create an easel card.
Using the sepia ink and masking off the ' in Season's and the s in greetings I stamped the sentiment onto a strip of white card then added the A using the Panduro Alphabet stamps.
I used another off cut strip, pale lime, to put under the greeting and used 3D foam pads to mount the greeting strip having first gone around the edges with the sepia ink.
I cut four off cuts of Core'dinations card into tags and sent each one through a different embossing folder to match the season.
Blue - winter - ice crystals
Pale green - spring - budding vine
Darker green - summer - cottage floral
Browny orange - autumn - woodgrain
I then mounted them onto some off cuts of Kraft Card, punched a hole in the top and threaded with paper string. The triangles in contrasting colours at the bottom were the cut offs from the season tags on my Art Journal cover.
 |
| A closer look at winter and spring |
 |
| and summer and autumn |
Before attaching them to the bottom half of the folded card I ran the sepia inkpad along the two side edges.
And there we have it, job done. Now I just need to work out how to link it to the challenge!
Tuesday, 7 January 2014
Every book needs a cover
I enjoyed myself so much doing the Art Journal Calendar Challenge that I got carried away and made the cover for the book as well. As it is a calendar journal I went with a four seasons theme, to cover the whole year.
Materials Used:
For the background I used my stencils and acrylic paints in a random design, and added a few spots of gold paint here and there.
When the paint had dried, I blended different coloured inks onto some of the white areas. I cut four large tags from the Core'dinations card, then stamped the numbers in similar colours onto white card. I then stamped the designs on each number to represent the four seasons, and coloured with Spectrum Noir Pens, before cutting out and sticking onto the tags. I threaded a piece of paper string, again in similar colours, through the hole in the top of each tag before sticking them onto the cover.
Materials Used:
Stencils:
That special touch - Grid, Small Polka
Clarity - Leafy Swirl
Swirly one unknown
Acrylic paint - red, purple, yellow, gold
Adirondack Inks:
Wild Plum
Meadow
Denim
Lettuce
Rust
Core'dinations Card - pale blue, pale green, darker green, browny orange
Various stamps from Creative Stamping Magazine
Large number stamps Papermania
Spectrum Noir pens
Paper string - various colours
Wool - various colours
Mixture of beads
For the background I used my stencils and acrylic paints in a random design, and added a few spots of gold paint here and there.
When the paint had dried, I blended different coloured inks onto some of the white areas. I cut four large tags from the Core'dinations card, then stamped the numbers in similar colours onto white card. I then stamped the designs on each number to represent the four seasons, and coloured with Spectrum Noir Pens, before cutting out and sticking onto the tags. I threaded a piece of paper string, again in similar colours, through the hole in the top of each tag before sticking them onto the cover.
I then threaded some strands of wool through the spine, knotting them at the top to keep them in place and adding different beads to the bottom of some of the them.
So now my Art Journal is covered and January ready to be written in. Better start thinking about February's page now!
 |
| The Finished Cover |
Sunday, 5 January 2014
Rising to a challenge
 |
| My first ever Art Journalling Calendar Page |
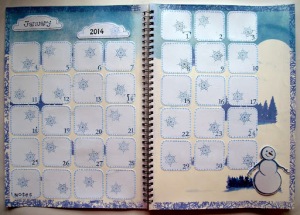
My thanks to Sheila Cross for introducing me to the concept of Art Journalling Calendar pages. So this is my first attempt. For January I decided to try a snowy scene to make up for being surrounded by floods.
Ingredients:
Stamps:
Pilkington Wood bare tree Stamps Away
Pine Forest Clarity Stamps
January and frame free with a magazine
Snowman Get Stamping magazine
Snowflake unknown origin
Alphabet stamp set Hampton Art
Numbers stamp set Panduro Hobby
Stamps:
Pilkington Wood bare tree Stamps Away
Pine Forest Clarity Stamps
January and frame free with a magazine
Snowman Get Stamping magazine
Snowflake unknown origin
Alphabet stamp set Hampton Art
Numbers stamp set Panduro Hobby
Inks:
Adirondack Denim
Memento Paris Dusk
Adirondack Denim
Memento Paris Dusk
Cutting Dies:
Circle Stampin' Up
Spellbinder Rounded Square
Circle Stampin' Up
Spellbinder Rounded Square
A4 Art Pad
White Gesso Primer Daler Rowney
Spectrum Noir TB4 and TB9
Inkilicious Ink Dusters
Make up sponge
White Gesso Primer Daler Rowney
Spectrum Noir TB4 and TB9
Inkilicious Ink Dusters
Make up sponge
How I did it!
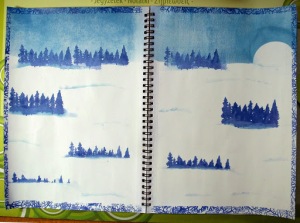
1. I painted a two page spread with white gesso and left to dry.
2. Using a piece of torn copy paper as a sky line and a die cut circle for the moon I made the sky by blending Denim ink across the top with the ink duster.
3. I stamped the Pine Forest using Paris Dusk randomly over both pages. I then used the make up sponge and Denim to put some mounds in the snow and shadow under the trees. I also put in the horizon through the moon. Using a piece of scrap paper as a mask I stamped a border with Paris Dusk and the bare tree stamp.
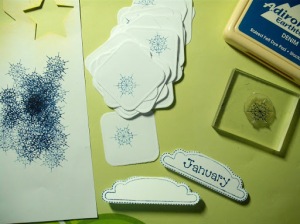
4. With the rounded square die I cut 35 squares of white paper and stamped a snowflake on each in different positions with Denim ink and using the third impression. Then I stamped two frames and January in one of them, and cut them out. I then arranged the labels and squares on my pages before sticking them down and numbering them using the stamp set. On the extra four squares on the bottom row of the left-hand page, I stamped 'Notes' with the alphabet stamps.
4. With the rounded square die I cut 35 squares of white paper and stamped a snowflake on each in different positions with Denim ink and using the third impression. Then I stamped two frames and January in one of them, and cut them out. I then arranged the labels and squares on my pages before sticking them down and numbering them using the stamp set. On the extra four squares on the bottom row of the left-hand page, I stamped 'Notes' with the alphabet stamps.
5. Finally I stamped a snowman onto a scrap piece of Centura Pearl card, cut it out and stuck it in the bottom right corner. All done.
There are a lot of mistakes in it and things I would do differently but for a first attempt I am quite pleased with the outcome. So perhaps I might even go on to do the rest of the year, in time.
Friday, 3 January 2014
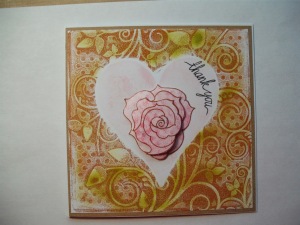
Time for those 'Thank you' letters
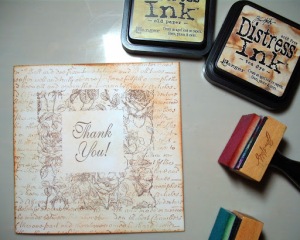
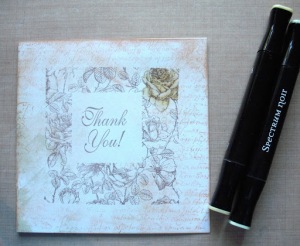
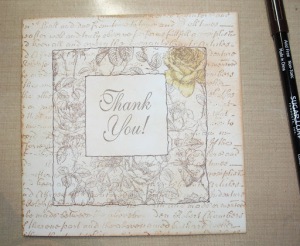
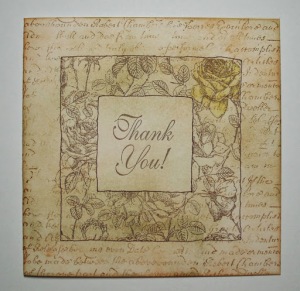
So Christmas is over and it's time to write those 'Thank you's' which means making the 'Thank you' cards. So this year I have made a quick vintage style floral card. I apologise now that the photographs are not wonderful. I am thinking I might need to invest in a better camera but then there are so many things I need to save up for already; a new A3 printer, a melt pot, more stamps, more inks, more card etc.
Having looked around at other people's blogs I notice that many start with a list of 'ingredients' so I thought I might as well do likewise. So here we go, first make of 2014.
Ingredients:
Stamps:
Calligraphic Mat 13 from the Aritistic Stamper
Fleur Botanique from January's issue of Cardmaking and Papercraft magazine
Thank you! from Stamp Craft
Inks:
Tim Holtz Distress Inks: Tea Dye, Old Paper, Vintage Photo
Memento: Rich Cocoa
Pens:
Spectrum Noir: LY1, LY2
Sugar Loaf: Dark Brown
5.5 inch square white card blank
Post-it notes
Blending tool
How I made the card:
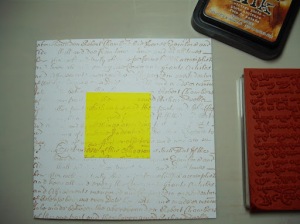
1. I put a post it in the centre of my card blank to mask off a space for my greeting.
2. I stamped the Calligraphic Mat over the whole card front using second generation stamping and Vintage Photo ink.
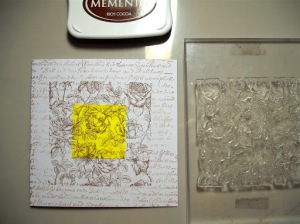
3. Leaving the mask in place I then stamped the Fleur Botanique using Memento Rich Cocoa in the middle of the card blank.
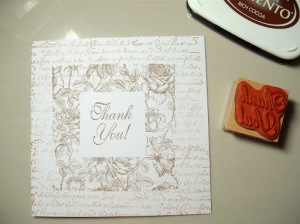
4. I then removed the mask and stamped the Thank You! in the space using Memento Rich Cocoa.
5. Using Tea Dye and Old Paper Distress Inks and a blending tool I coloured the whole of the card front. Because the Old Paper has a green tinge to it I tried to put more where the leaves are on the design.
6. With the Spectrum Noir pens I coloured one rose in the top right hand corner of the card.
7. Then I feehand drew a boarder with the fine tip of the brown pen around the Fleur Botanique design and the greeting.
8. The finished card. Now all I need to do is write them!
I have made a fairly quick card because I needed to make quite a few quickly. You can make a more elaborate card by colouring in more of the design and some of the roses are crying out to be decoupaged. Changing the colour scheme and or background would change the look also.
I had better go and write all those cards now.
Wednesday, 1 January 2014
New Year, New Beginnings
New Year, New Beginnings
So here we are in 2014, not sure where 2013 went but I feel it is time to resurrect the blog. I doubt I shall be posting daily but hope to manage at least a couple a month, hopefully one a week.
My problem is that a lot of my crafty makes are presents for friends so I don't want to give the game away. So as 2013 is over here are a few photographs of last years makes.
A fairy ATC
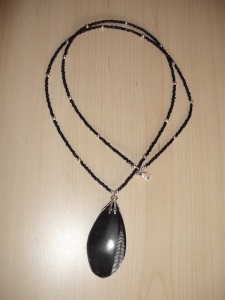
A necklace made from a Nautiloid fossil
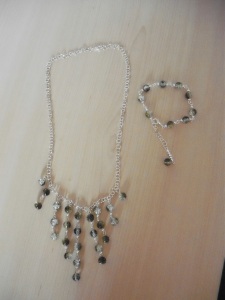
Christmas gift, necklace and matching bracelet
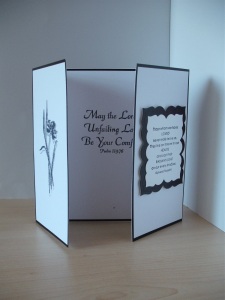
A Sympathy card using some Stampin' Up stamps
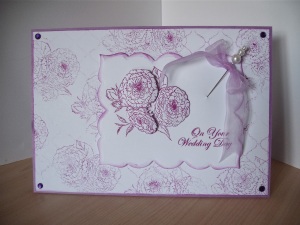
A Wedding card
Anniversary card for my husband using Clarity stamp
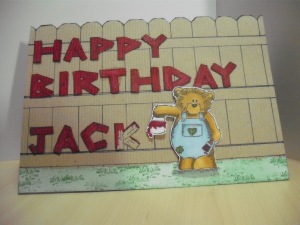
Birthday card for a friends son
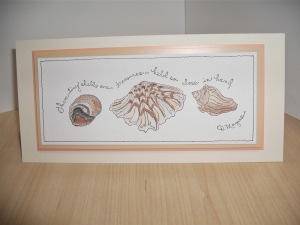
One of my favourite stamps coloured in with pencil crayons
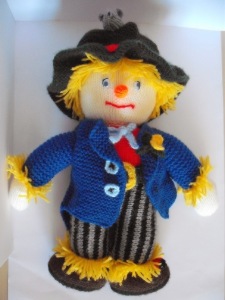
A knitted scarecrow for the church's plant sale
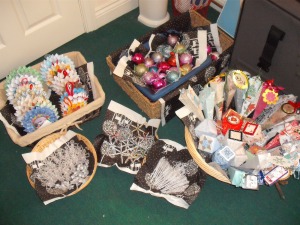
Various Christmas decorations and gift boxes make for the church Christmas Bazaar
My first ever gelli plate card
This is just a small selection of some of my personal favourites. There is also a cable jumper and a Nativity Advent Calendar that I am pleased with but I forgot to photograph them! Something else to try to get right in 2014!
Meanwhile I will leave you with these and the promise of more regular posts. I am off now to make 'Thank You' cards. Happy New Year to you all.
Subscribe to:
Comments (Atom)

